Contact Us

Questions? Comments? Concerns? Suggestions? Submissions? Shout-outs?

Whatever you want to tell us here at Mikey Does Cosplay, we're always happy to hear your thoughts and feedback!


123 Street Avenue, City Town, 99999

(123) 555-6789

email@address.com


You can set your address, phone number, email and site description in the settings tab.
Link to read me page with more information.

reflection.jpg

Blog

Here's where the magic happens. I'll be posting about all of my experiences and experiments (both failed and successful ones), introducing you to my costumes, sharing fun stories, linking tutorials and useful products, and who knows what else!


Filtering by Category: prop breakdown

Two of Them

Michael MacWolff

Welcome back to another round of Pandemic Props with Mikey! This time around we’re going to take a look at another pair of swords from Genshin Impact that went to two different homes, to be wielded independently. Let’s take a look at the making of the beautiful, but giant pain-in-my-ass-twice-over, Aquila Favonia.

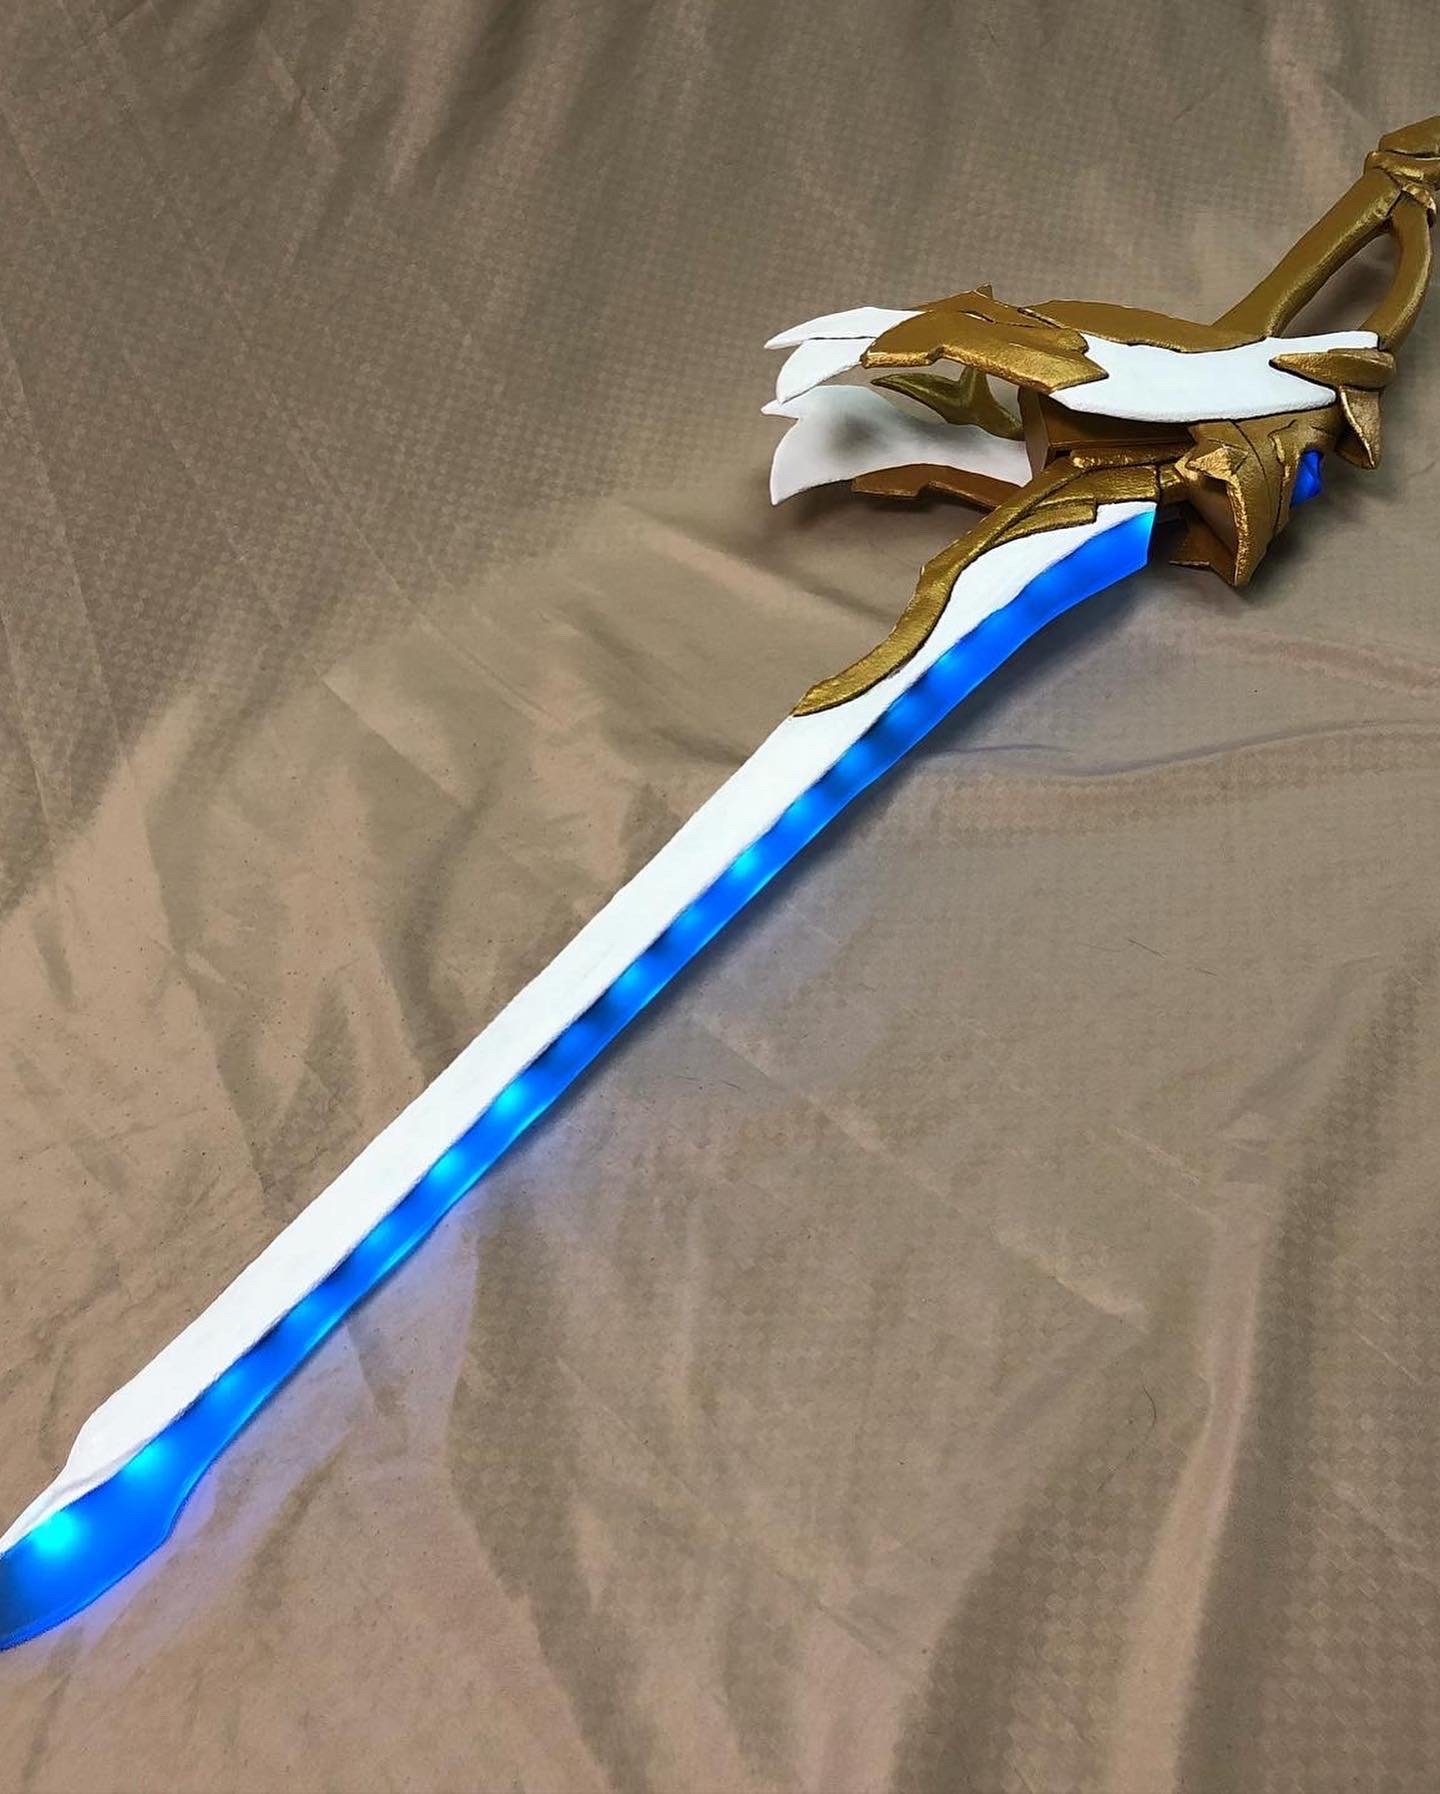
The first thing you’re probably noticing is the mesmerizing blue glow of the blade, arguably the most eye-catching aspect of it, which of course is a feature my first commissioner wants to include. This was the biggest obstacle to work through construction-wise, because it greatly impacts what materials I’m going to be using to make it, and how they’ll have to go together. Additionally I have to think about what sort of lighting I’m going to be using to get the whole blade to light up.

The blade material was pretty straightforward, since I found some light blue acrylic on Amazon which would work well. The biggest downside was that it wasn’t as thick as I wanted and the pieces weren’t wide enough to get the full length of the blade in one piece.
As for the lighting, my first thought was to use EL wire because it lights consistently along the whole wire and has a relatively manageable-sized battery pack. Unfortunately when I tried it, the EL wire wasn’t powerful enough to make the acrylic glow enough to notice. So instead I went with a battery-powered LED strip which was plenty powerful enough for the project! And as a bonus, the LED strips can change color so the blade could be pretty much any color you want!

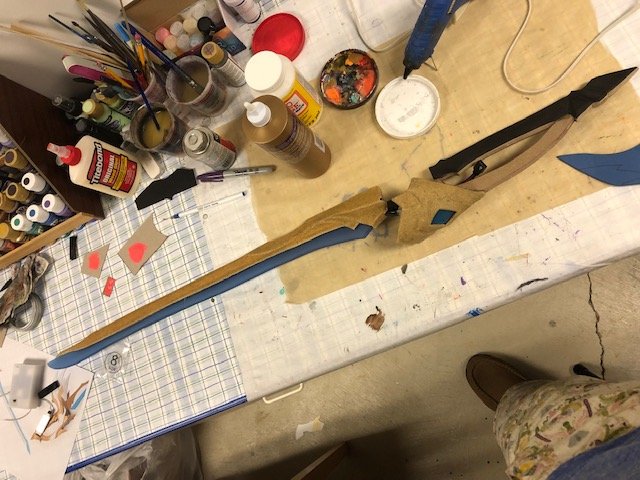
As you can see here, the acrylic blade and the MDF base with the chunk cut out for the battery pack that will hide in between the crazy hilt wings. The LED strip sits nicely along the edge of the MDF section, which I then used contact cement to attach the acrylic section. To hold everything together and keep the blade in place, I used thin craft foam over the section that didn’t light, with worbla over the foam to make it solid.

In order to get the blade to diffuse the light better, I sanded the surface with a very fine-grit sandpaper and sprayed it with a frosted glass spray.

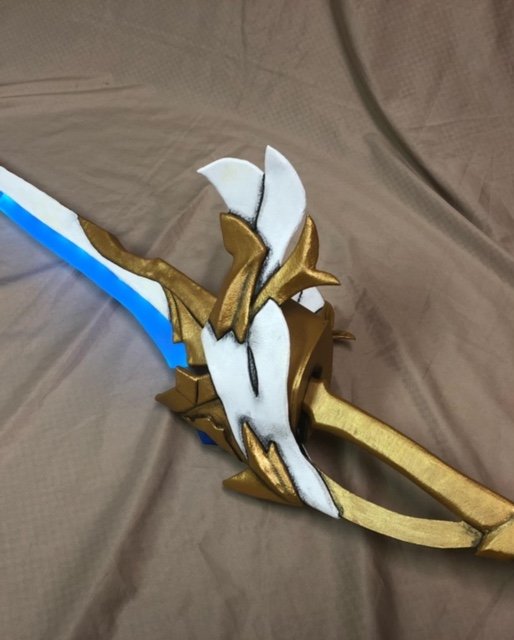
With the way the hilt wings stick out, they also needed a lot of structural support, so I made them out of foam with a worbla shell, along with the bit that sticks out at the bottom with the glowing gem. That particular piece also sandwiches around the end of the LED strip so the lights will shine thourough the gem there without needing a separate light.

With the structural stuff done, priming and painting are next! Fun story, I realized during my second build that I painted one of the sections the wrong color, so you can play “find the difference” between the two finished swords XD

Here’s a hint if you can’t find the weird spot from the first photos…

Now these two beauties are at their forever homes, and with any luck I will never have to make another one TT_TT

G'raha Mia!

Michael MacWolff

It’s time for more pandemic props with Mikey! We’re actually going to take a step away from Genshin this time (blasphemy, I know), to take a look at the first prop commission I actually got during lockdown: the glowing staff of G’raha Tia’s new digs in Final Fantasy XIV.

And of course I have mmore glowy bits to deal with. And with this one I had very limited wiggle room to hide a battery, because it’s just a long, skinny shaft. That was problem #1 to tackle, so I started with the crystal at the head of the staff. I will admit, the construction on this thing was super janky, but it worked XD

Unfortunately I didn’t do a great job taking photos of the steps I took (probably because I wanted to forget all of my egregious sins), but the basic process was thus:
1) Make an EVA foam crystal shape
2) Dremel in the contours & bevels
3) Heat pieces of worbla TranspArt (the clear worbla… which behaves very differently than regular worbla) over the foam shape
4) Cry in frustration
5) Repeat step 4, as black foam bits stick to the clear worbla as you remove it and then spend several hours trying to sand it out of there, to only moderate success [If I were to try this again, I would hopefully be smart enough to cover the foam with aluminum foil, so that this didn’t happen… and pray to the cosplay gods that the foil didn’t irreparably stick to the worbla itself.
6) Assemble the LED circuit that goes in the crystal (I used bright white LEDs for this, since the blue ones aren’t as bright and I had other ideas to achieve the color I wanted)
7) Sand the LEDs with a fine grit sandpaper to help with light diffusion
8) Wrap the lights in crinkled iridescent cellophane to add interest, fun color sheen, and further diffusion to the lights. Also this helped keep the LED’s in place on the inside of the crystal.
9) Cry some more as you try to attach the two halves of the crystal together unsuccessfully
10) Use spray adhesive to attach a layer of blue plastic grocery bag to the outside of each crystal shell half
11) Now try attaching the two halves again, with much greater success (they’re literally hot glued, btw… not a recommendation but it did work well enough because the heat made the edges of the worbla pliable enough to flex in helpful ways along the edges)
12) Cut away the excess plastic bag
13) Cry some more because you actually managed to cobble this #$%#@$# thing together

So, here’s the photos I do have!

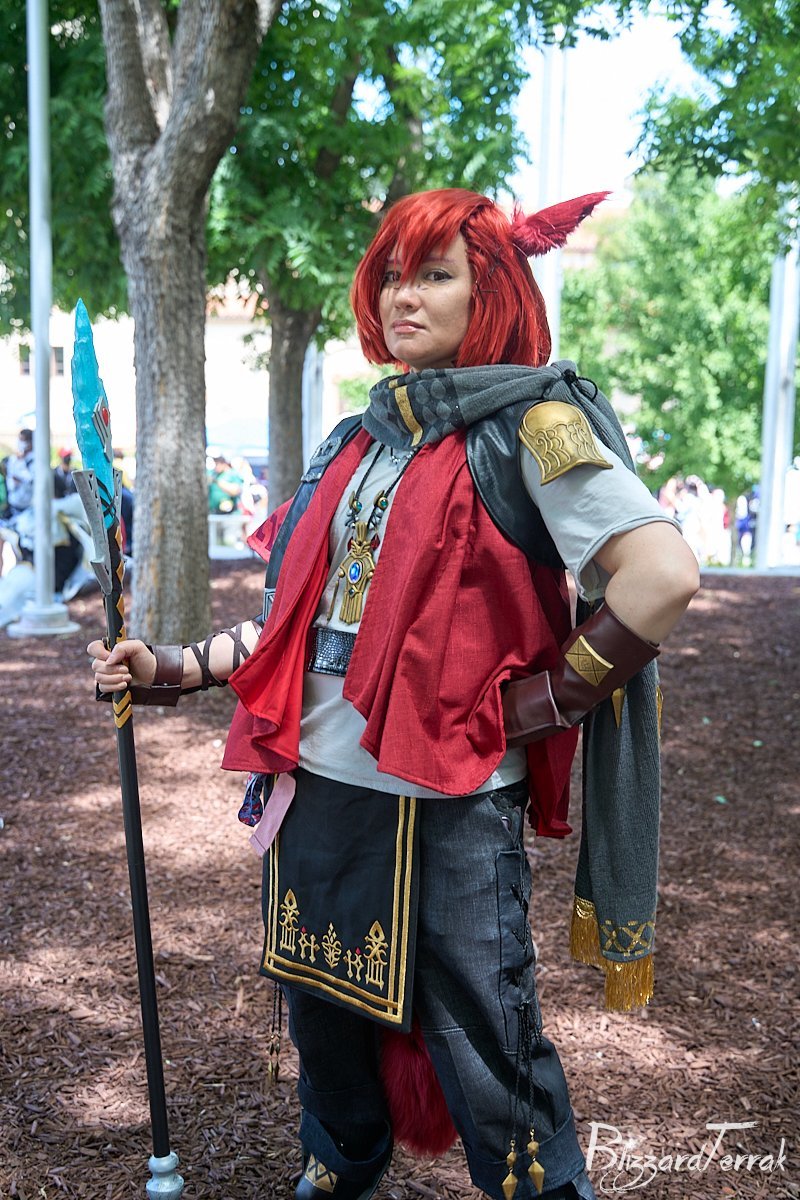
That’s all for today! Hopefully the next one will have a wider array of in-progress photos so you can see what I did instead of read through my struggles. On the bright side, I have photos of this prop in action!

The delightful Nihohoho makes such a wonderful G’raha Tia! The costume is from Taobao.com and the photos were taken by BlizzardTerrak Photography.