Materials Monday: Finishing Products
Michael MacWolff
This time around, I wanted to do a review of finishing products, since it's be super short and probably not very interesting if I did individual posts for each product.
Paint
Up first is probably the most important thing when it comes to props and cosplay: paint. I mean, it's generally how you get your stuff to be the color you need it to be!
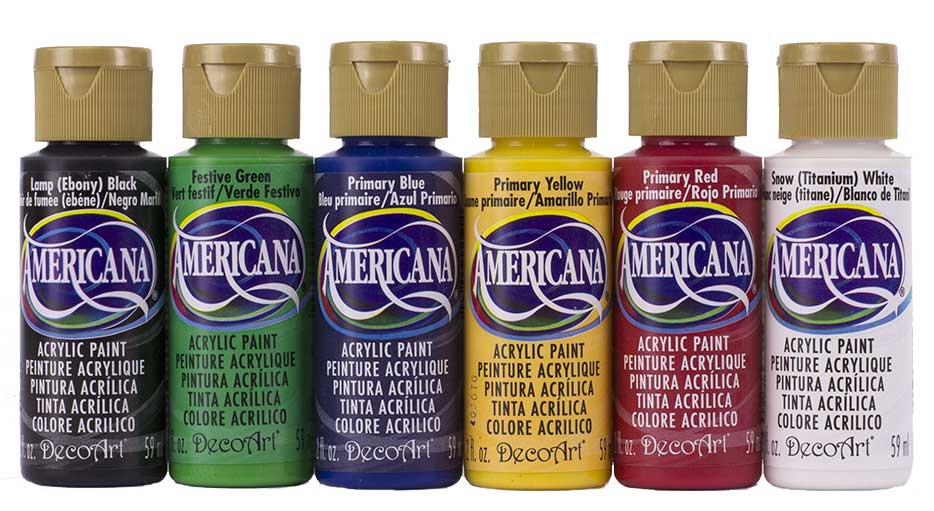
When it comes to paint, simple acryllics are my go-to for just about everything. They're inexpensive, come in a wide variety of colors, and are available at any craft store in large quantities/varieties.
While there are lots of different brands to choose from, my favorites are Americana and Folk Art. I feel like they are generally very consistent in their colors and quality, though that's not to say that other brands fall short, it's just my personal preference. I also like those brands because they have a little sticker on top that has the color on it so they're easy to compare.
When it comes to metallic colors, if I'm brushing them on, I tend to use Dazzling Metallics by DecoArt. They work well and come in a variety of shades so you can usually find what you need.
Since we're talking about paint, I feel like now is the perfect time to remind everyone to BASE COAT YOUR SHIT. Metallic colors will end up way more even if you use a base coat of a similar color. The same thing goes for warm hues (pink, red, orange, yellow), the pigment tends to not be as strong, so it doesn't cover as well. If you use a darker base coat it'll come out looking a lot better, and you shouldn't have to paint 8000 coats to get it looking nice. For the warm hues, I generally use a darker, brownish color as a base coat. For yellows, you still want to use a brown tone, but you'll want to use a lighter color so your yellow doesn't come out super wonky.
And of course, when it comes to metallics or painting in general, spraying your items works well in most circumstances. The upside of spray paint is that it goes on a lot quicker and more evenly than brush painting. The obvious downsides are that you can only really spray on one color, you'll have to paint the other colors by hand. Also, there's the issue of overspray. If you're spray painting something that has parts you don't want to get paint on, you'll want to make sure those parts are covered. I usually use a plastic grocery bag and some masking tape.
When it comes to spray paint brands, I'm a little less picky, because the colors are generally more limited than what you can find in the 2 oz. bottles of acryllic, so I usually just try to find the best color for my project.
Sealants
Sealants are super important for prop making because it accomplishes several things all at once:
-It helps bind all of the different pieces together
-It helps protect the base materials
-It smooths out the surface of your prop
-It can help you achieve the sheen/finish you want
-It keeps your paint from chipping as easily
When I make props I usually use sealant coats in two steps: before and after I paint the item. Using sealant coats before painting helps reinforce the adhesive holding all of the pieces together and smooths out the surface of your props. It also provides a good paintable surface for things that may not hold paint as well, such as smooth plastic and foam.
**An important note when using styrofoam and other open-celled foams: Most spray paint and certain adhesives can melt your foam; using a sealant layer (usually multiple just to be safe) is the best way to keep this from happening.
After I finish painting my props, I generally add another sealant layer. This helps protect the paint, as well as giving the prop the sheen I want. You can even use different sealants in different places if you want the sheen to be different.
Yes, you all know I go through a ton of mod podge. It's what I use most often for both my base sealant coat and my top coat because I like the satiny finish the matte mod podge has. For things that I want to be shinier, there's also a gloss mod podge that works quite well. As a warning, I've noticed the gloss mod podge does have a fairly strong odor, so you should be aware and want to make sure you have some ventilation when you're working with it.
My other go-to when it comes to sealant coats is shellac. It's similar to polyurethane but it dries a lot quicker and it comes in spray form as well as brush-on form. There are pretty much two instances I use shellac over mod podge. First if i have paper portions that need to be sealed, shellac is a much better choice. Since you can spray the shellac on, it goes on in a much more even, and thinner coat than you can easily achieve with a brish and some mod podge. This helps keep the paper or card stock from wrinkling or curling when you want it to remain flat. Also, since it can be sprayed, I'll use it when I'm more pressed for time.
I should also note that shellac has a very glossy finish, so your stuff will end up being pretty shiny if you use this as a top coat.


