Contact Us

Questions? Comments? Concerns? Suggestions? Submissions? Shout-outs?

Whatever you want to tell us here at Mikey Does Cosplay, we're always happy to hear your thoughts and feedback!


123 Street Avenue, City Town, 99999

(123) 555-6789

email@address.com


You can set your address, phone number, email and site description in the settings tab.
Link to read me page with more information.

reflection.jpg

Blog

Here's where the magic happens. I'll be posting about all of my experiences and experiments (both failed and successful ones), introducing you to my costumes, sharing fun stories, linking tutorials and useful products, and who knows what else!


More Masks!

Michael MacWolff

Hey folks, as promised I have some updates on the second mask I've been working on, now that the RWBY one is finished.

The process was pretty much the same as the last one, but the shapes were a bit more organic this time which made things interesting.

2015-09-09 08.11.11.jpg
 

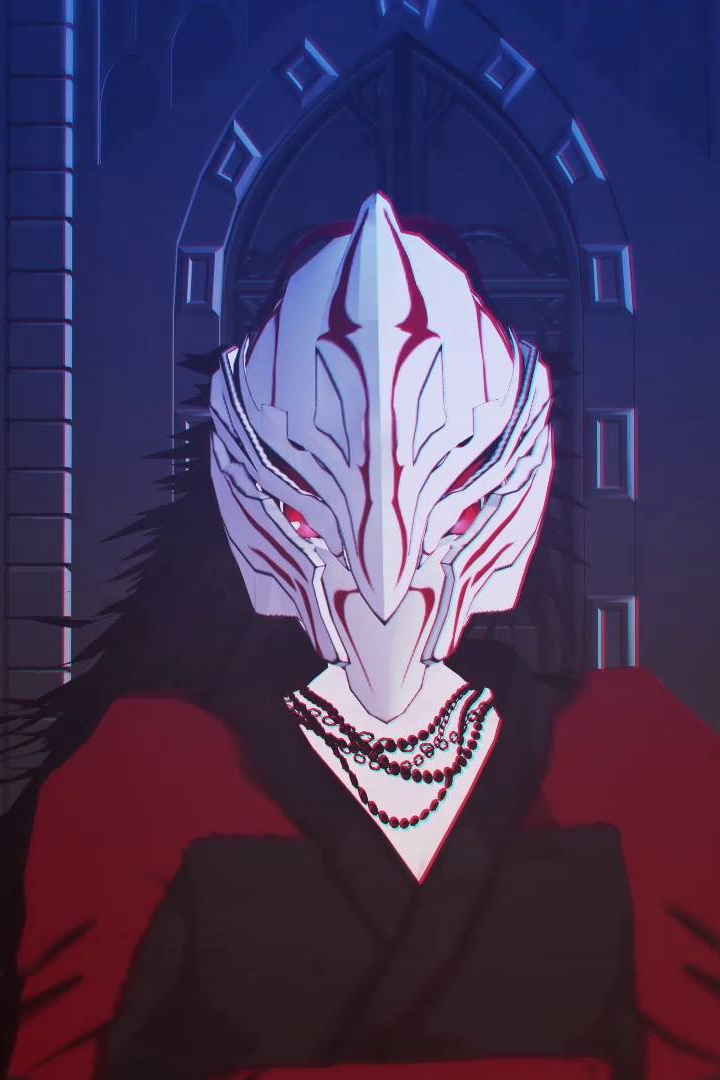
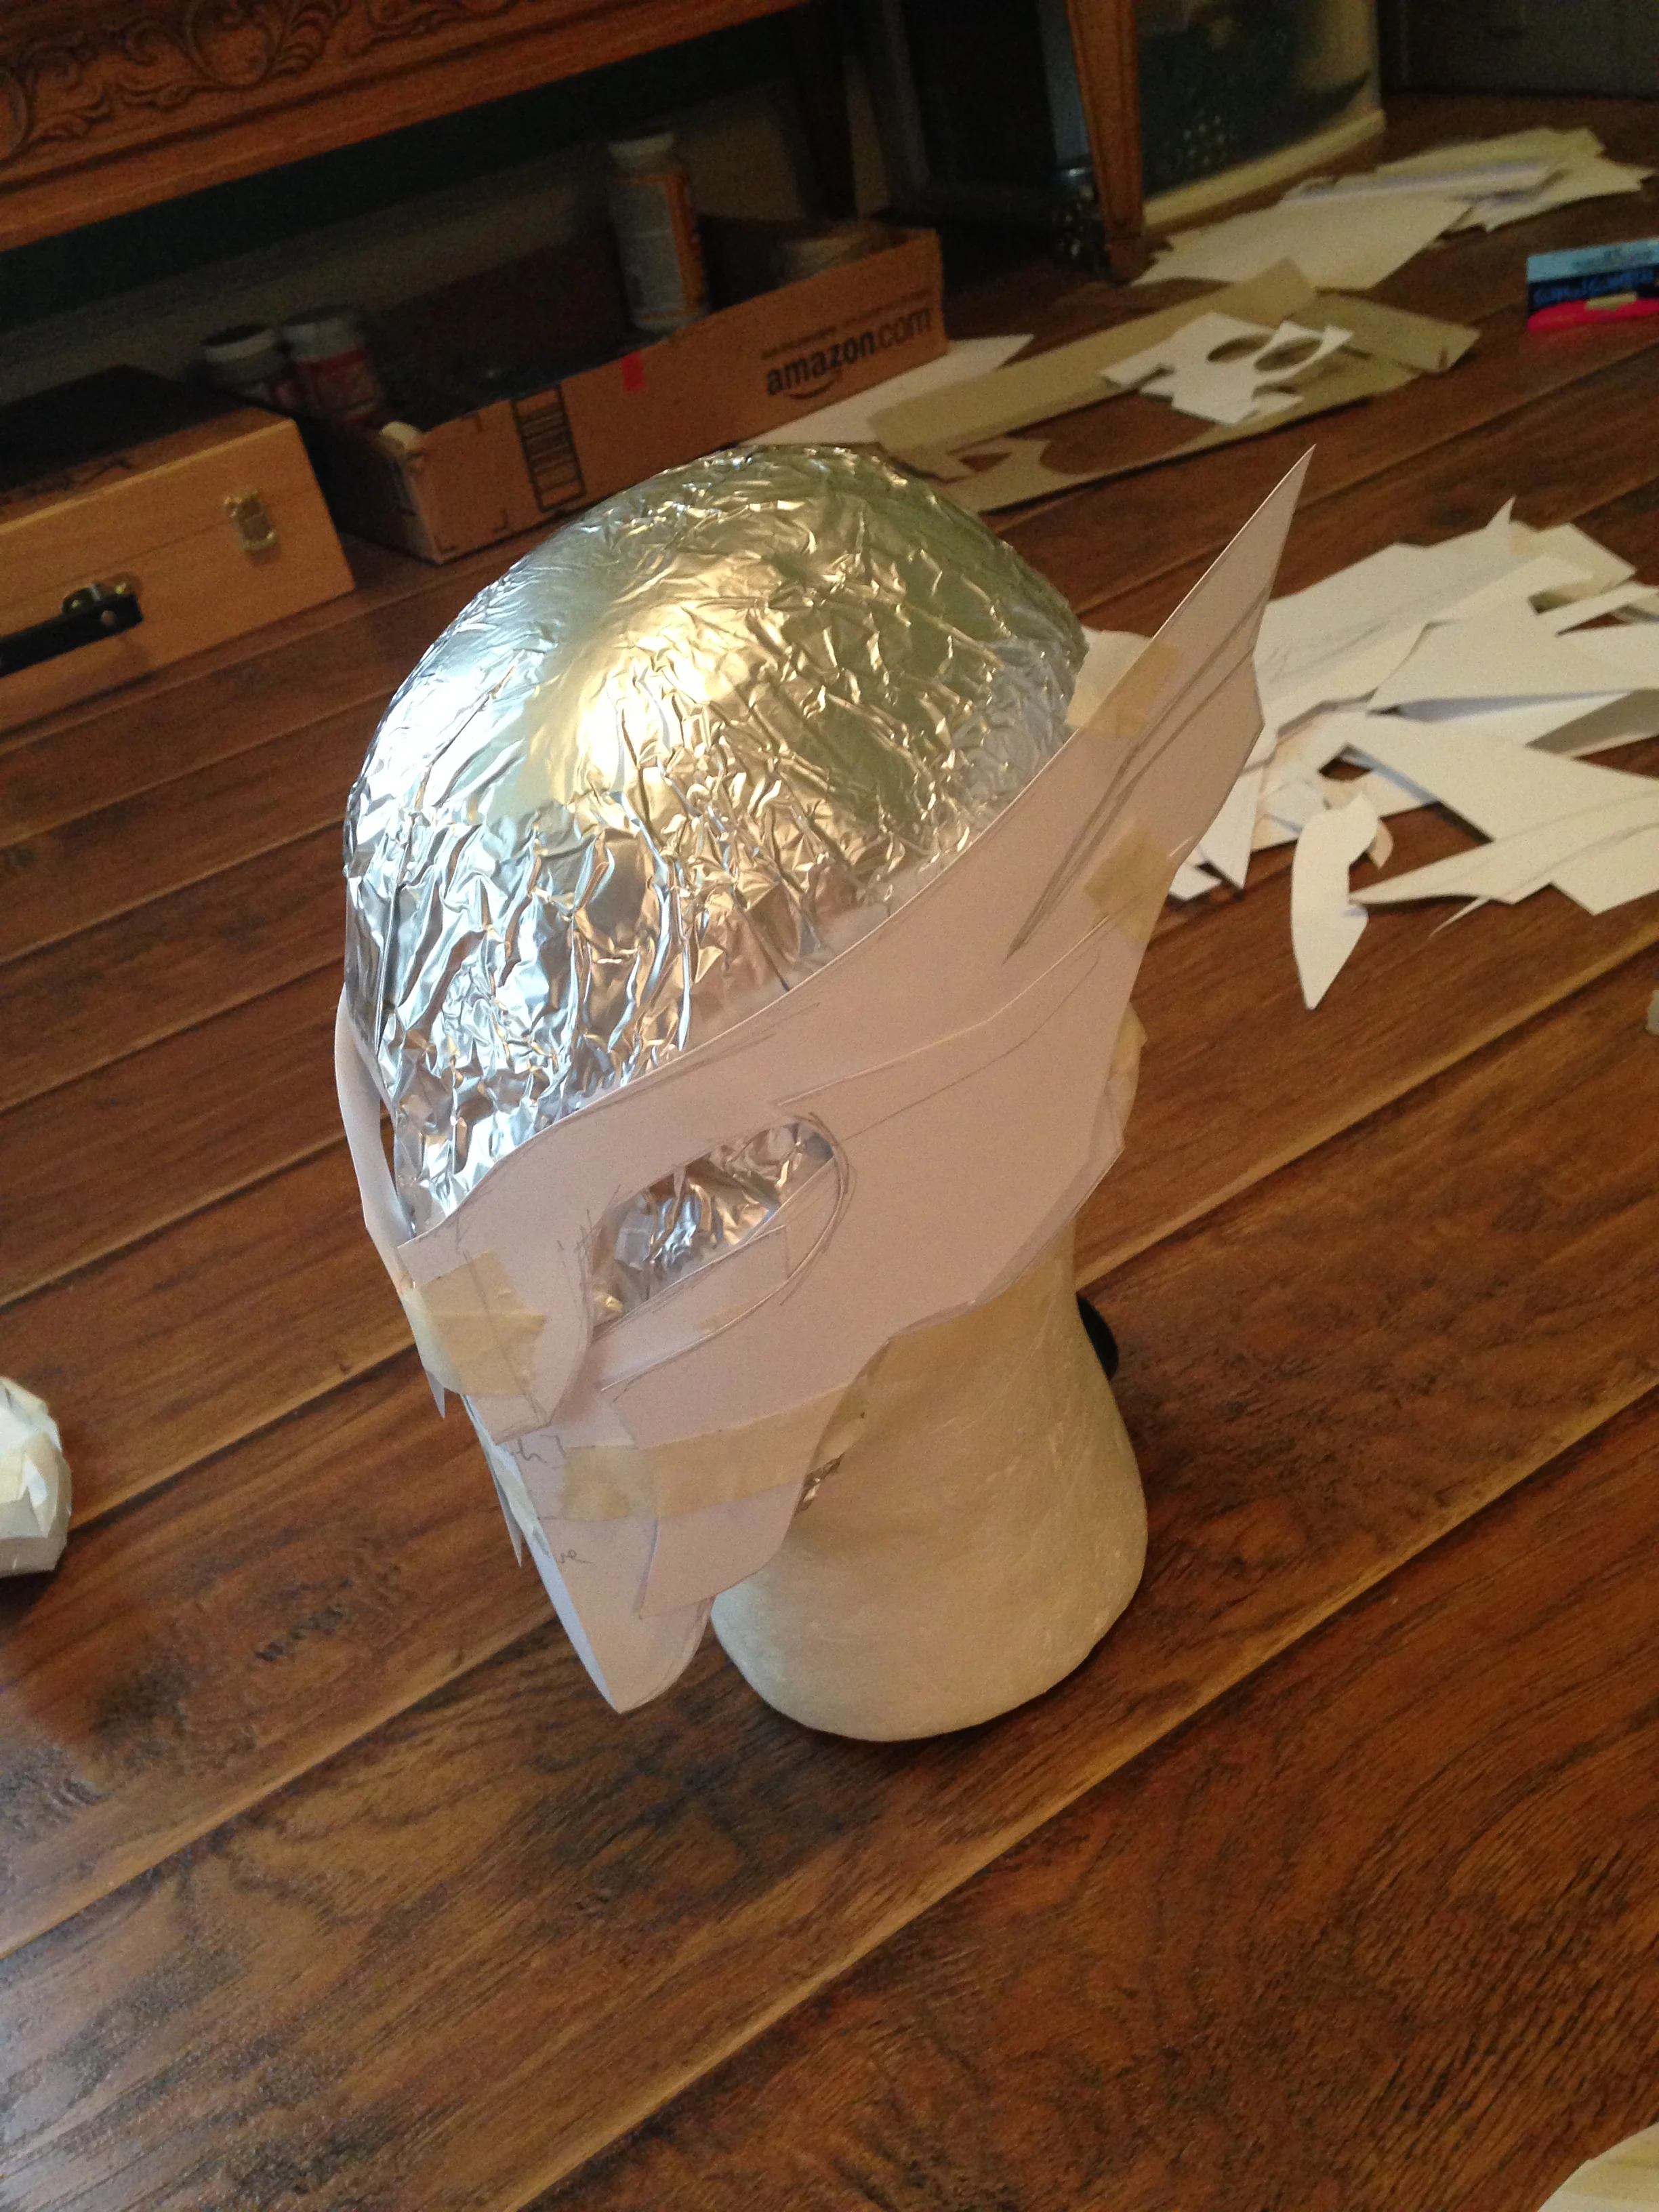
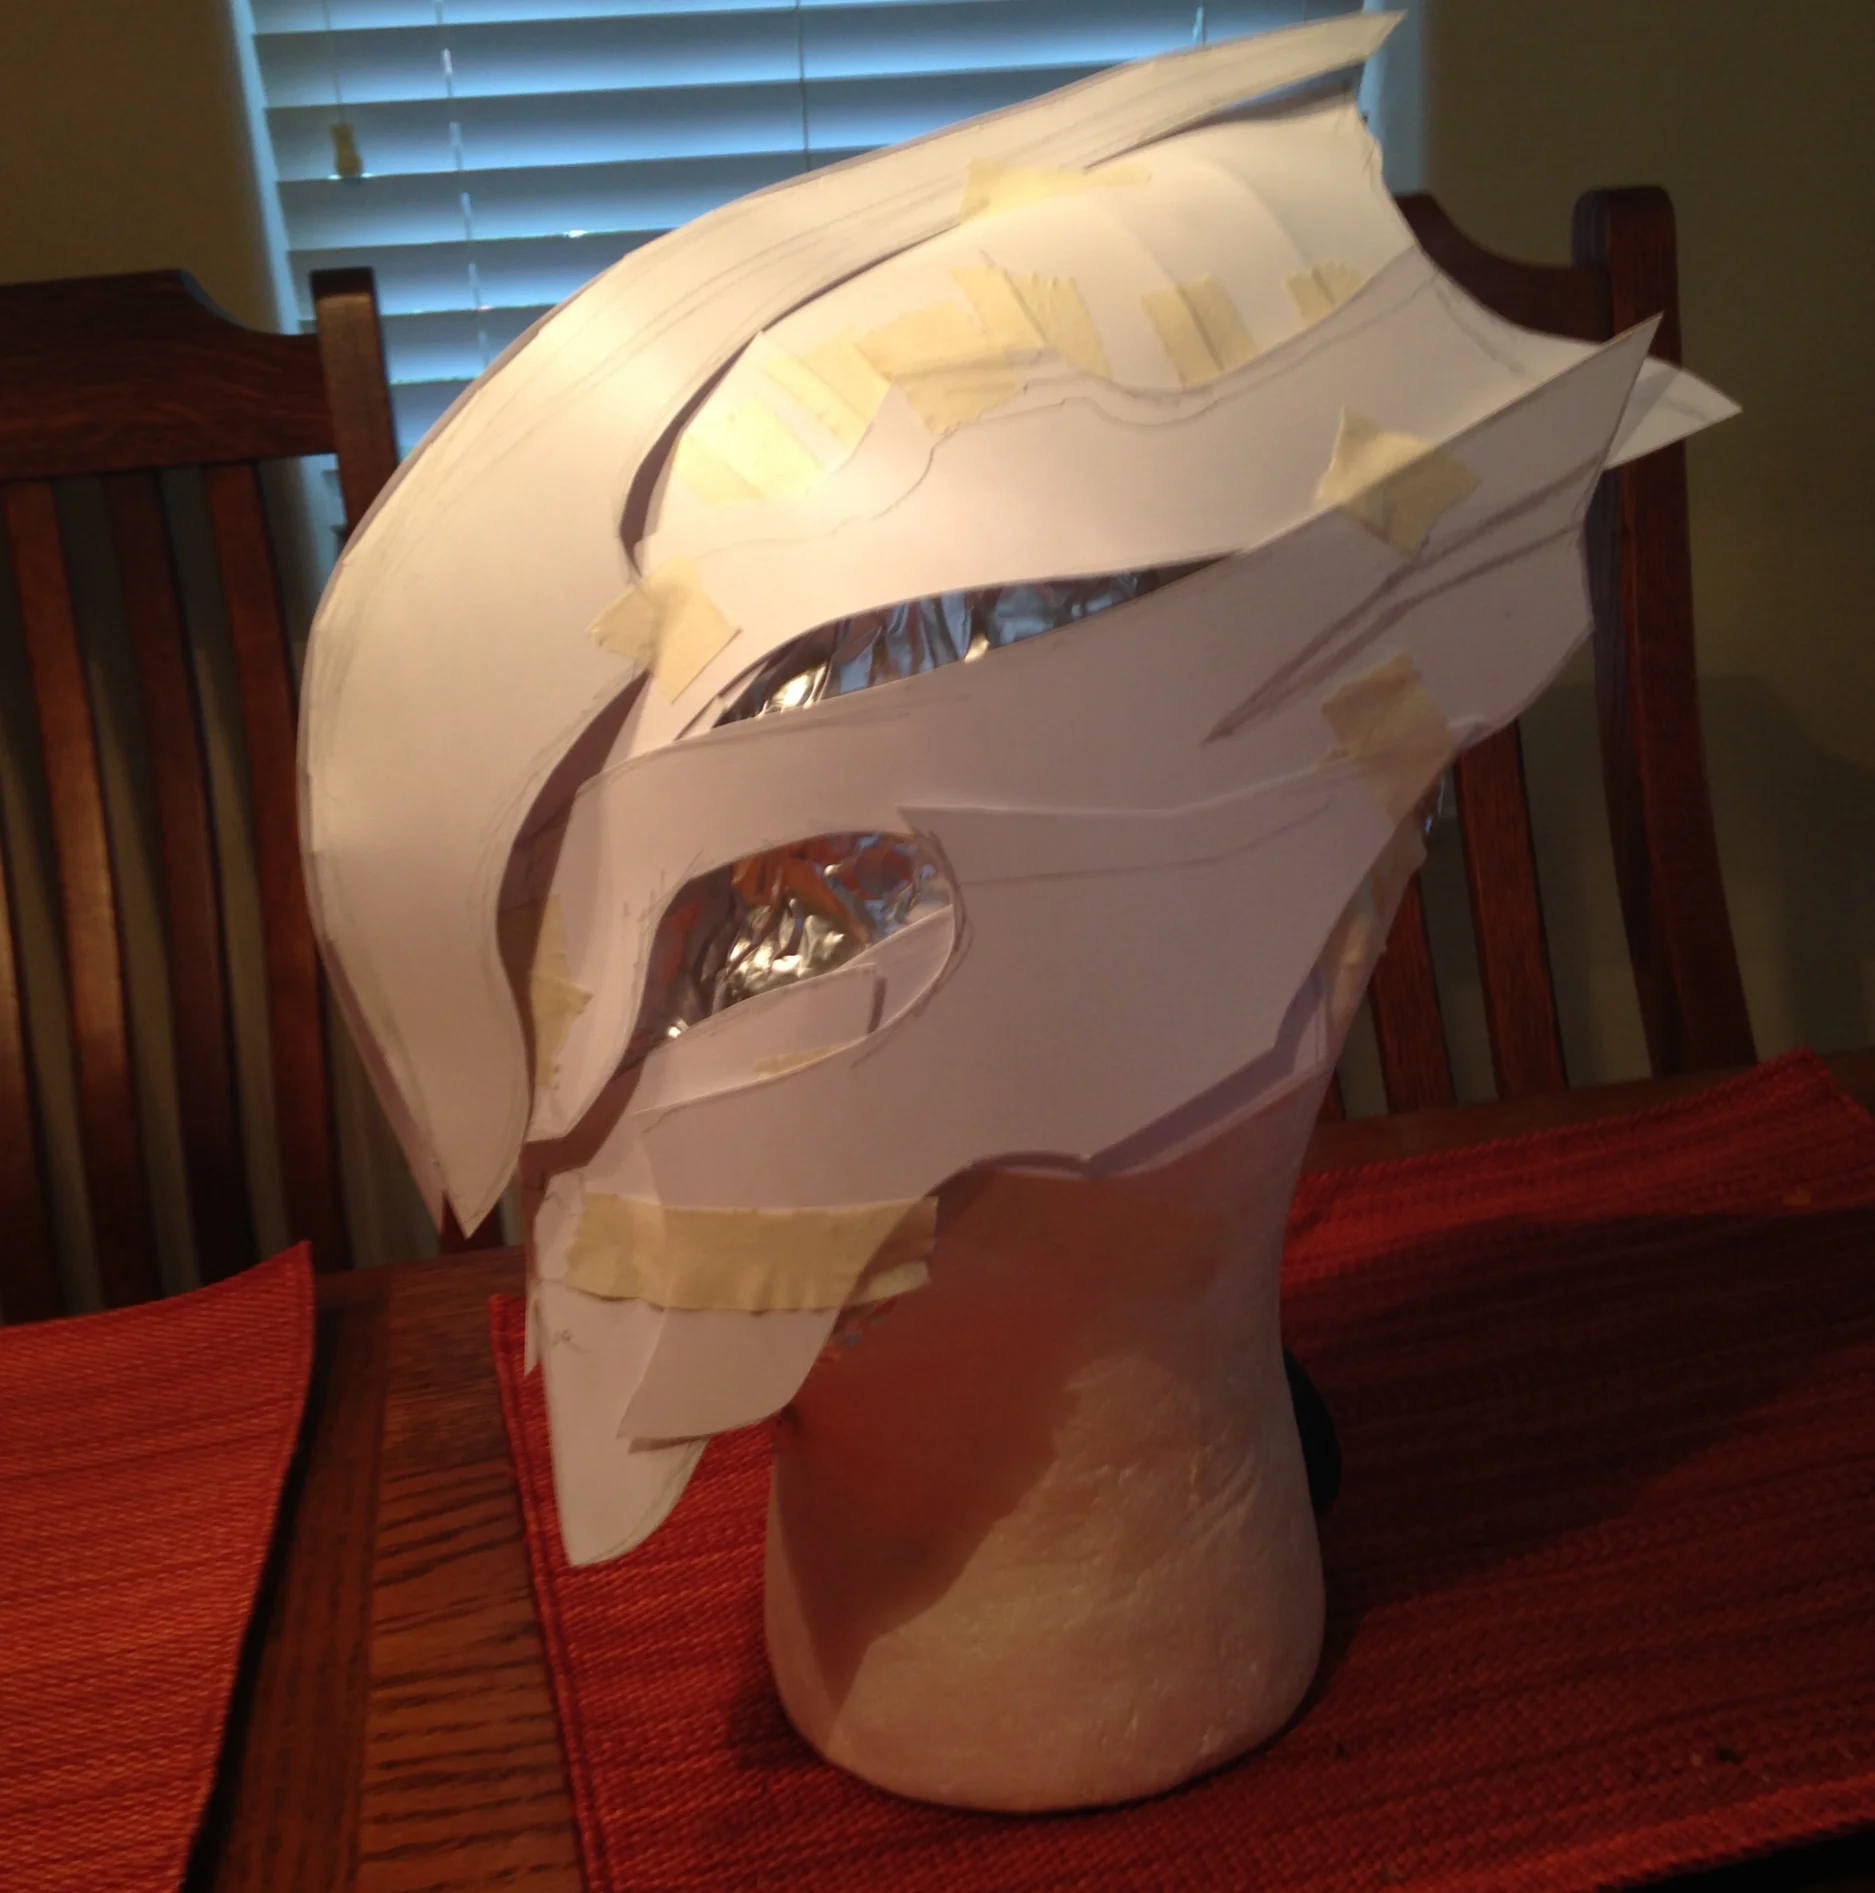
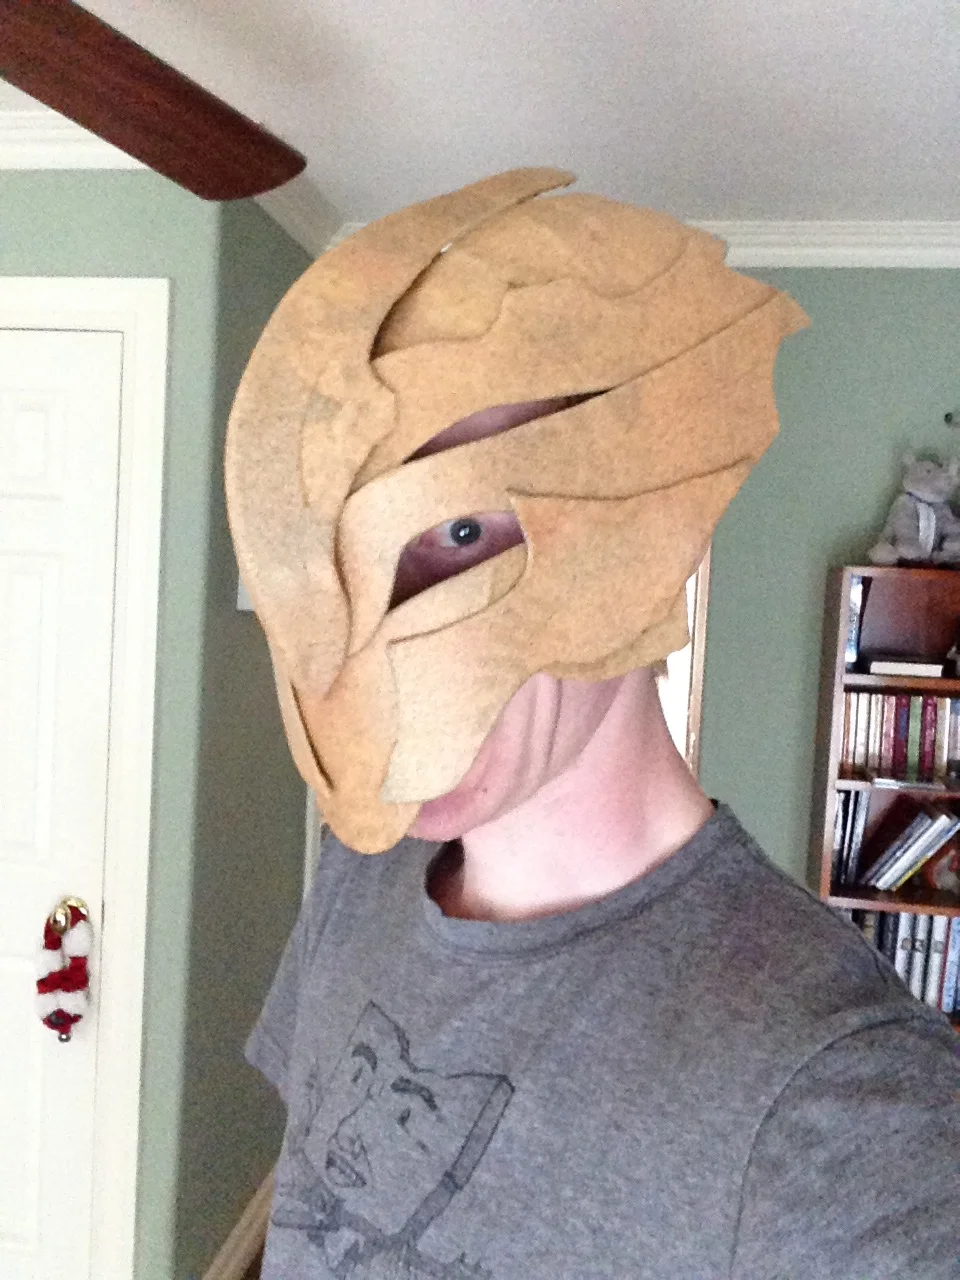
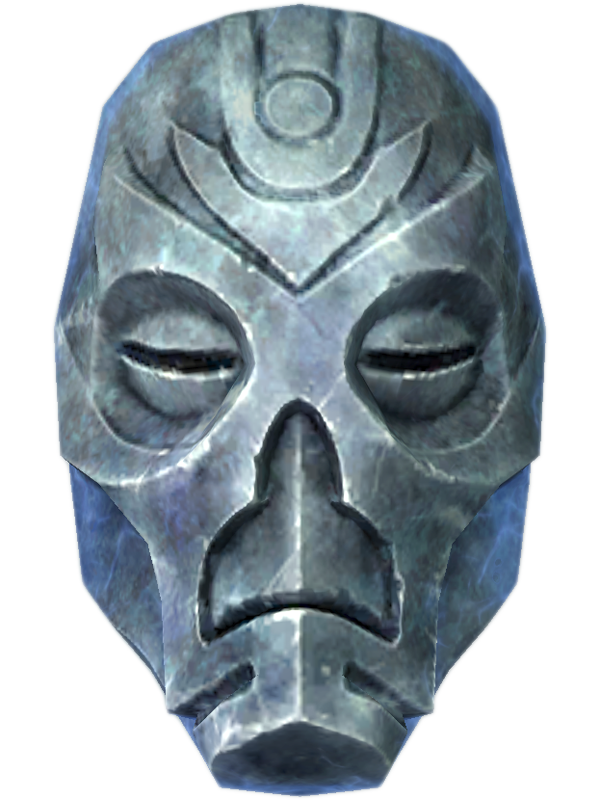
This is the dragon priest mask, from Skyrim. I don't know a ton about skyrim, but I do know this is a pretty cool mask. Just like last time, I put together the pattern on a wig head using cardstock. The shaping was a bit harder to figure out and I had to tweak things a bunch to get them right, but ultimately I had a viable pattern to use.


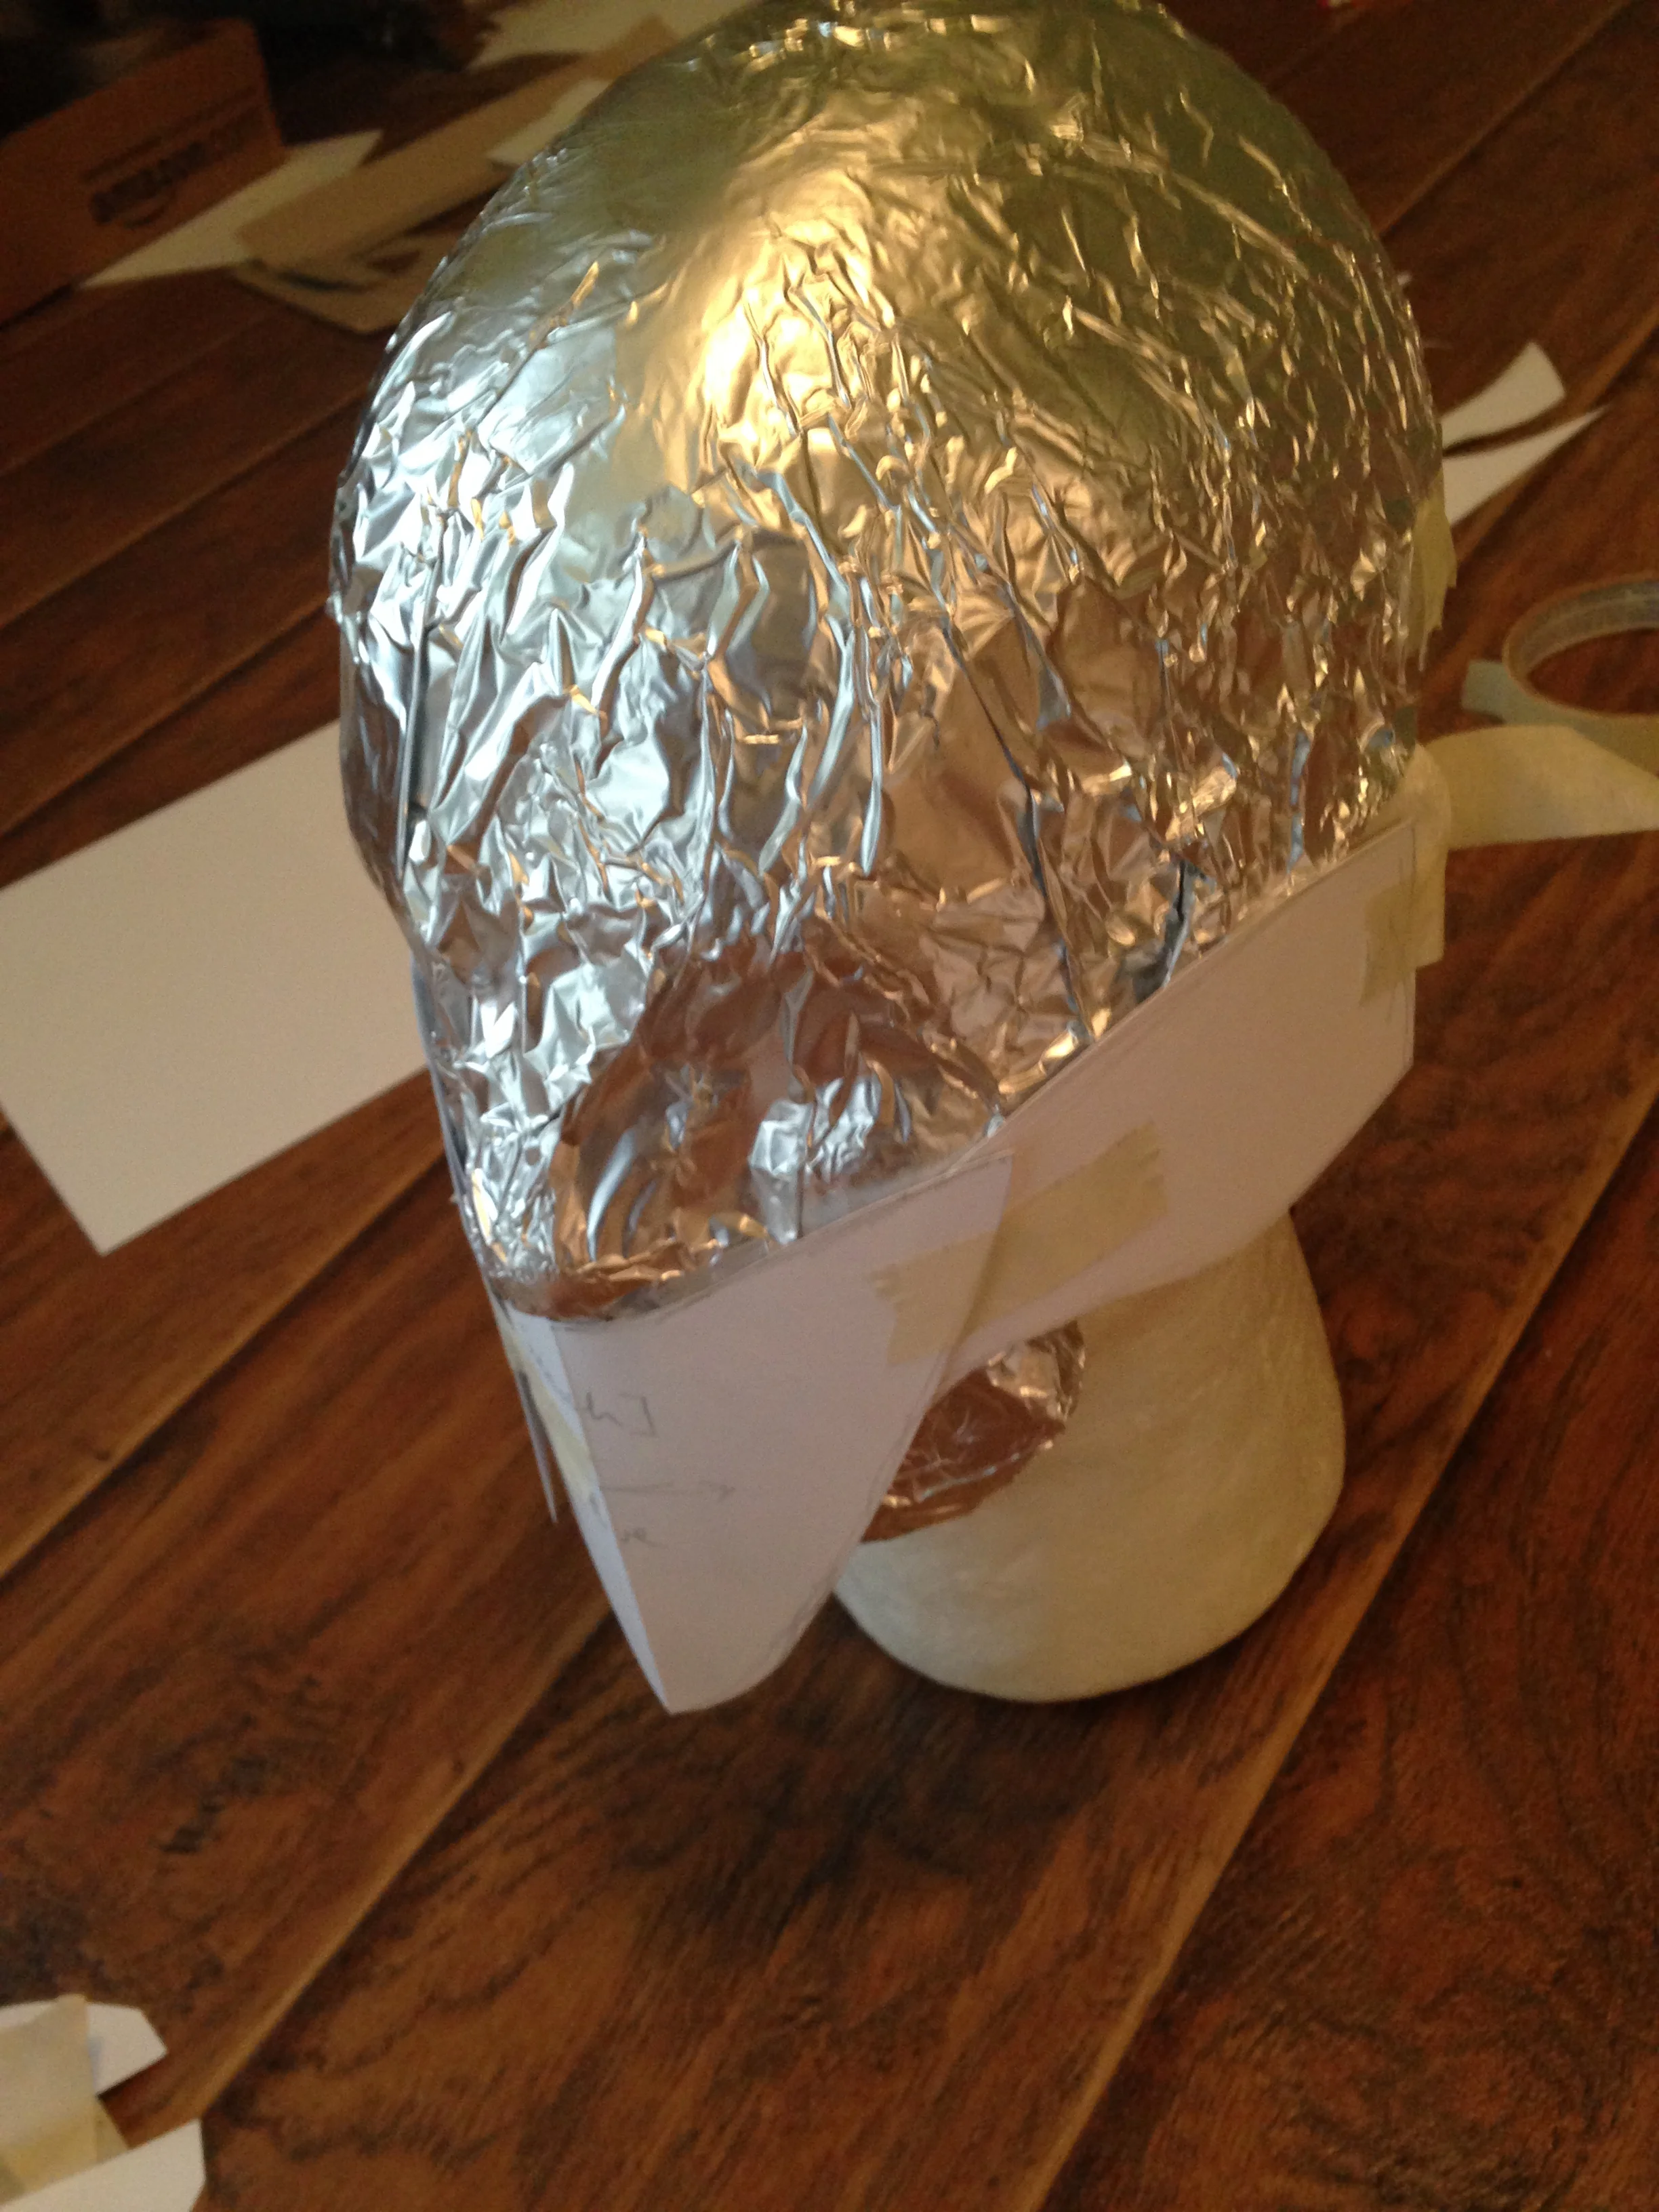
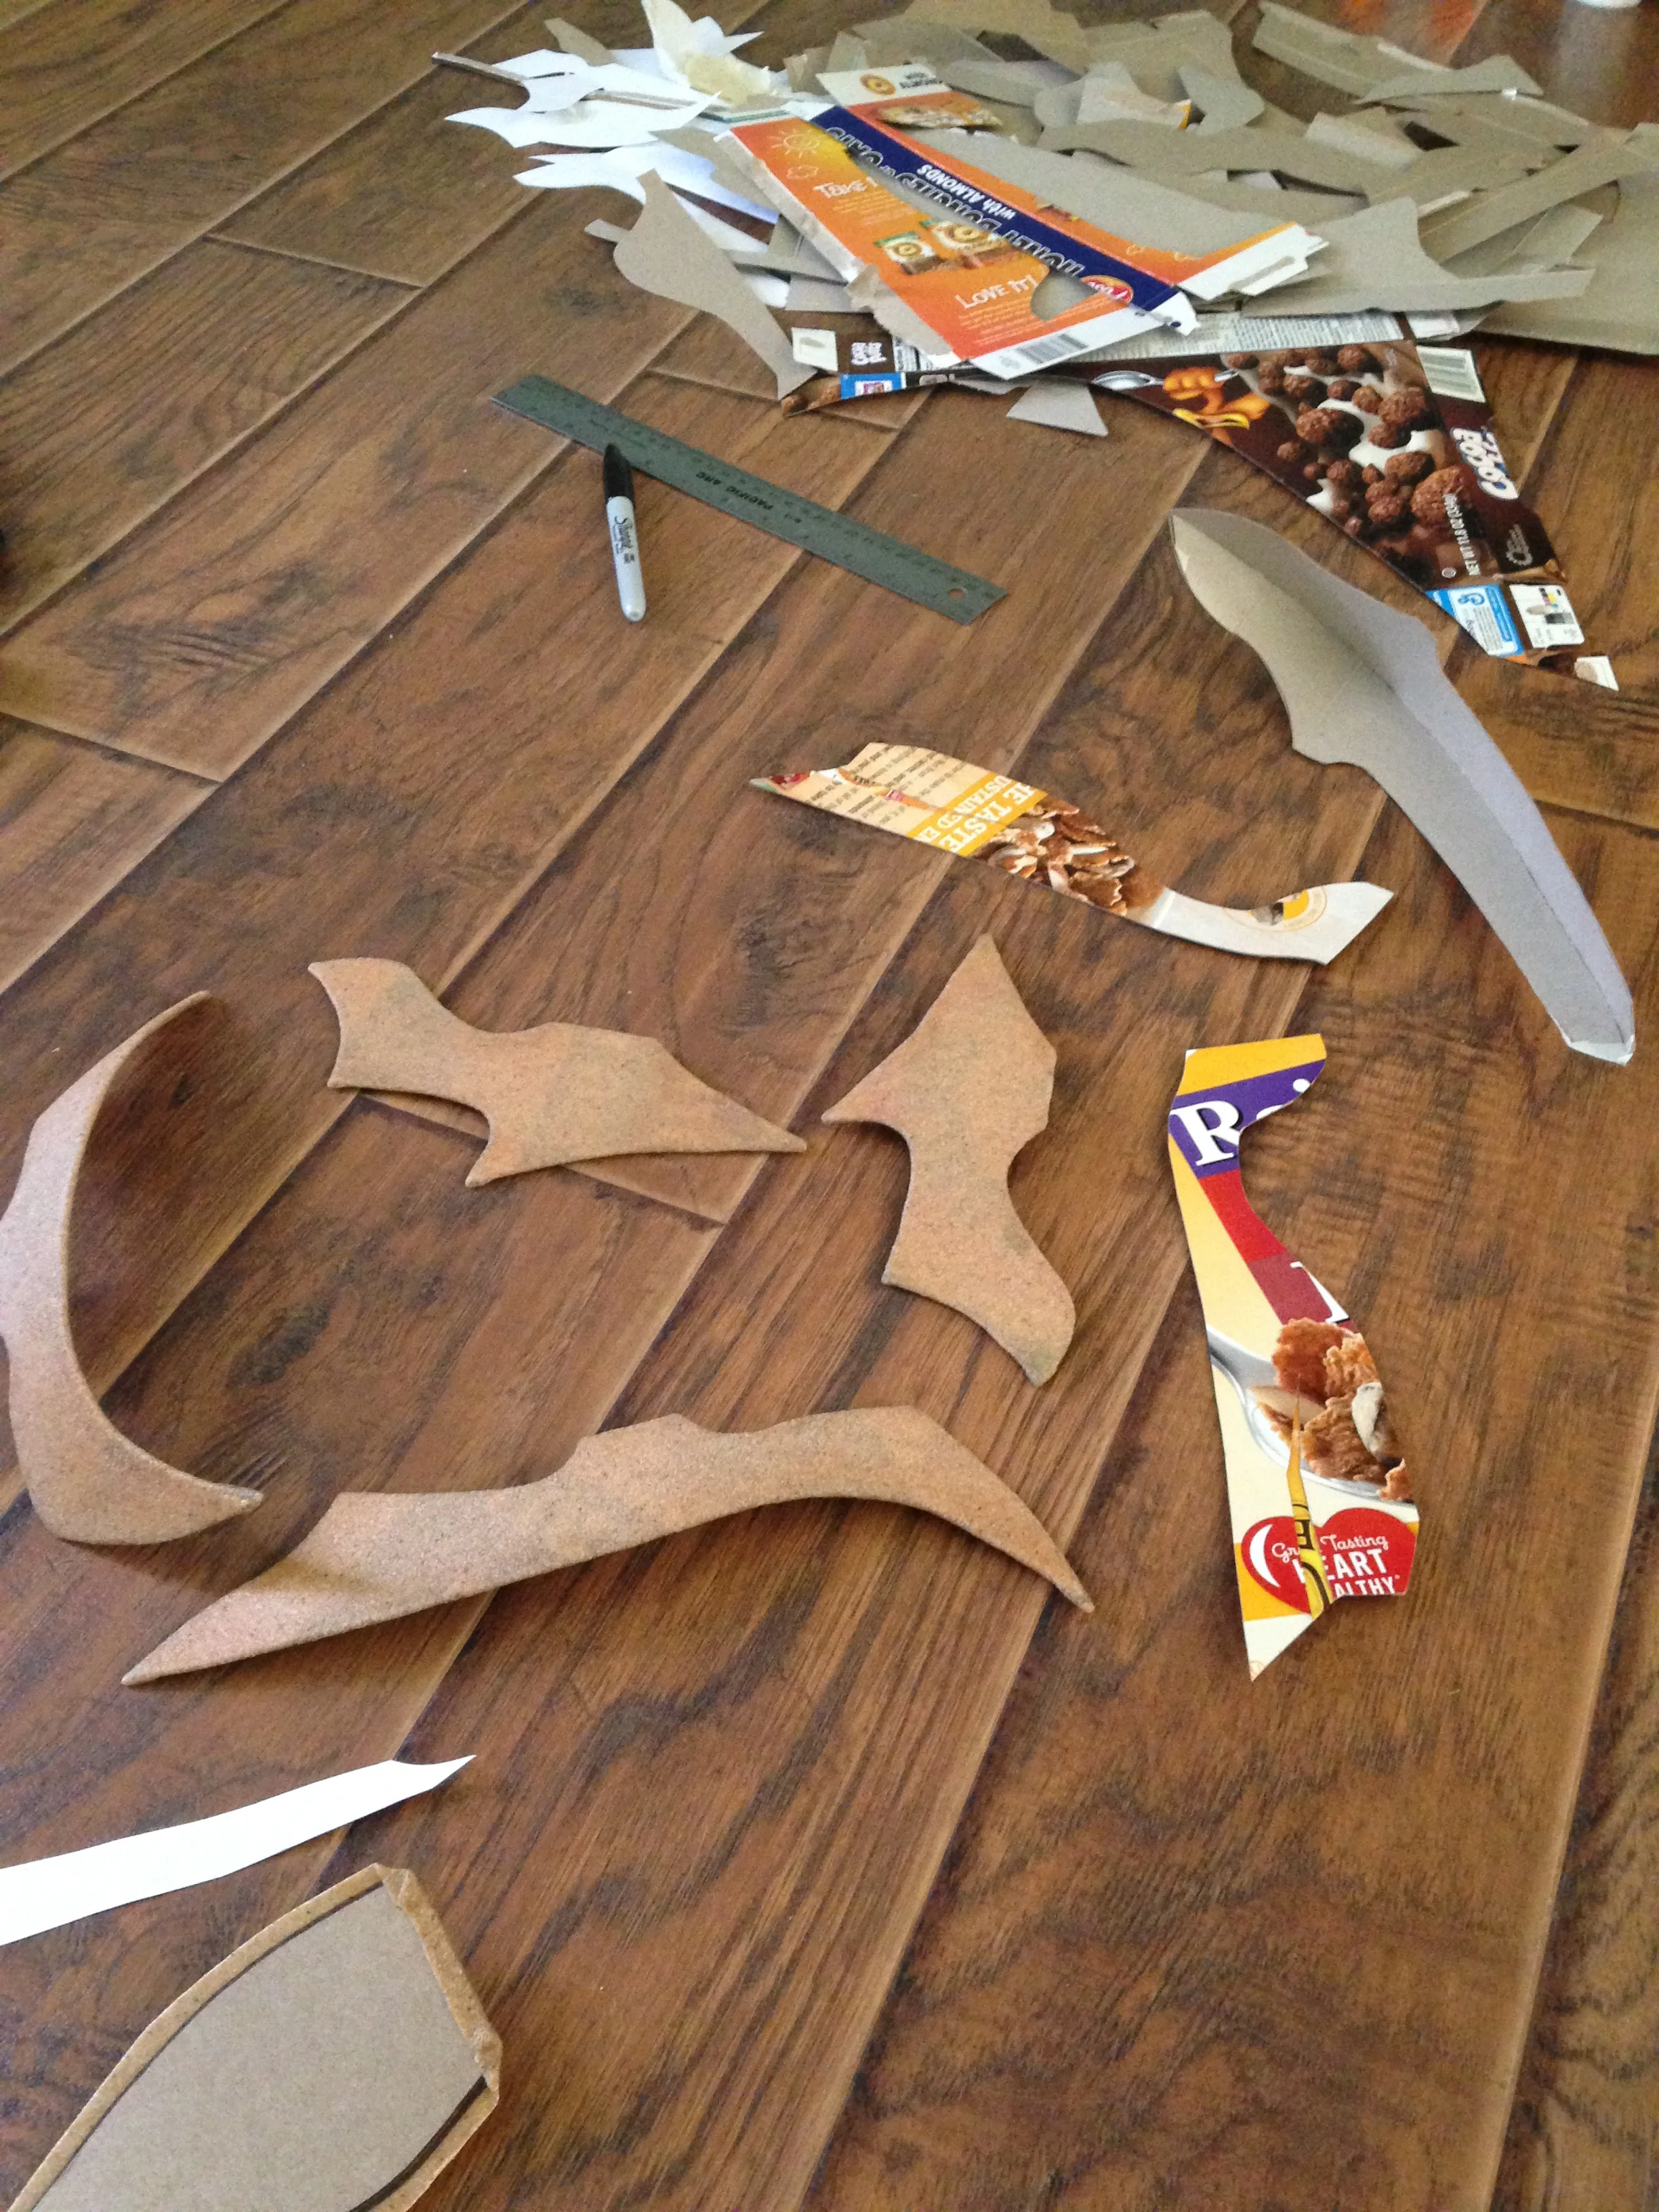
You know what comes next, make it again out of paperboard and cover it with worbla!

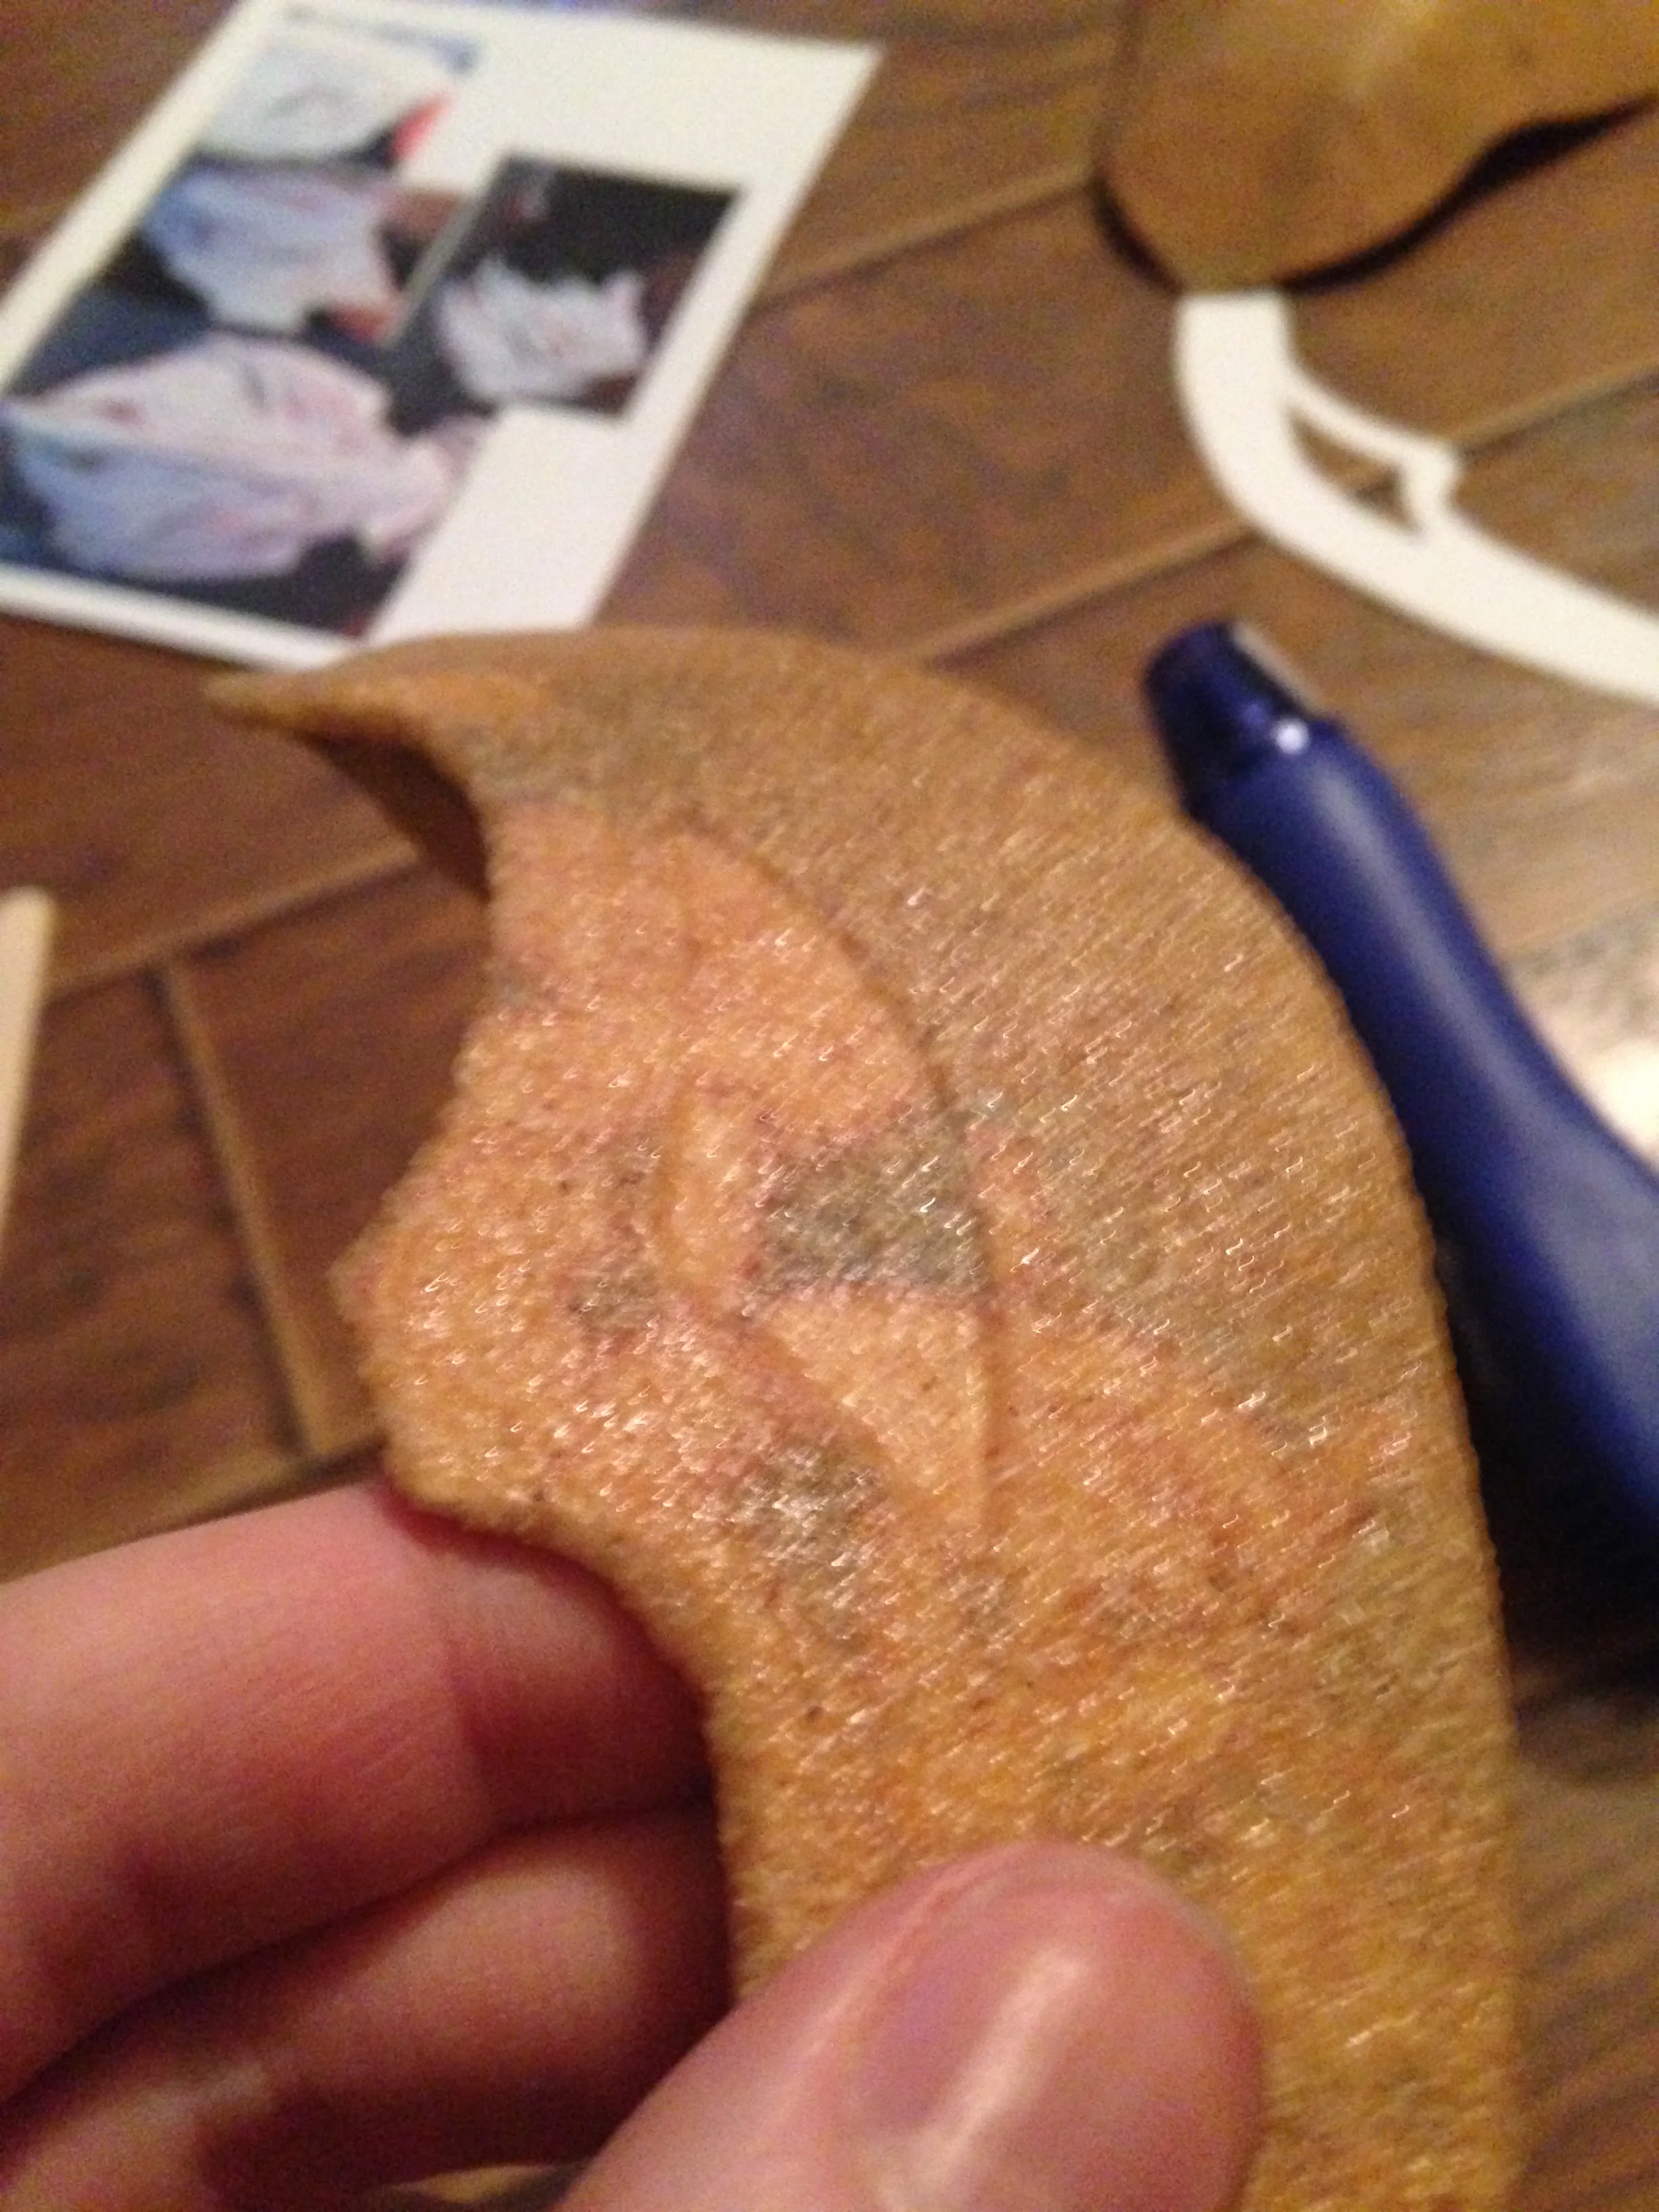
A note about using worbla over  detail pieces: start in the middle and work your way to the edges to avoid any bubbles.
Another note along the same lines: Popsicle sticks are great for pressing the worbla into the details. You can see how I did it with the eyes and cheekbone ridges.

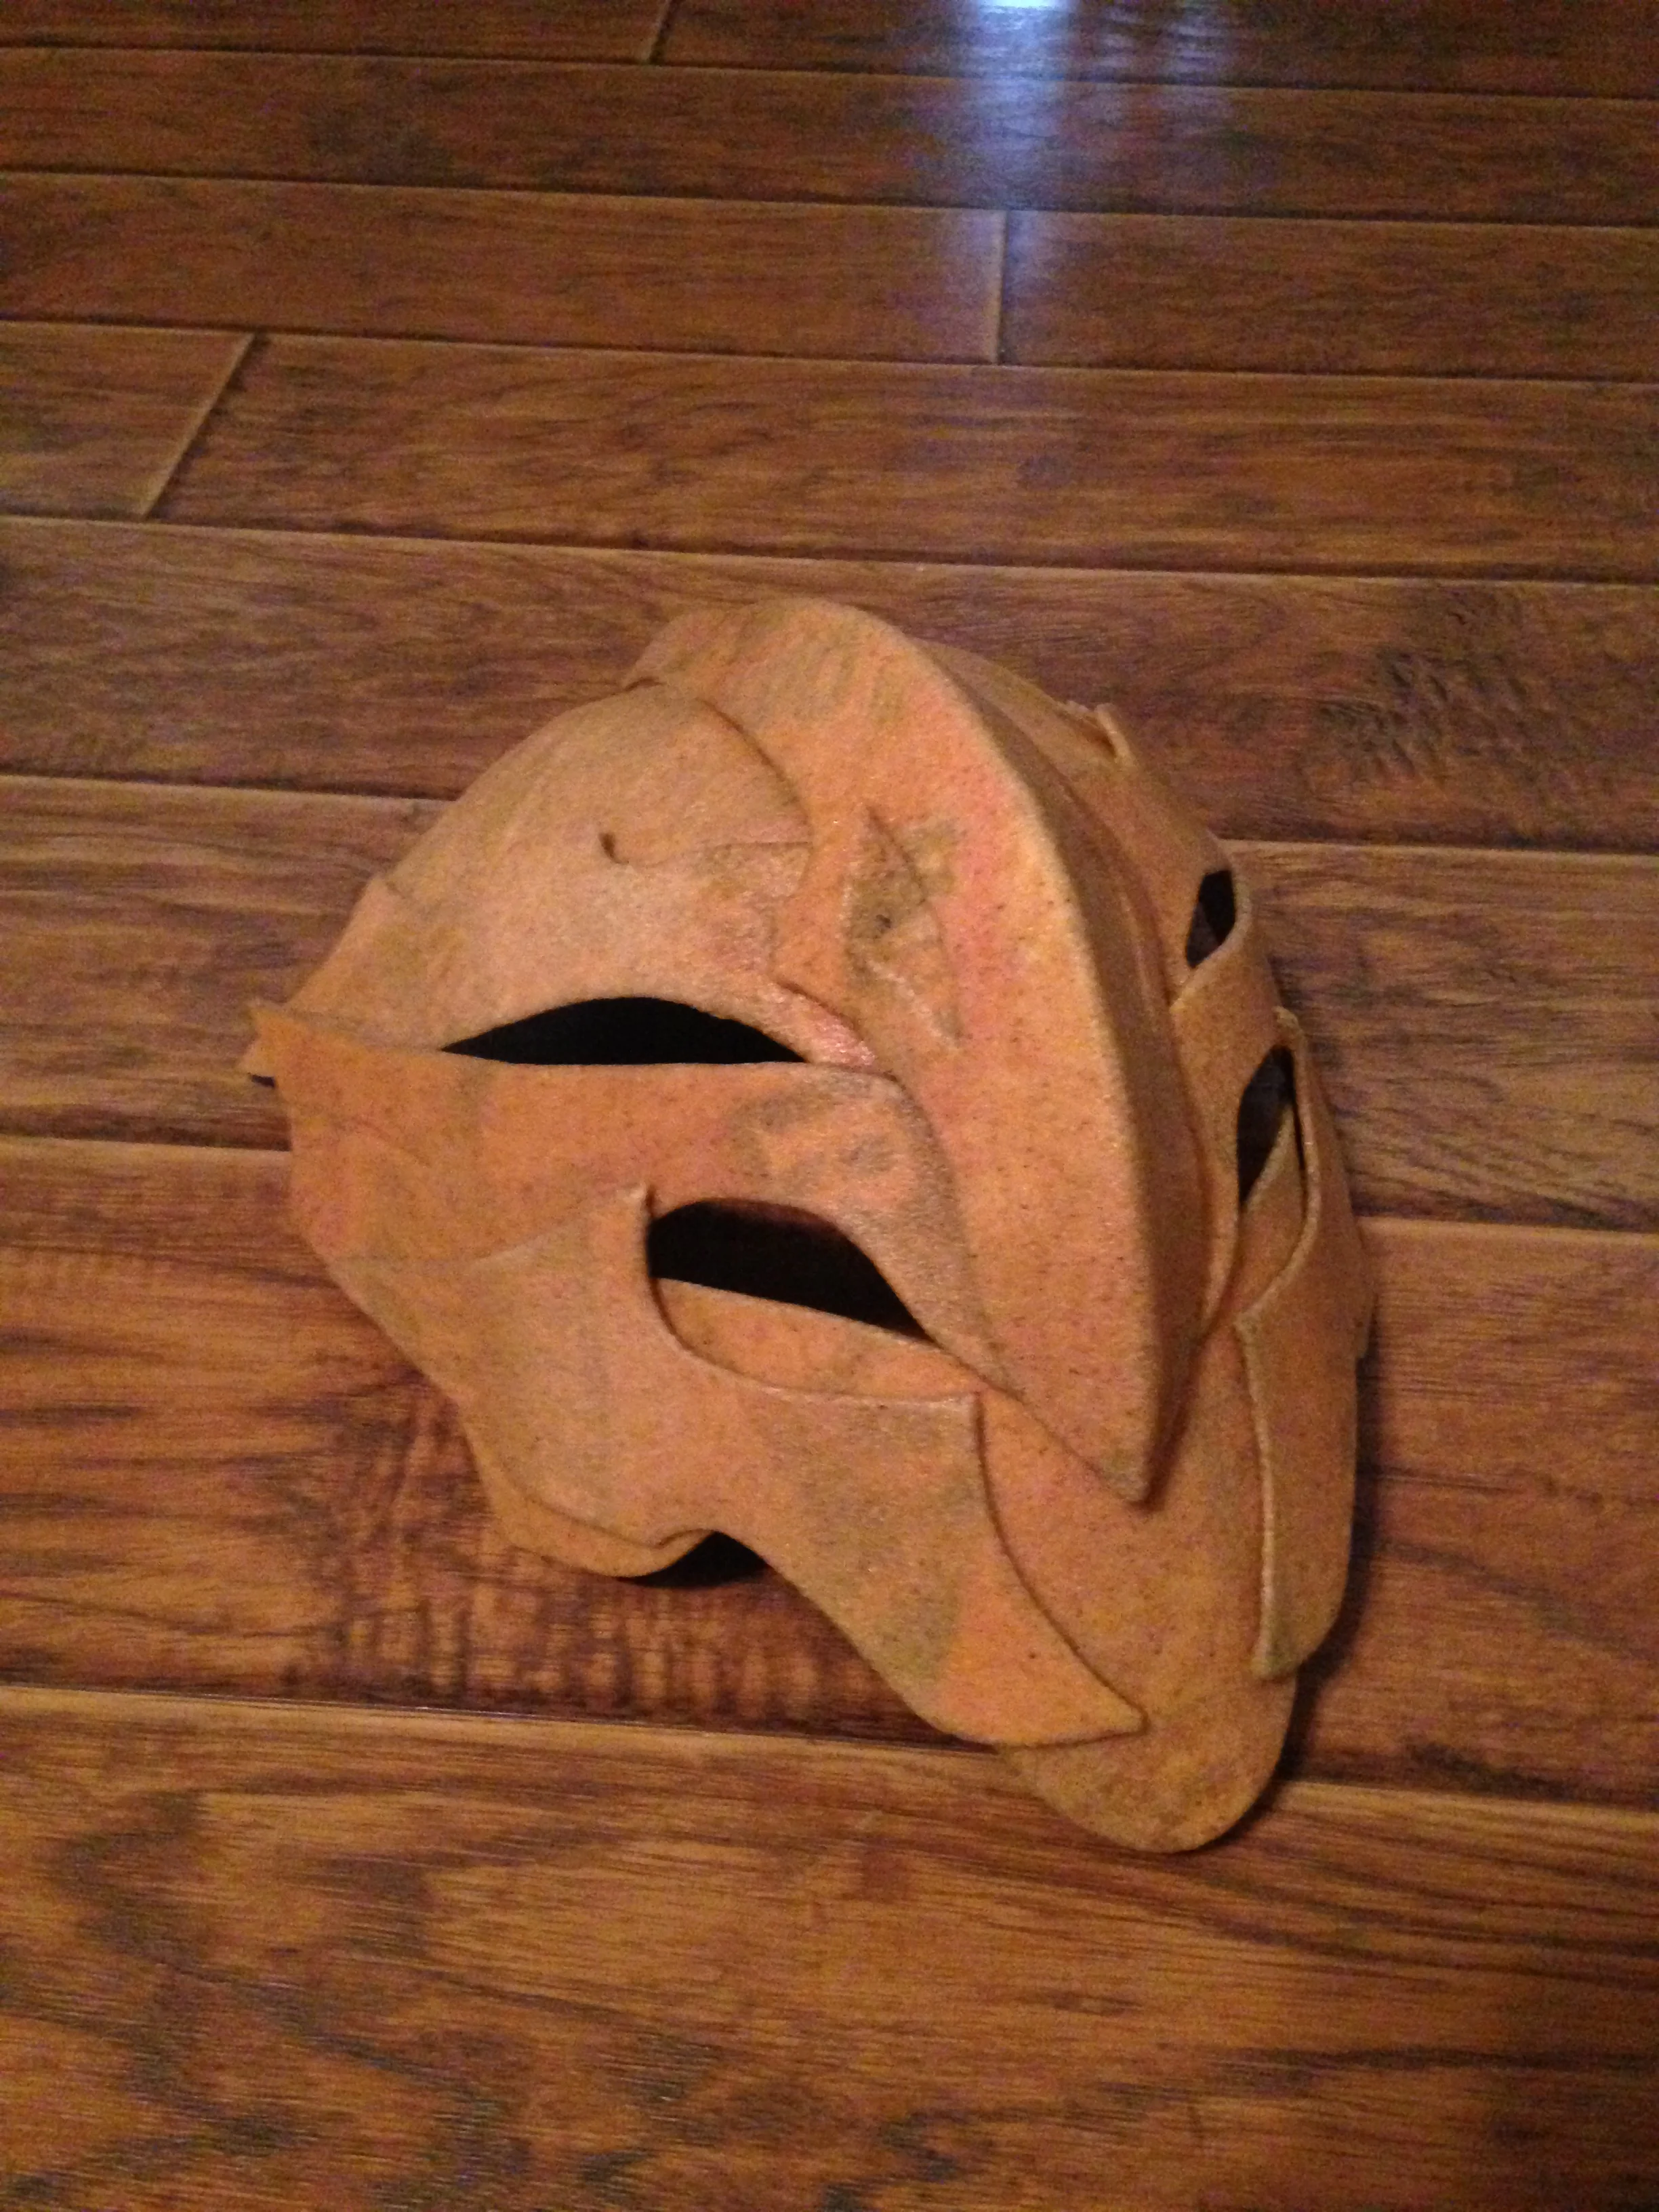
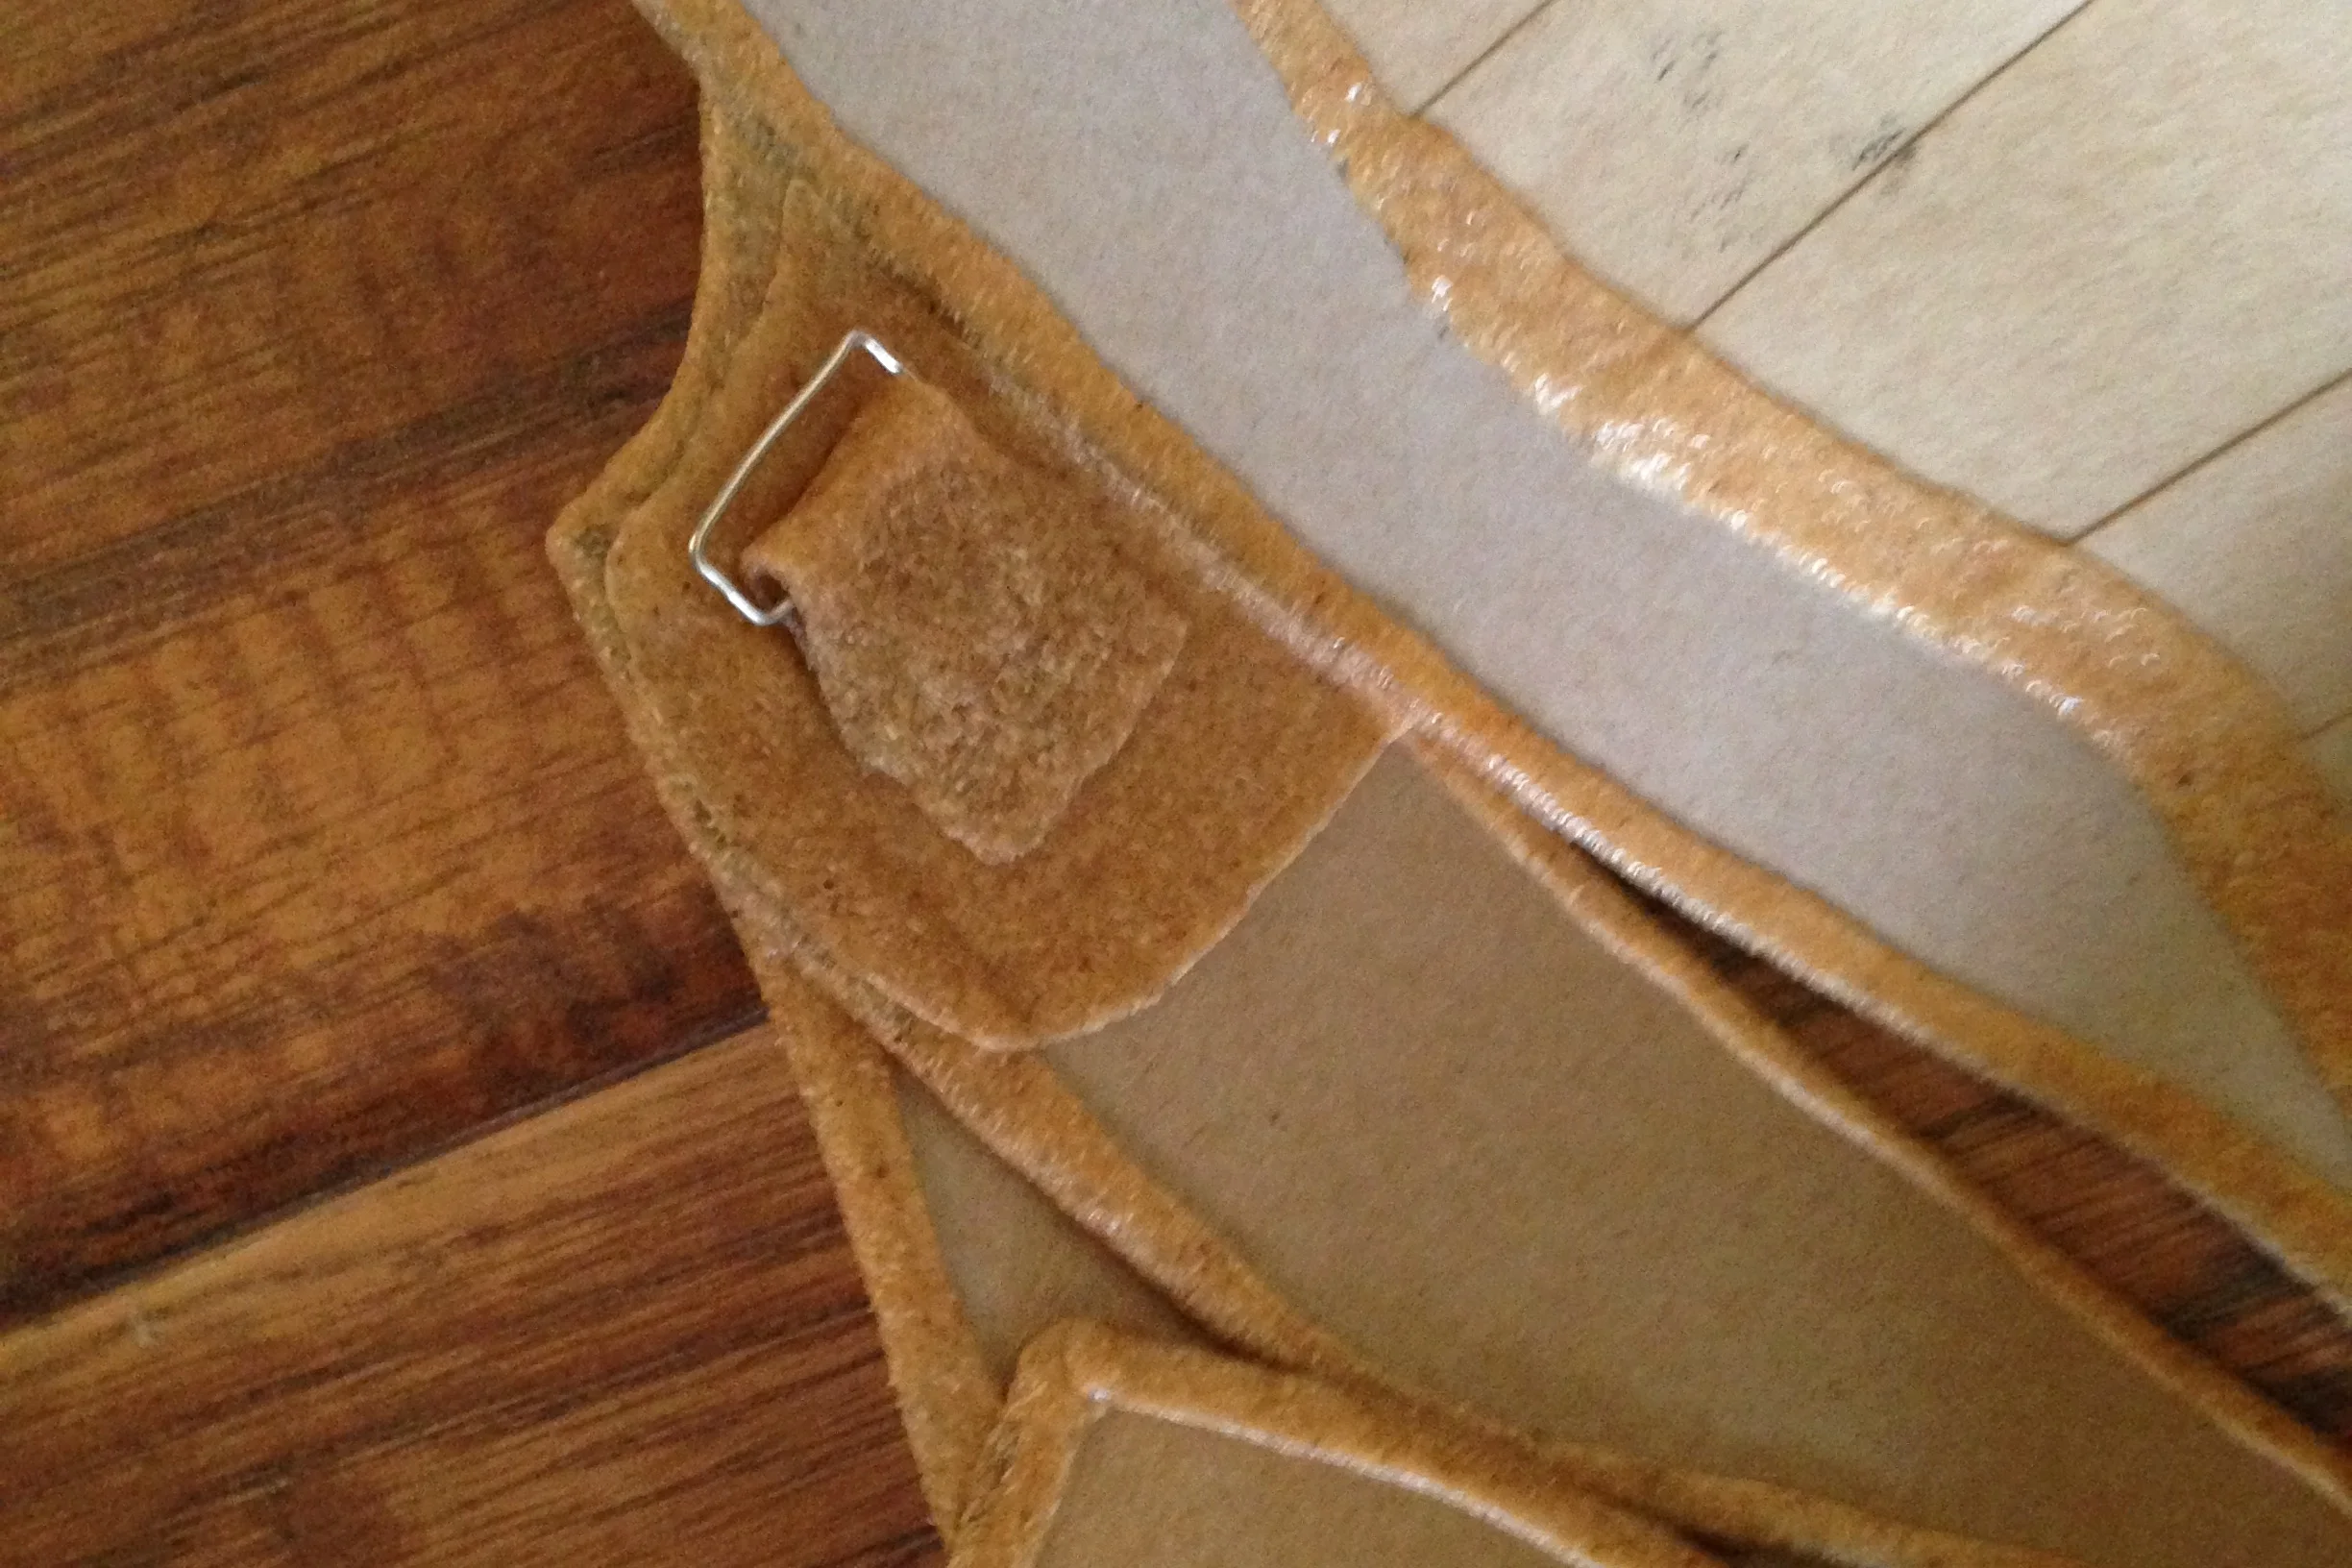
The mask construction is done! Now it's time to add the loops for the straps to attach to. I did kind of a bad job of explaining how I made those last time so I tried to take pictures of the steps this time.

Start with some heavy-gauge wire. I think the wire I used was gauge 16, I wouldn't recommend anything thinner than that. You start by folding your piece of wire into a rectangle with the two ends overlapping on one side. Then take a long rectangle of worbla (I used two layers, and would recommend you do too for extra stability), and put it through your wire loop. Then heat up your worbla and fold it around the wire loop, over the edge where the two raw ends are. Then heat it up again and mush the soft plastic into the surface where the loops need to go. You definitely want a layer of worbla on the surface underneath the loop, because the worbla will stick better to other worbla than most other surfaces.

And that's were are now. I'll be priming and sanding for a few days and then it's on to painting! Huzzah!

Do Fairies Even Have Tails?

Michael MacWolff

Hey folks. I have a few announcements today, and then some adorable photos for you. First off, my commissions are officially closed until November. I'm still happy to discuss projects with you, but I won't be able to take on anything new until October is over; wedding things and my current commissions are pretty much why. But anyway, I'm looking forward to the crafting I'll be doing in the meantime!

Now onto the coplay stuff! I recently finished a pair of commissions for a couple of friends of mine, and we had a little photoshoot in our back yard. They came out really well and I'm super happy to have been able to have made a Grey & Juvia. But I'm sure you don't want to hear me blather, so let's get on with the photos!

I Love My Job

Michael MacWolff

That's really all there is to say about it. I have so much fun creating and figuring out how to create the wonderful things in our fandoms. It does give me the occasional migraine and has been know to make me scream profanity loudly when no one else is in the house, but the rewards far outweigh the frustrations.

Today is no exception. I'm working on a new project for one of my friends that I have been having a blast making.

This is a character from RWBY, and as you probably guessed, I was tasked to make her mask. Though to be fair her crazy rainbow machine gun-katana thing would also be an interesting prop to make.

Now I've not done a ton of masks, but despite its complexity, I knew exactly what I wanted to do as soon as I looked it over closely. The different sections mostly have one-dimentional curves (like a cylinder as opposed to a sphere, which has multi-dimensional curves). That means that you can use flat pieces and curve them to fit your needs. I used a wig head as the model for the project, and busted out my pencil, cardstock, scissors, and masking tape.

As you can see, I made the individual pieces one at a time and added them to the wig head to build the shape of the mask. It might look simple, but it took several tries to get some of the pieces right. Eventually, we end up with this:

Once the pattern was done, the other steps were fairly simple. I re-made all of the pieces in compressed paperboard (you all probably know that to mean cereal boxes by now), and did two layers for some of the pieces that had some contoured details. Unfortunately, I don't have a great photo of the cardboard pieces by themselves, but the next step is the more important one anyway! I covered all of the pieces with a layer of worbla (just the front side of each piece). This does several things: 1) it gives the outside a uniform layer that is both strong and waterproof, 2) it helps everything keep its shape, and 3) it makes putting all of the pieces together easier.

As you can see in the first photo, I heated and bent the worbla around the edge of each piece so it would stay attached to the cardboard better. That's also important when you go to attach all of the pieces of the mask together. One of the great things about worbla is that when you heat it up to its malleable temperature, you can mush two pieces together and they'll stick together. Let them cool and they'll harden into a fairly solid bond. This let me easily put all of the sections of the mask together without having to glue and clamp everything.

The piece here to the left is one of the areas where there was a contoured detail in the mask. I used two layers of cardboard, with the outermost layer having the detail cut out. When I covered the piece with the worbla, I took a yarn needle (though you can use anything sturdy with a fine point) and pressed in around the edges to sharpen them. It makes for good detailing, and I'll highlight the shapes later when I paint.

Here you can see the finished mask construction. I built it in the same way I built the pattern, using the wig head as a base and adding one piece at a time, but instead of using masking tape to hold it all together, I heated up the worbla and solidified it wherever two pieces came together.

The last part of construction was making hooks for the strap to go on, which was a little trickier that with most masks, because I didn't want to put holes in anything. So instead I took some heavy-gauge wire and made who small rectangles, the long edge of which was as wide as the strap I'll be using. Then I took a few small scraps of worbla, heated two layers together to make it thicker and stronger, and bent it through the rectangle of wire, heating it and attaching it to the inside of the mask on either side.

The straps will thread through there and voila! It's wearable!

Construction is finished now, and all that's really left to do is the long, arduous process of smoothing out the surface of the worbla (which is really the most significant downside of using it, but everything else about it's awesome so I don't really care) and then painting it when that's all done.

I'm already stoked about this project and can't wait to finish it. And it's been great practice for the next thing I'll be making, which is actually another mask, but this one's from Skyrim.


And you'll get to watch me create this thing over the next few weeks as well, though you can expect to see a very similar process to the creation of the other mask. Either way, should be pretty awesome!