Contact Us

Questions? Comments? Concerns? Suggestions? Submissions? Shout-outs?

Whatever you want to tell us here at Mikey Does Cosplay, we're always happy to hear your thoughts and feedback!


123 Street Avenue, City Town, 99999

(123) 555-6789

email@address.com


You can set your address, phone number, email and site description in the settings tab.
Link to read me page with more information.

reflection.jpg

Blog

Here's where the magic happens. I'll be posting about all of my experiences and experiments (both failed and successful ones), introducing you to my costumes, sharing fun stories, linking tutorials and useful products, and who knows what else!


Drinks all around!

Michael MacWolff

Hello dearies, so sorry for my prolonged hiatus but planning a wedding and doing all of the creative bits was rather all-consuming for the past couple of weeks (not to mention the small con I attended the week before at which I was vending). Needless to say, it's been exhausting but it was oh-so-worth it.

Since I haven't been doing much costume-related stuff lately,I figured I might show off some of the fun crafty, and very nerdy, creations I put together for the wedding. You can expect the cosplay stuff to resume promptly after this week as I'm already into my next commission and started thinking about my [secret cosplay] again too.

So for the traditionally creative and craft bits of the wedding, I made pretty much everything. We had centerpieces put together with the wonderful help of my mother (god bless), and those actually doubled as favors, so we got two birds with one stone there. We decided to save some money on materials by using a bunch of things I already had: Magic cards. For those of you who play Magic: the Gathering, you know how relevant the lotus is in the lore, and as such, it seemed like an appropriate flower to liken the centerpieces to. Jordan and I actually met primarily because of Magic through a mutual friend who is much more heavily into the game than we are. So it seemed appropriate that MtG cards were used somewhere in the decorating.

As you can see in the photos, there's a little button on a pipe cleaner to hold things together, and a round piece that says "Wishing you Magic in your lives" in the center. Thank god my mom cut out all of the petals and did a lot of the assembling with me because they took a long while to put together. You can also see some of the other arting I did for the tables in the form of those family crests that you can see. We used those for the table designations because come on, who was expecting me to just use numbers, I mean really?

Along with all of the lotuses we used for the table decor, I decided to create some different Magic card flowers for boutineers, which was particularly relevant because that friend through whom we met, who also is an avid magic player, was our officiant for the ceremony. so we all got some Magic roses for our lapels, with some sprucing up in the form of fall foliage. 

The next fun creation I got to put together was the card box. This was a lot of fun to work on and was Jordan's Idea in the first place.

It has a cardboard base, with a foamcore top and details in whatever random materials I could find (mostly more of the same). The nails are all brads that are actually punched through the cardboard. And the best part is the inside.

That's right, our card box was a mimic. Half our guests probably didn't really get it, but honestly, who cares XD

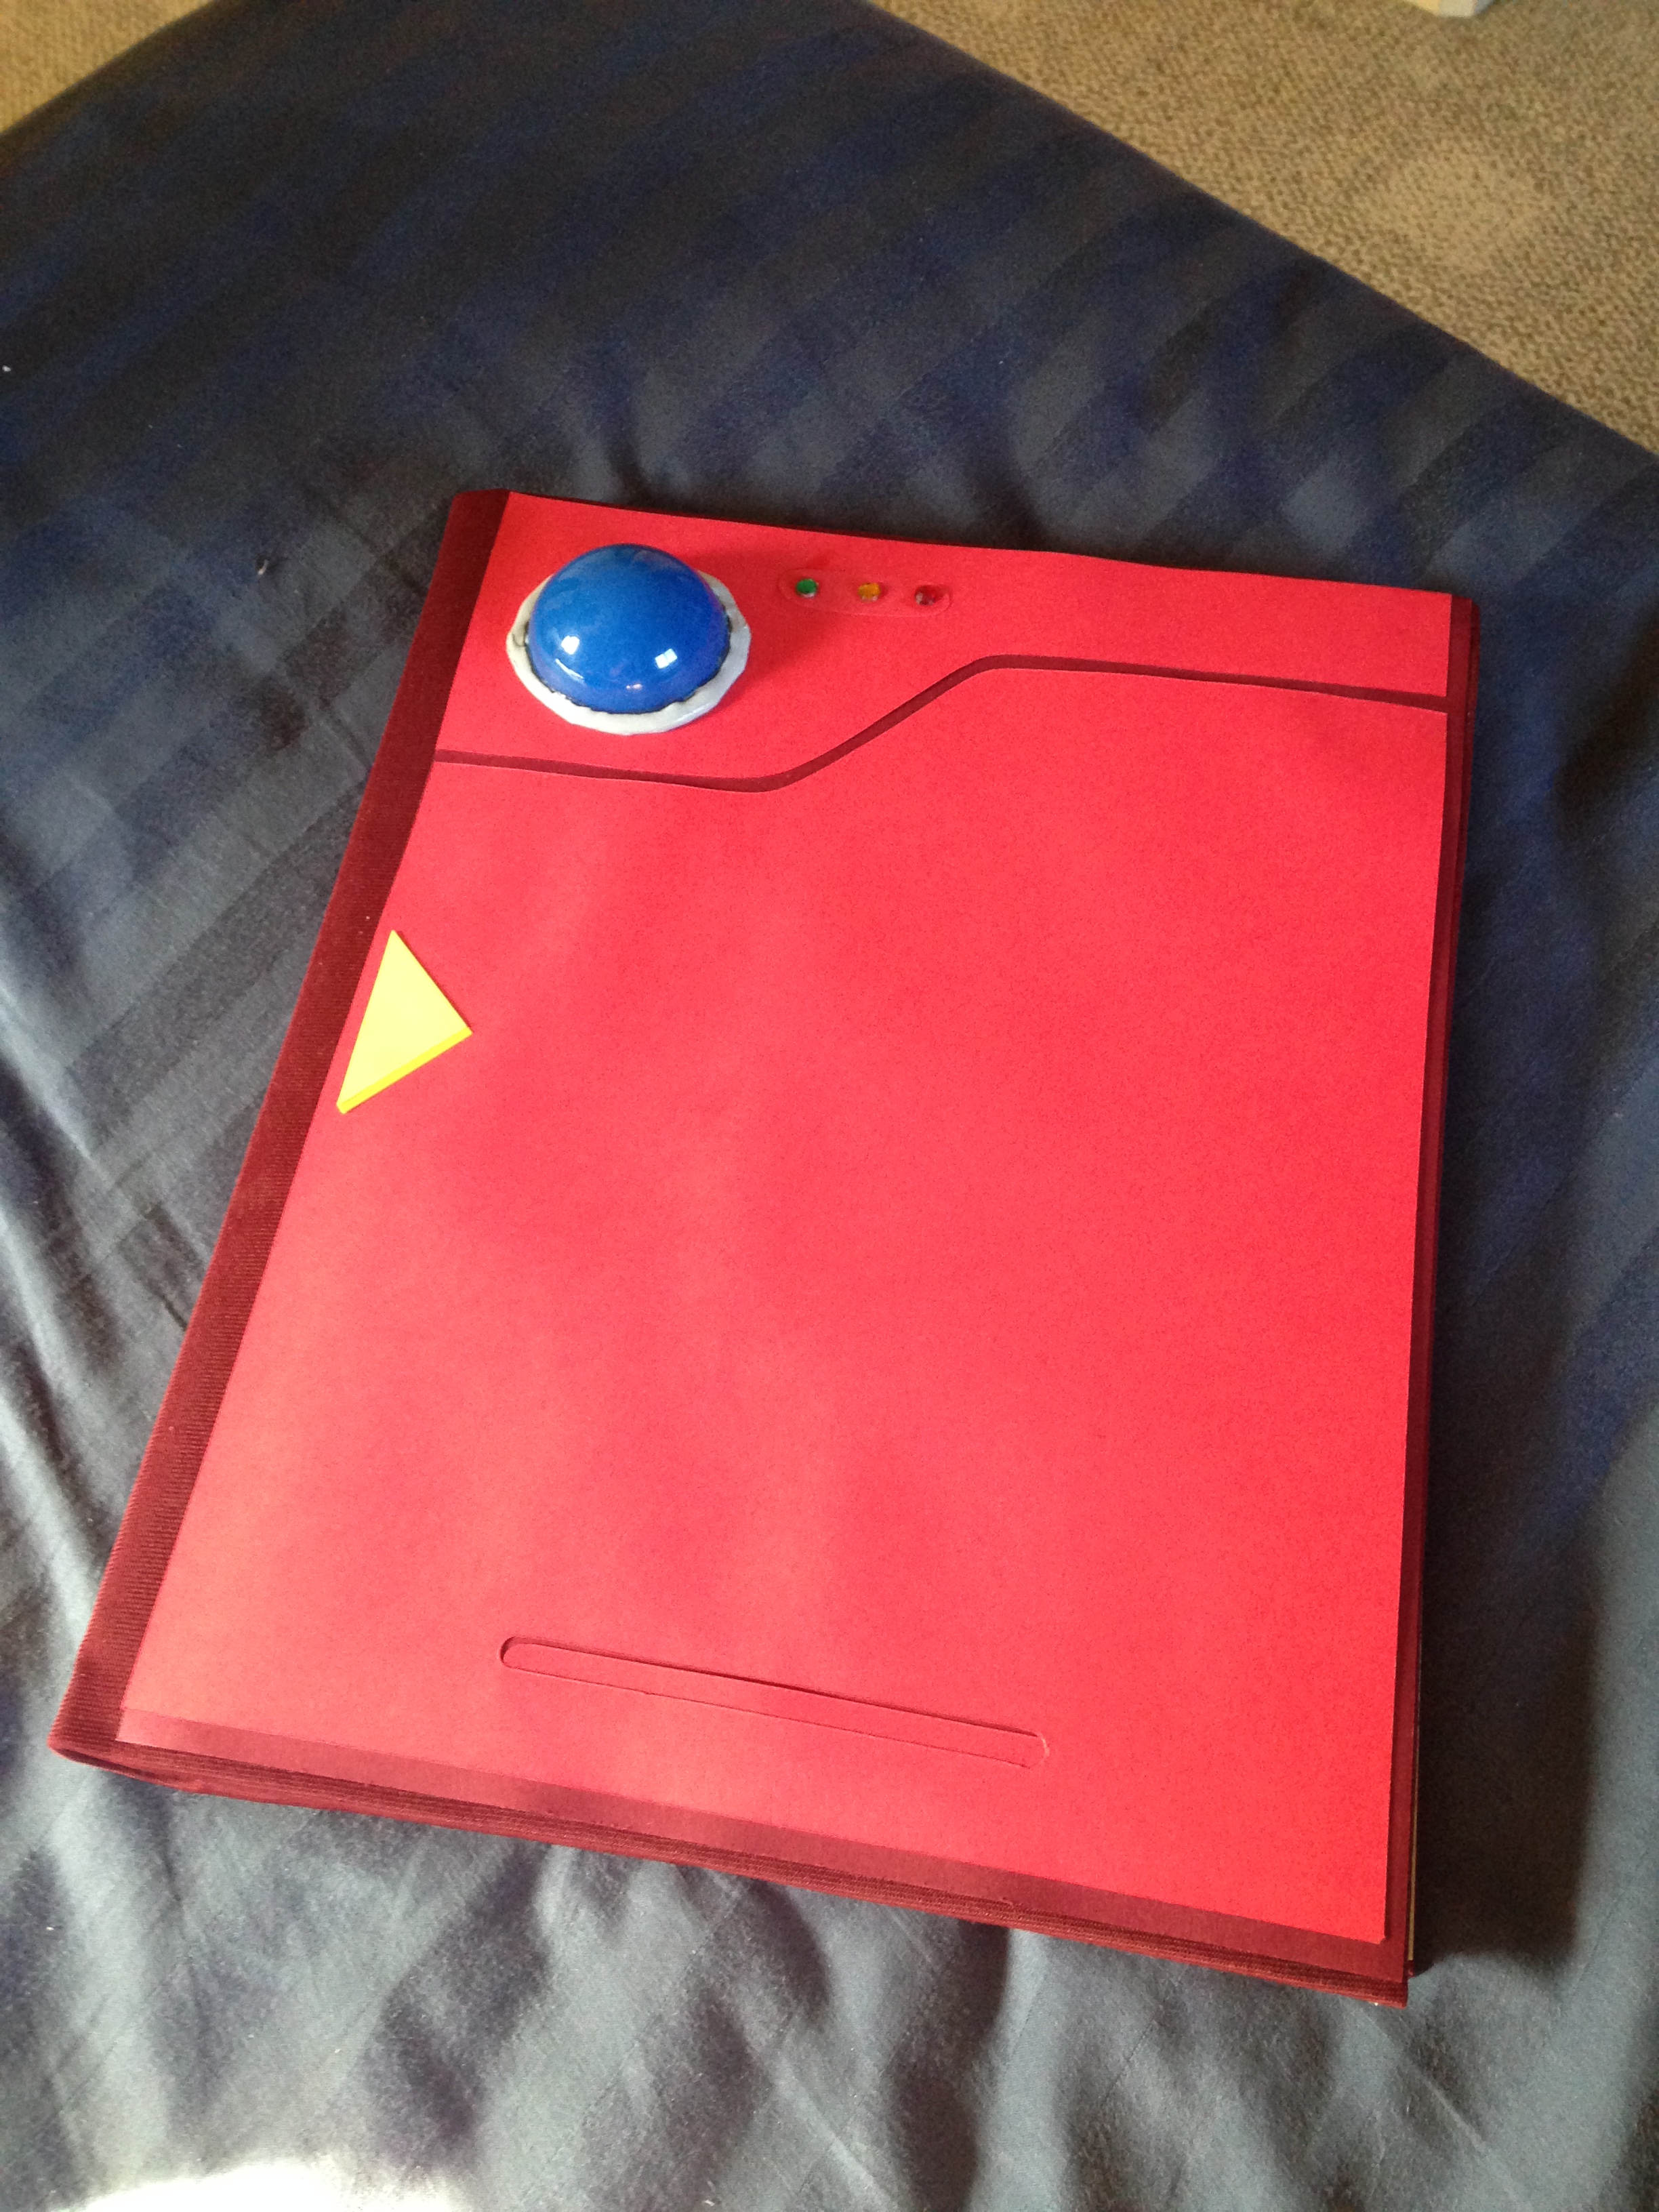
The last of the fun crafty things I got to do was put together the guest book. Since I've bound some books before it was fairly simple, though I didn't actually bind the pages myself for this one, I was lazy and bought a sketchbook and made a new cover for it. Along with 2 new pages for the front.

So I had lots of fun scheming and creating for our wedding, as I almost always do any time I get to make stuff.

If you'd like to see any of the photos of us on our big day, go check out facebook and you'll see us and all of our friends and family being adorable. That's all for now, loves!

Dragon Priest Mask and some Steampunk Stuff

Michael MacWolff

I'm taking a hot second to show off my finished dragon priest mask and then I'm disappearing back into my cave where I'm assembling a million and one paper flowers out of magic cards. So here 'tis!

dragon priest mask

I'm super happy with how the paint job came out and so is my client, so BOOYAH!

Also, while I'm here, here's my (finally) finished steampunk shotgun that I've been half working on forever and finally got my shit together to finish weathering it and everything. I debuted it in its final form at a steampunk event in the Cuyahoga Valley (you know, that park that used to steal my sou... I mean that I used to work at).

Nidhogg1
Nidhogg2

It has been dubbed "Nidhogg" and is much more menacing in more modest lighting.

And here's a few photos from the event, coutresy of Three Rivers Modeling Co.

CZU at CVSR
face off

More Masks!

Michael MacWolff

Hey folks, as promised I have some updates on the second mask I've been working on, now that the RWBY one is finished.

The process was pretty much the same as the last one, but the shapes were a bit more organic this time which made things interesting.

2015-09-09 08.11.11.jpg
 

This is the dragon priest mask, from Skyrim. I don't know a ton about skyrim, but I do know this is a pretty cool mask. Just like last time, I put together the pattern on a wig head using cardstock. The shaping was a bit harder to figure out and I had to tweak things a bunch to get them right, but ultimately I had a viable pattern to use.


You know what comes next, make it again out of paperboard and cover it with worbla!

A note about using worbla over  detail pieces: start in the middle and work your way to the edges to avoid any bubbles.
Another note along the same lines: Popsicle sticks are great for pressing the worbla into the details. You can see how I did it with the eyes and cheekbone ridges.

The mask construction is done! Now it's time to add the loops for the straps to attach to. I did kind of a bad job of explaining how I made those last time so I tried to take pictures of the steps this time.

Start with some heavy-gauge wire. I think the wire I used was gauge 16, I wouldn't recommend anything thinner than that. You start by folding your piece of wire into a rectangle with the two ends overlapping on one side. Then take a long rectangle of worbla (I used two layers, and would recommend you do too for extra stability), and put it through your wire loop. Then heat up your worbla and fold it around the wire loop, over the edge where the two raw ends are. Then heat it up again and mush the soft plastic into the surface where the loops need to go. You definitely want a layer of worbla on the surface underneath the loop, because the worbla will stick better to other worbla than most other surfaces.

And that's were are now. I'll be priming and sanding for a few days and then it's on to painting! Huzzah!