Contact Us

Questions? Comments? Concerns? Suggestions? Submissions? Shout-outs?

Whatever you want to tell us here at Mikey Does Cosplay, we're always happy to hear your thoughts and feedback!


123 Street Avenue, City Town, 99999

(123) 555-6789

email@address.com


You can set your address, phone number, email and site description in the settings tab.
Link to read me page with more information.

reflection.jpg

Blog

Here's where the magic happens. I'll be posting about all of my experiences and experiments (both failed and successful ones), introducing you to my costumes, sharing fun stories, linking tutorials and useful products, and who knows what else!


All Sparkly Glowy

Michael MacWolff

Hey folks, as promised, I wanted to show you the construction of one of my recently finished commissions, a staff for the Crystal Maiden of Dota 2! For those of you who don't know what that looks like, here:

So where to begin? Well, I started with the request that the staff be potentially modular, and ultimately that it be easy to ship to Canada, as well as transport to & from cons. So I started with a flagpole. I've tried taking dowels and trying to use dowel screws to allow you to screw & unscrew the rods together, but I don't have a machine that lines things up perfectly for me, so that's never turned out particularly well. The additional benefit of the flagpole is that I could have both the crystalline topper as well as the bottom embellishments on the staff both be removable from the center rod.

Construction started on opposite ends, using cardboard to create the gold portion of the topper that would serve as the base for the crystal. Why cardboard, you ask? Well, first of all I needed to have something I could carve the middle out of as I layered it together, because the crystal needed to light up, so I had to hide the battery pack(s) somewhere. Also, my intention was to cover the gold part of the topper with worbla, and while you can cover foamcore with worbla, the heat tends to make the foam expand and makes it a bit more difficult to work with. On the opposite end, however, I did actually use my standard foamcore layering method to create the foot of the staff.

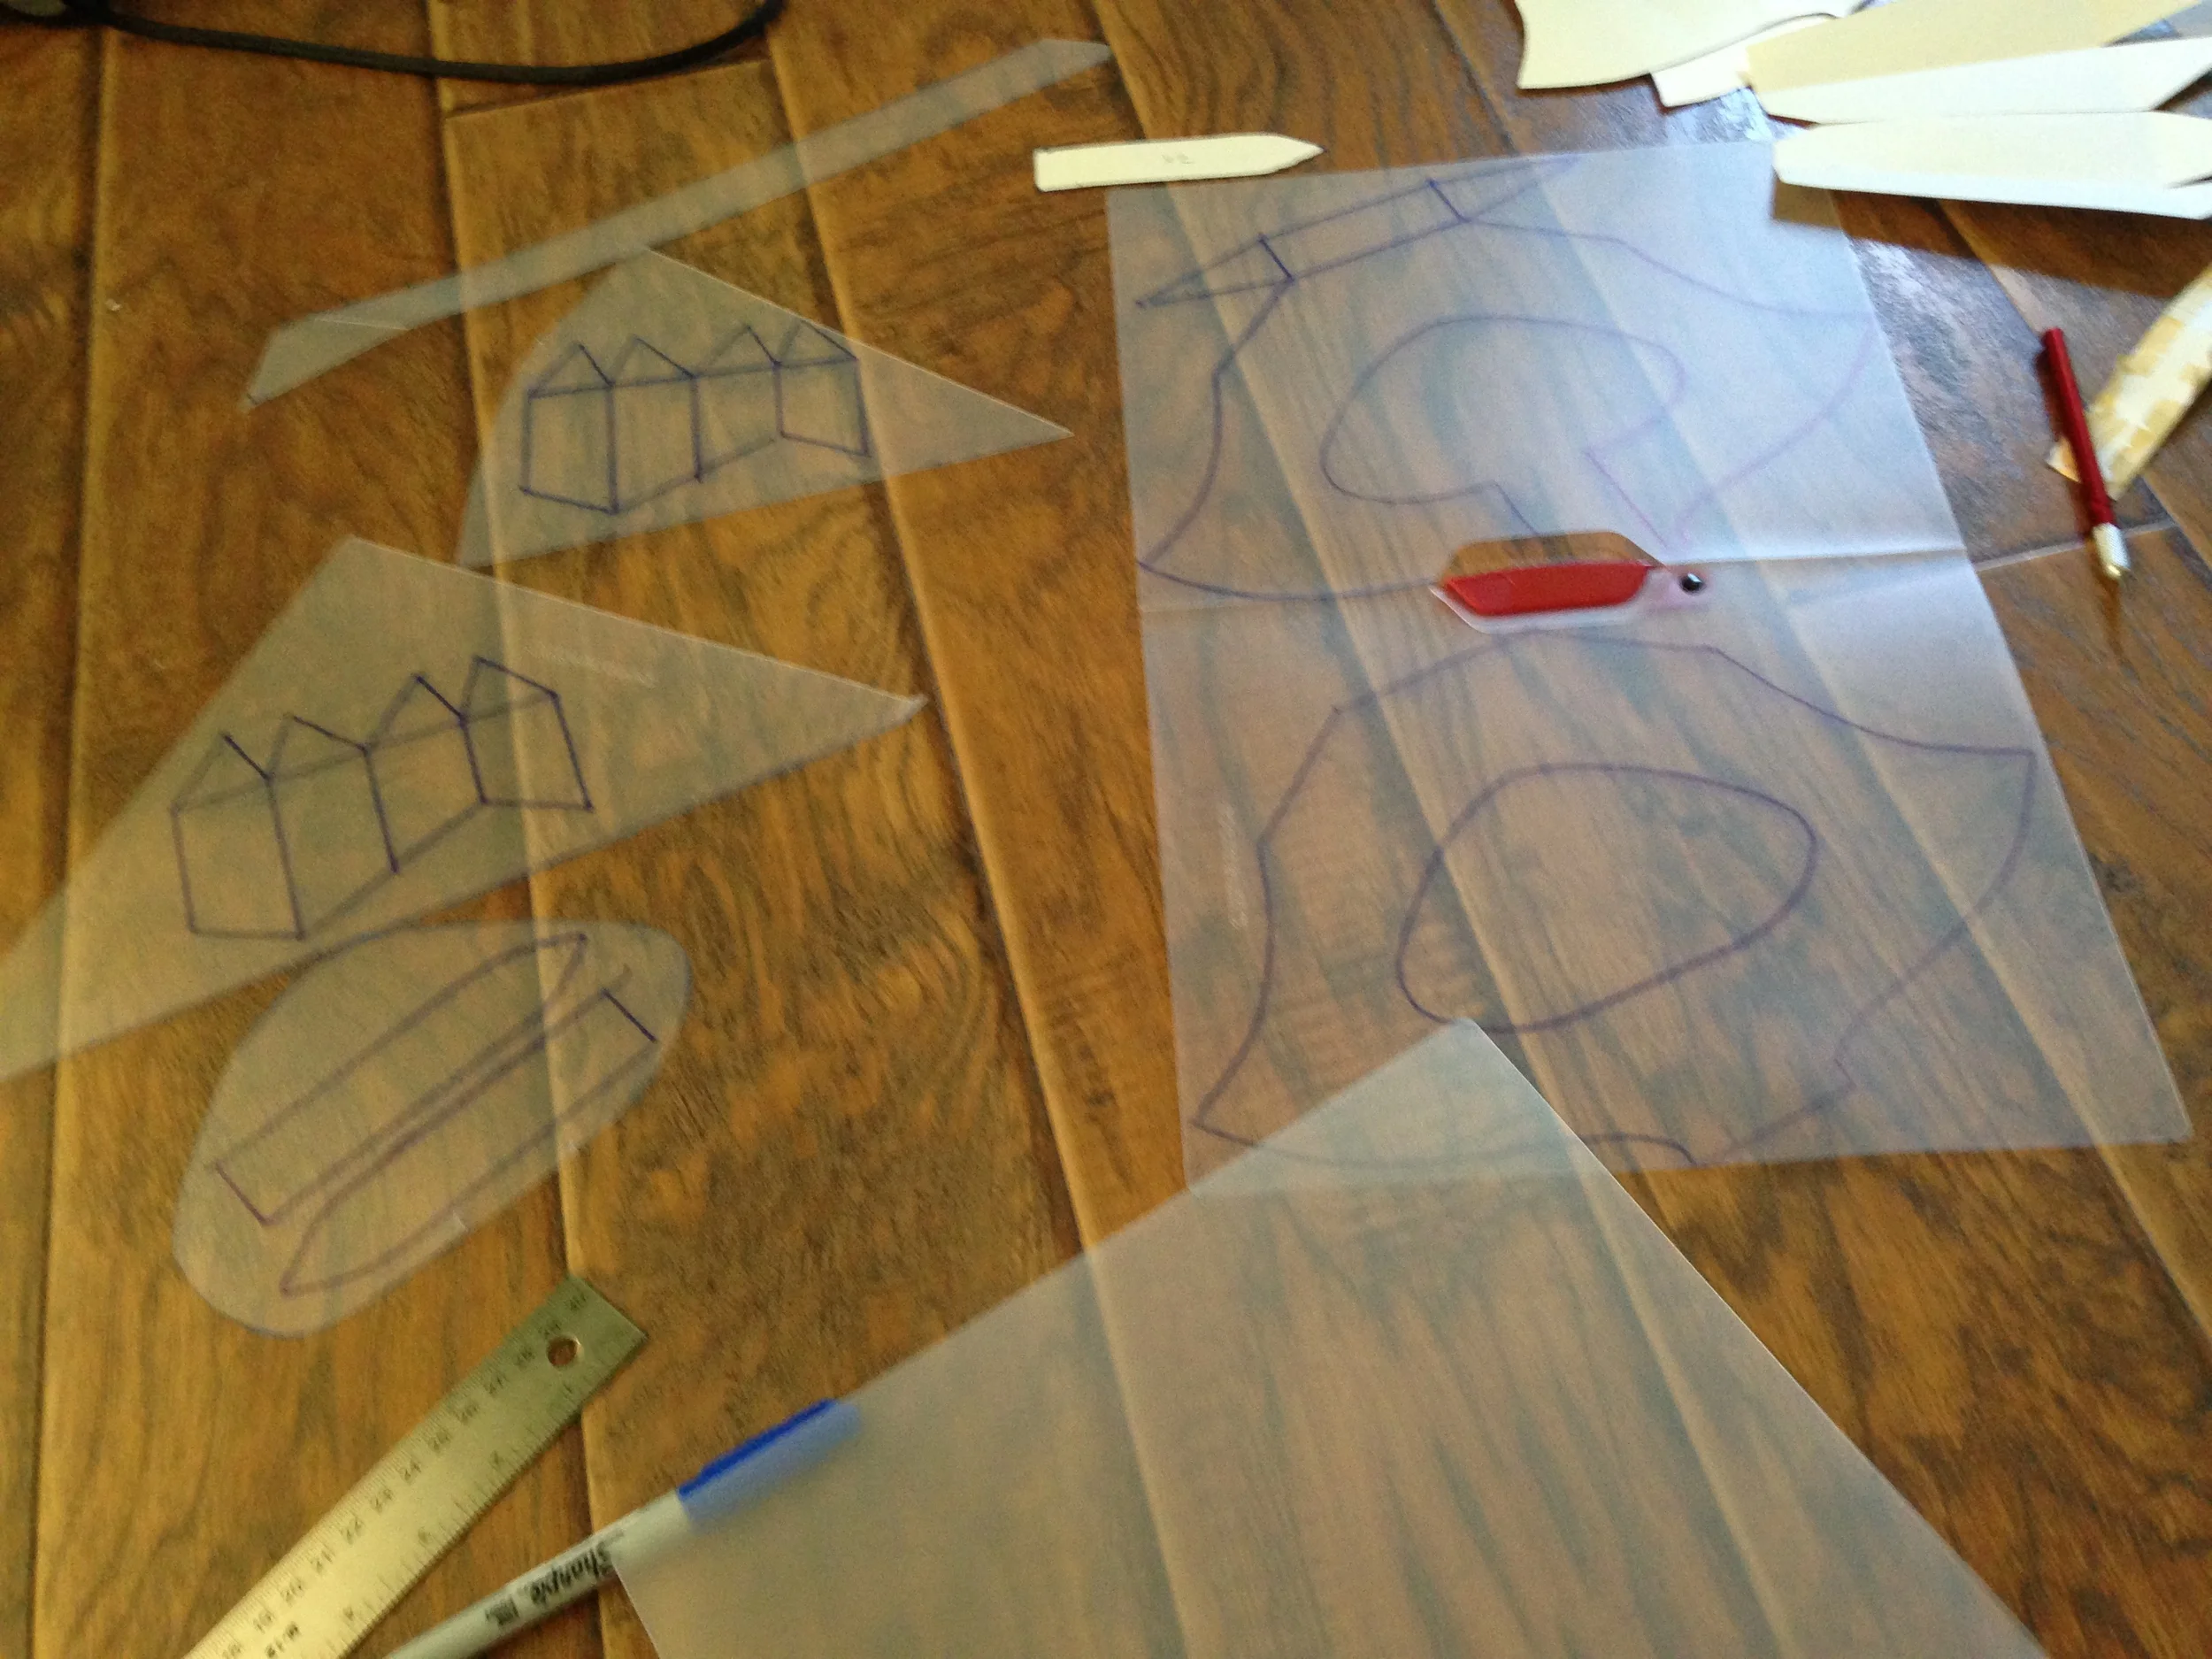
The next bit was probably the most time-consuming: patterning out & making the crystal. Thankfully I did pretty well in high school geometry so putting the pattern together wasn't too painful. I also had some help from this lovely tutorial by Kohalu Cosplay, which gave me some good pointers and helpful methods & supply ideas to use. I didn't follow it quite to the letter as I needed a bit more flex to my crystal, but it's definitely a great tutorial to look at if you're needing a place to start on something like this.

As I always recommend (do I always recommend it? I should because you should always do it, so I will recommend it henceforth), pattern your things out on paper first. Well, cardstock in this case so it actually has enough oomph to keep its 3D shape when you tape it together. Also, once you have the flat shapes made, actually assemble them. I realize that's probably an unnecessary note because you are all brilliant people out there, but testing this part by putting it together with some masking tape can save you a lot of headaches later when you're using your actual materials.

And speaking of said materials, you're probably wondering what I used for the actual crystal. I used these lovely translucent report covers, found at my local Office Depot. They're pretty much the same thing I used for Scarlet Flandres's wings if you remember those go look in the "Prop Gallery" for the big wings with the rainbow of glowing crystals). I even colored them the same way: with lots of Sharpie.

Once you transfer the pattern to your translucent plastic sheets, you'll want to score the fold lines with something; I used the dull side of an exacto knife... just be careful if you do the same, I went a little too deep in a couple of spots and cut all the way through the plastic. A ball-point pen might be a better idea to avoid that issue. After all of your pieces are cut out & scored, sharpie away!

Now, before I actually constructed this monstrosity, I put together an understructure to build the crystal around, so that the twinkle lights that would provide illumination had something to hold them in place, and because once the crystal was built, I wouldn't be able to manipulate anything on the inside. I simply used another piece of the translucent plastic with long tines sticking out to wrap the light strand around.

Now that the lights were in place, I needed something to diffuse the light a bit more evenly in the crystal, so now I got to cut up some white plastic grocery bags (yes, like the kind they put your stuff in when you go to the store... any store) and wrap them around the lights, using a bit of packing tape here or there to secure them.

Voila! Our light has now been diffused a bit, and thankfully the translucent colored plastic will help diffuse it more. Which brings us to the actual crystal construction. This thing is actually constructed and held together using packing tape. Seriously, that's the extent of what's holding this crystal together (Ok, I did use some E-6000 on the edges of the smaller crystal offshoots to help hold them in place, but it's mostly the packing tape).

**A note about this step: put the side you sharpied the hell out of to the INSIDE.

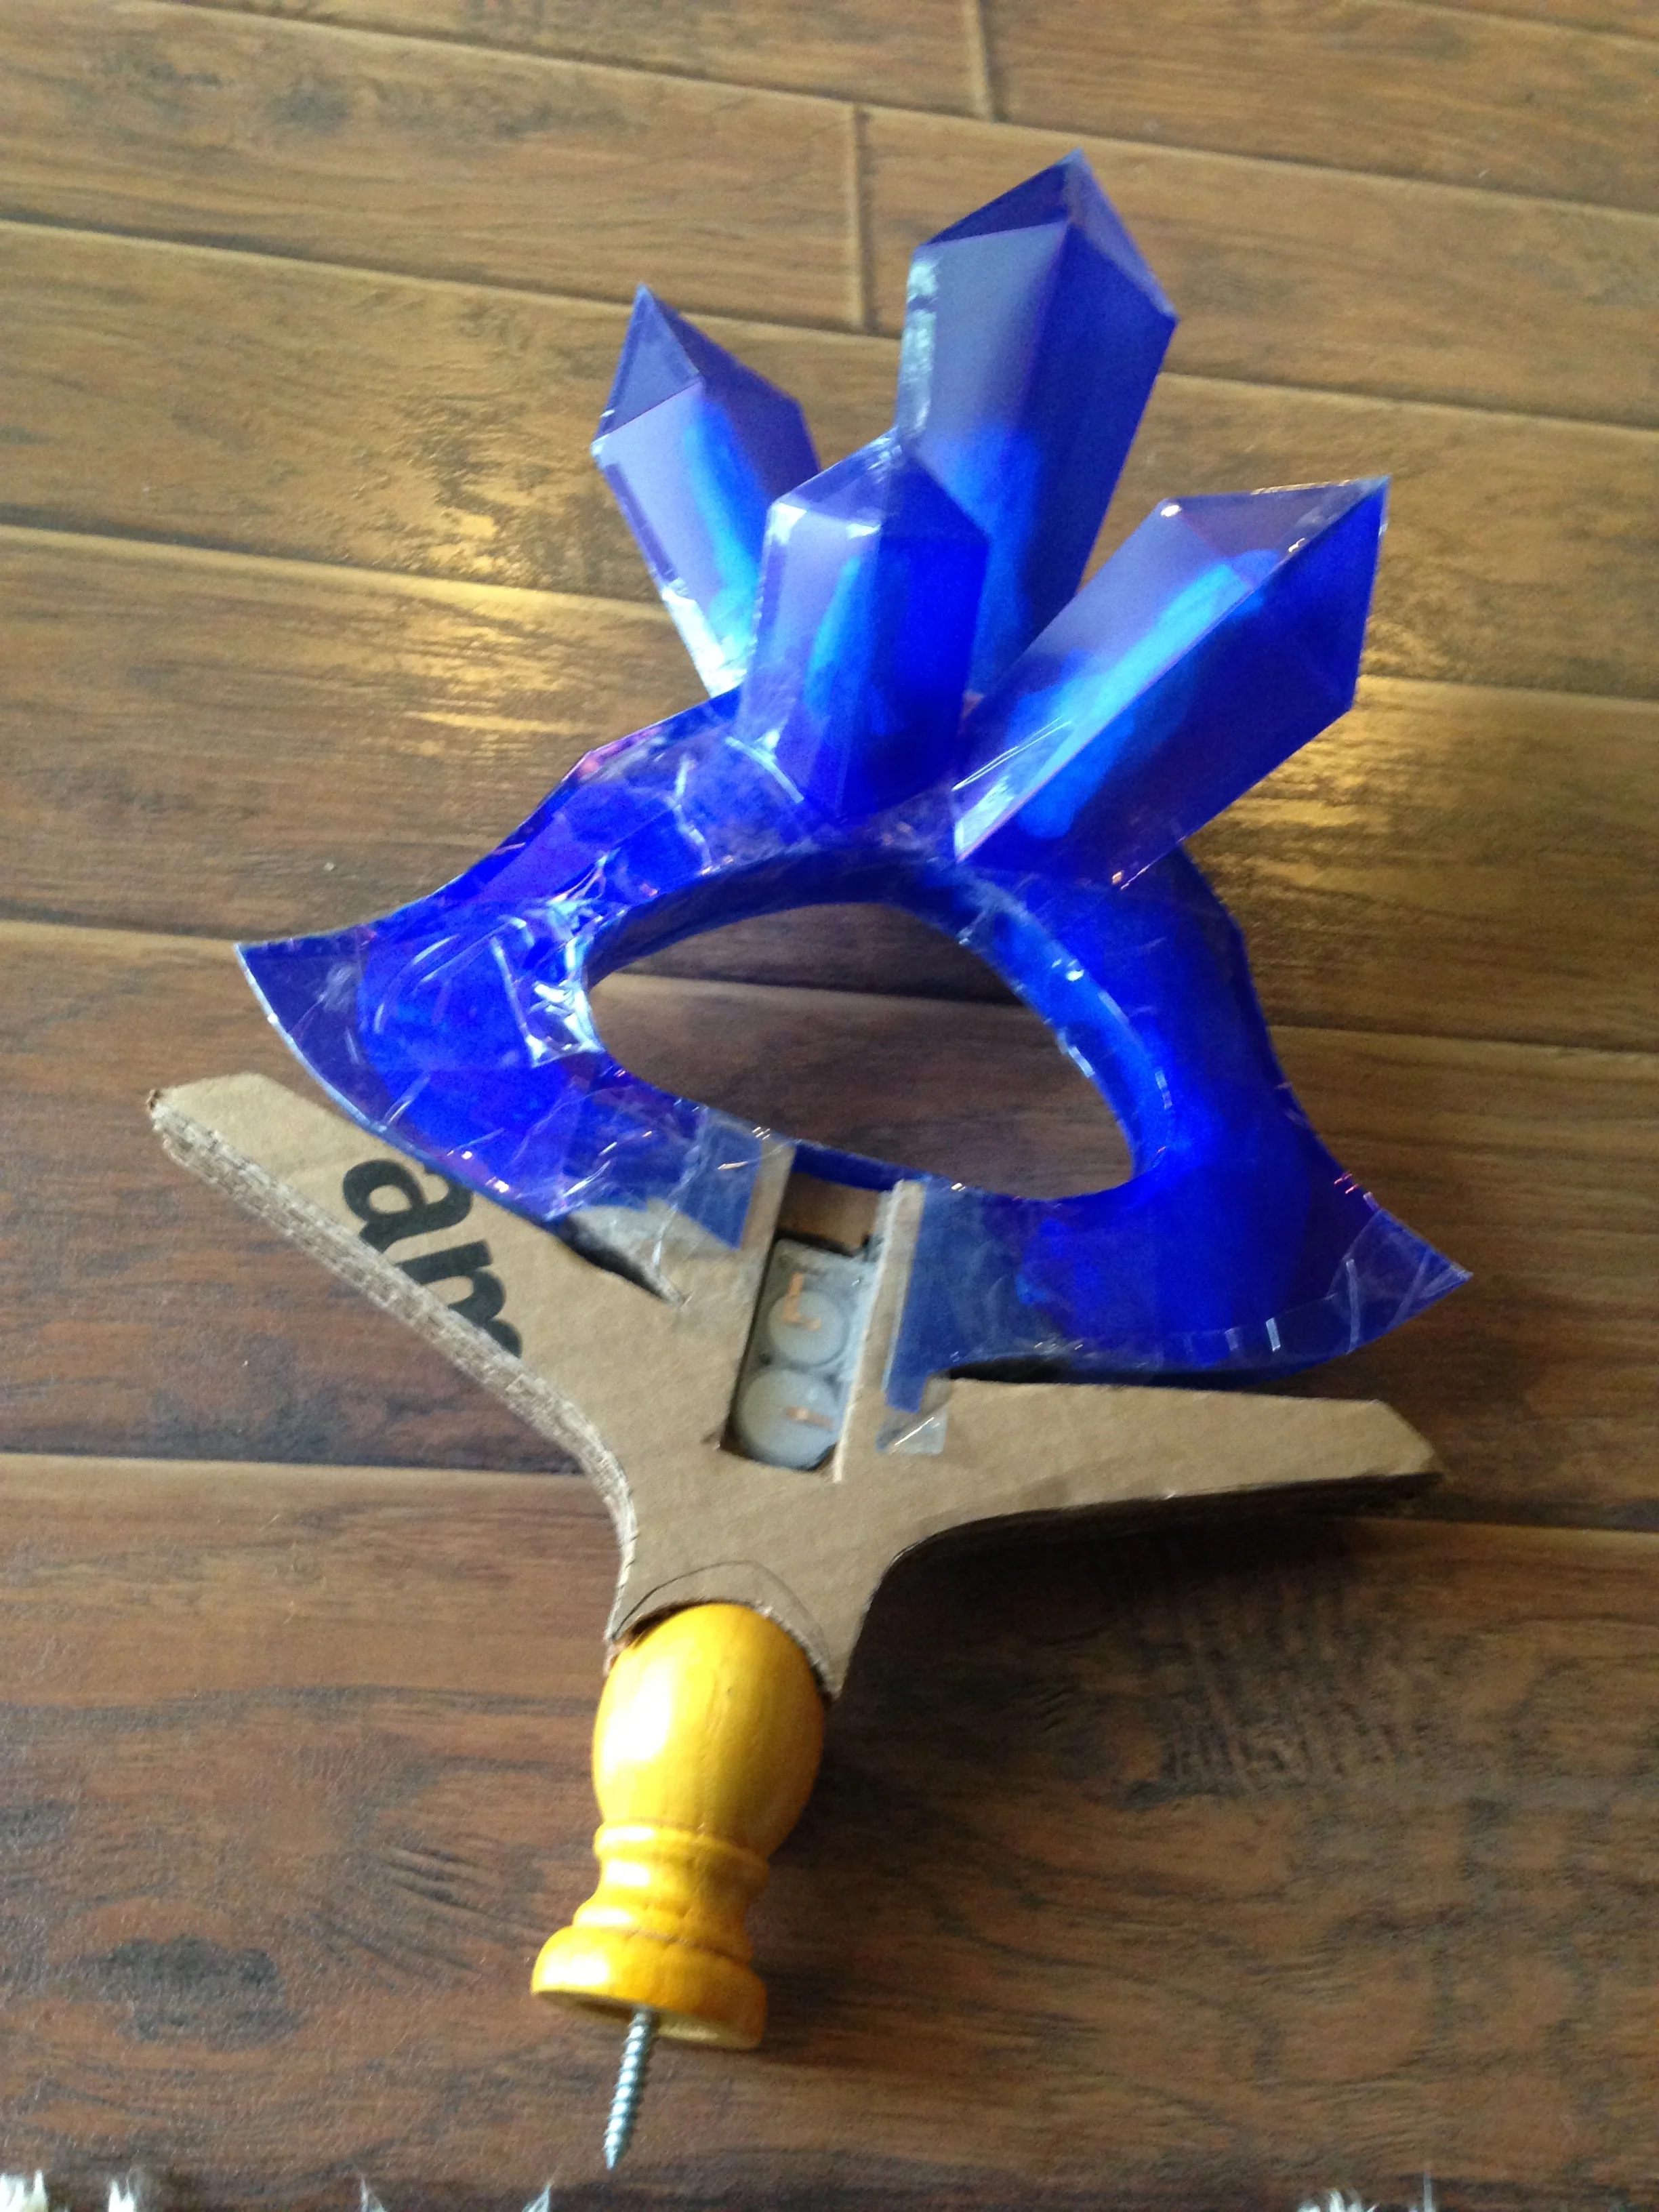
Now you'll notice all of the glare and unevenness from the tape. That's just a hazard of the wierd shapes of this particular crystal. If you're making a more geometric shape (like the smaller crystals on top), that happens a lot less. But you can also help remedy that and make it look more crystal-y by now sharpie-ing the entire outside of the crystal (that's what I did... and you'll want to buy at least two sharpies of the color you need, I killed one and a half in the process of making this). Once the outside layer was covered in an even coat of sharpie, I shellacked the entire crystal. I used this spray shellac for this step, and sprayed about 5 coats on to make sure it was even & well-covered.

See how much nicer that looks? You'll also notice I've already put the worbla over the base at this point too. Now for the last bit, the round parts on the bottom of the staff. I actually should make a little tutorial on how I did this because it was kinda wonky, but I used cardstock & masking tape to make the... I don't even know what shape to call that... round, sharp-edged protrusion. Then once the base was down I slathered it in spackling paste, let it dry, then sanded. Rinse, repeat several times until it was smooth enough for me to be happy.

The only thing left to make now are the round gems the go on the staff head, and then to start painting! With the crystal on top, I couldn't really spray on a base coat without the risk of ruining the crystal, so I brush painted everything. Don't forget my rule of undercoating your metallics! I used a honey brown color under all of that gold and it turned out lovely.

Here's the gem, it's just blue sculpey, but I did use the sharpie on it as well to give it the same tone as the crystal, then I sprayed it with the shellac to make it nice and shiny!

Here's the gem, it's just blue sculpey, but I did use the sharpie on it as well to give it the same tone as the crystal, then I sprayed it with the shellac to make it nice and shiny!

Here's the majority of the paint job, on all of the pieces.

Here's the majority of the paint job, on all of the pieces.

The very last part was taking some fur (it was actually come of the leftover trim from Ashnard's cape) to make the little fluffballs that hang from the branches on the staff head. So here you can see the finished product!

I'm very pleased to say that I've already heard back from the customer and it sounds like everything arrived safely and she loves it. I'm hoping in the next week or so that she'll send me some photos of the whole costume put together that I can share with all of you, but until then, cheers!

Puppies! And FIREBENDERS!

Michael MacWolff

Welcome back friends, and thanks for sticking with me through my extended hiatus! Why was I gone so long? Well there's lot's of reasons, chief among them being the fact that my usband and I got a new puppy!

Meet the newest member of our family, Donnerschlag! Yes, that is his actual name, it means "thunderclap" in German and we got the idea for the name from the anime Kiddy Grade; Donnerschlag is the main characters' guard robot. He's a German Shepard mix and if you look at those paws you can tell he's going to grow into a BIG BOY!

So with house training and pretty much having to be aware of what the puppy is doing at all times or risk losing shoes, power chords, and flesh to his sharp little puppy teeth, I've not been able to do a ton of work on cosplay stuff, nor have I had much time to do much updating around the website here. Thankfully I've had a light workload as far as props go for these few months and I've been able to take the free hour here or there to work on my two commissions as well as put together a new costume for Matsuricon!

Most of you already know I've been wanting to start getting into crossplaying as a way to expand my repertoire of costumes, as well as my repertoire of costuming abilities, and get some good practice with things like makeup and shaping in my patterns and all that jazz! So for the first attempt at that, I'm doing P'li from Legend of Korra, since my Kya and Korra have been wanting to do a Red Lotus group for a while. You're probably wondering why I'm not doing Zahir, given my identity as an airbender. Well, mostly I just wanted to do something different! And I'm also a good height for her since she towers over the rest f the Red Lotus lol. Lastly, I like her design a lot, and with my two friends, both her and Zahir were open spots so I went with the badass combustion lady :-D

So after deciding on P'li for this group, and my cosposse deciding they wanted to do this for Matsuricon, I got right to work. I immediately went out to the thrift store and found her rib knit undershirt, and proceeded to make ridiculous faces while showing off my thrifting skills.

It took a long while to make any more progress, because the new puppy happened somewhere between then and now, but I recently discovered that Donner can be very well-behaved in my sewing room when I'm working in there. He does occasionally try to eat scraps of fabric and thread off of the floor, but he is a puppy after all.

This is his favorite spot, right underneath my sewing desk. He seems to actually like the sound of my sewing machine too, which is kinda weird since it's loud, but he'll come in from the living room whenever I start sewing on it and just plop down u…

This is his favorite spot, right underneath my sewing desk. He seems to actually like the sound of my sewing machine too, which is kinda weird since it's loud, but he'll come in from the living room whenever I start sewing on it and just plop down under my feet.

So with this newfound activity that is puppy-friendly, I got right to work! The bit you can see me sewing up there is her top, made from a knit material, which you can see finished here. The gold detailing is all satin, and I basically made a large tube of fabric in that shape and flipped & Ironed it flat. I then stitched it onto the top by hand so that the stitches wouldn't keep the knit from stretching in the way it needed to for me to actually get it on, since as you may know, satin doesn't stretch.

The weird scrolly bits on her hips were a bit more challenging. I started with a base of heavy duty craft intefacing so they'd be stiff and hold their shape. then I hand-stitched on the gold satin over top.

Unfortunately, I wasn't particularly happy with how they looked when they were done, so I scrapped those and did an applique stitch around them instead, which looks a lot better, in my opinion. I whip-stitch them onto the darker gold satin belt I slapped together and added the dangling panel to the front of the belt as well. It's the same knit material as the top for consistency, and because knit drapes well. The downside is that trying to iron pleats into this knit fabric was a nightmare, and didn't work particularly well, so I just had to stitch most of the way down them. Last bits I made were the arm... things. I really don't know what to call them because they're not gloves as they don't go over her hands, they're more like... long arm warmers? Detatched sleeves? Maybe they're just supposed to be regular sleeves but I made them a separate part so whatever. They're just a quick doubled spandex knit fabric that I happened to have enough of in my scrap drawer, but they turned out nicely and fit quite well.

With all of that done, and co-opting the harem pants I made for a different costume, we did a test run. 

I don't know about you guys, but I'd call that a success! I have a few things left to do, namely figuring out my footwear, french braiding the wig (hopefully with the help of my Katara because I have no idea how to do that), and making her shoulder pauldrons, which should be a breeze at this point considering how many of those sorts of things I've made at this point.

So in just about a month you'll be able to see this combustion bender in her full glory at Matsuricon! In the meantime I'll be finishing up a few commissions which I'll be telling you all about next time! Toodle-oo!

Post-Colossal Revue

Michael MacWolff

Hey folks! Colossalcon was a whirlwind as always, and unfortunately with as busy as my life tends to be of course I had to leave early which meant I didn't get to spend as much time with my wonderful con friends as I would have liked, but such is life.

Still, I got to meet some awesome new people who I will hopefully be able to cosplay with in the future! The bulk of my photos are up on my facebook page and it seems silly to double-post too many things, but I did want to show off the stuff of note!

Thursday I got in and immediately stumbled upon the Pokemon photoshoot and managed to find the only existing photo of my Ramos cosplay with all of its proper pieces, courtesy of Shadow Wolf Creative Photography (besides my little Gogoat who sadly broke as soon as I got out of the car on Thursday).

Friday was fun, I started out in Aang, making it to the Avatar/Korra shoot, though I don't have much in the way of photos since I was in most of them and being lazy about taking them when I wasn't. Then in the afternoon I transitioned to Edgeworth, but not before getting horribly sunburned >_<
Again, I managed to stumble across a shoot completely by accident so here's some Ace Attorneys! Again, there aren't a ton of photos since I was in about half of them.

For Saturday, I geared up in Aang again and had my cousin/husband team with me! It was lots of fun having a big group and we got lots of photos taken of us.

we're hoping to get the crew together again some time soon since we didn't get to spend too much time hanging out on Saturday.

Now I thankfully get a bit of a reprieve as I don't have too many orders that need to be filled immediately, though I do have an event this weekend in Strongsville, so anyone local should come visit!