Contact Us

Questions? Comments? Concerns? Suggestions? Submissions? Shout-outs?

Whatever you want to tell us here at Mikey Does Cosplay, we're always happy to hear your thoughts and feedback!


123 Street Avenue, City Town, 99999

(123) 555-6789

email@address.com


You can set your address, phone number, email and site description in the settings tab.
Link to read me page with more information.

reflection.jpg

Blog

Here's where the magic happens. I'll be posting about all of my experiences and experiments (both failed and successful ones), introducing you to my costumes, sharing fun stories, linking tutorials and useful products, and who knows what else!


Mikey Kicks Some Commission Ass

Michael MacWolff

Hey folks! Now that Ohayocon is over, I can actually sit down and put together another post. I promise I'll post a review of Ohayo soon, but I literally have 2 photos of my own cosplay and I'd like to wait until I get a few back so I actually have things to show you guys. So instead, I want to show you the awesome commission work I've gotten to do over the last month and a half!

First up, I churned out a Crescent Rose scythe super fast, since I was suppose to be delivering it at Ohayo this past weekend.

It all started with a blueprint. I'm very happy I kept this and used it to create separate pattern pieces to actually make the scythe because now I can just rinse/repeat when I go to make another one of these in a couple of months.

It all started with a blueprint. I'm very happy I kept this and used it to create separate pattern pieces to actually make the scythe because now I can just rinse/repeat when I go to make another one of these in a couple of months.

The majority of the scythe head/blade/whatever you want to call it is made from foamcore board (I know, but surprise) so that it's lightweight enough to actually carry around. I made the base of the spear point as well as the front blade out of MDF though, so it was more durable at the point. I've never used MDF (Medium Density Fiberboard) before, but I really like it. It's heavier than wood, but it cuts very nicely with a jigsaw, it doesn't split the way wood does, and it bevels nicely with a Dremel sander. I'll definitely be using it more in the future, particularly since I have a giant board of it that I cut out two tiny pieces for this...

The bit where the pole screws in is all cardboard layers (stiffer & stronger than foamcore), and the pole itself is a mop, the head of which I dismantled so you can unscrew the pole pieces. I did the same thing with the spear point, which attaches inside the gun section.

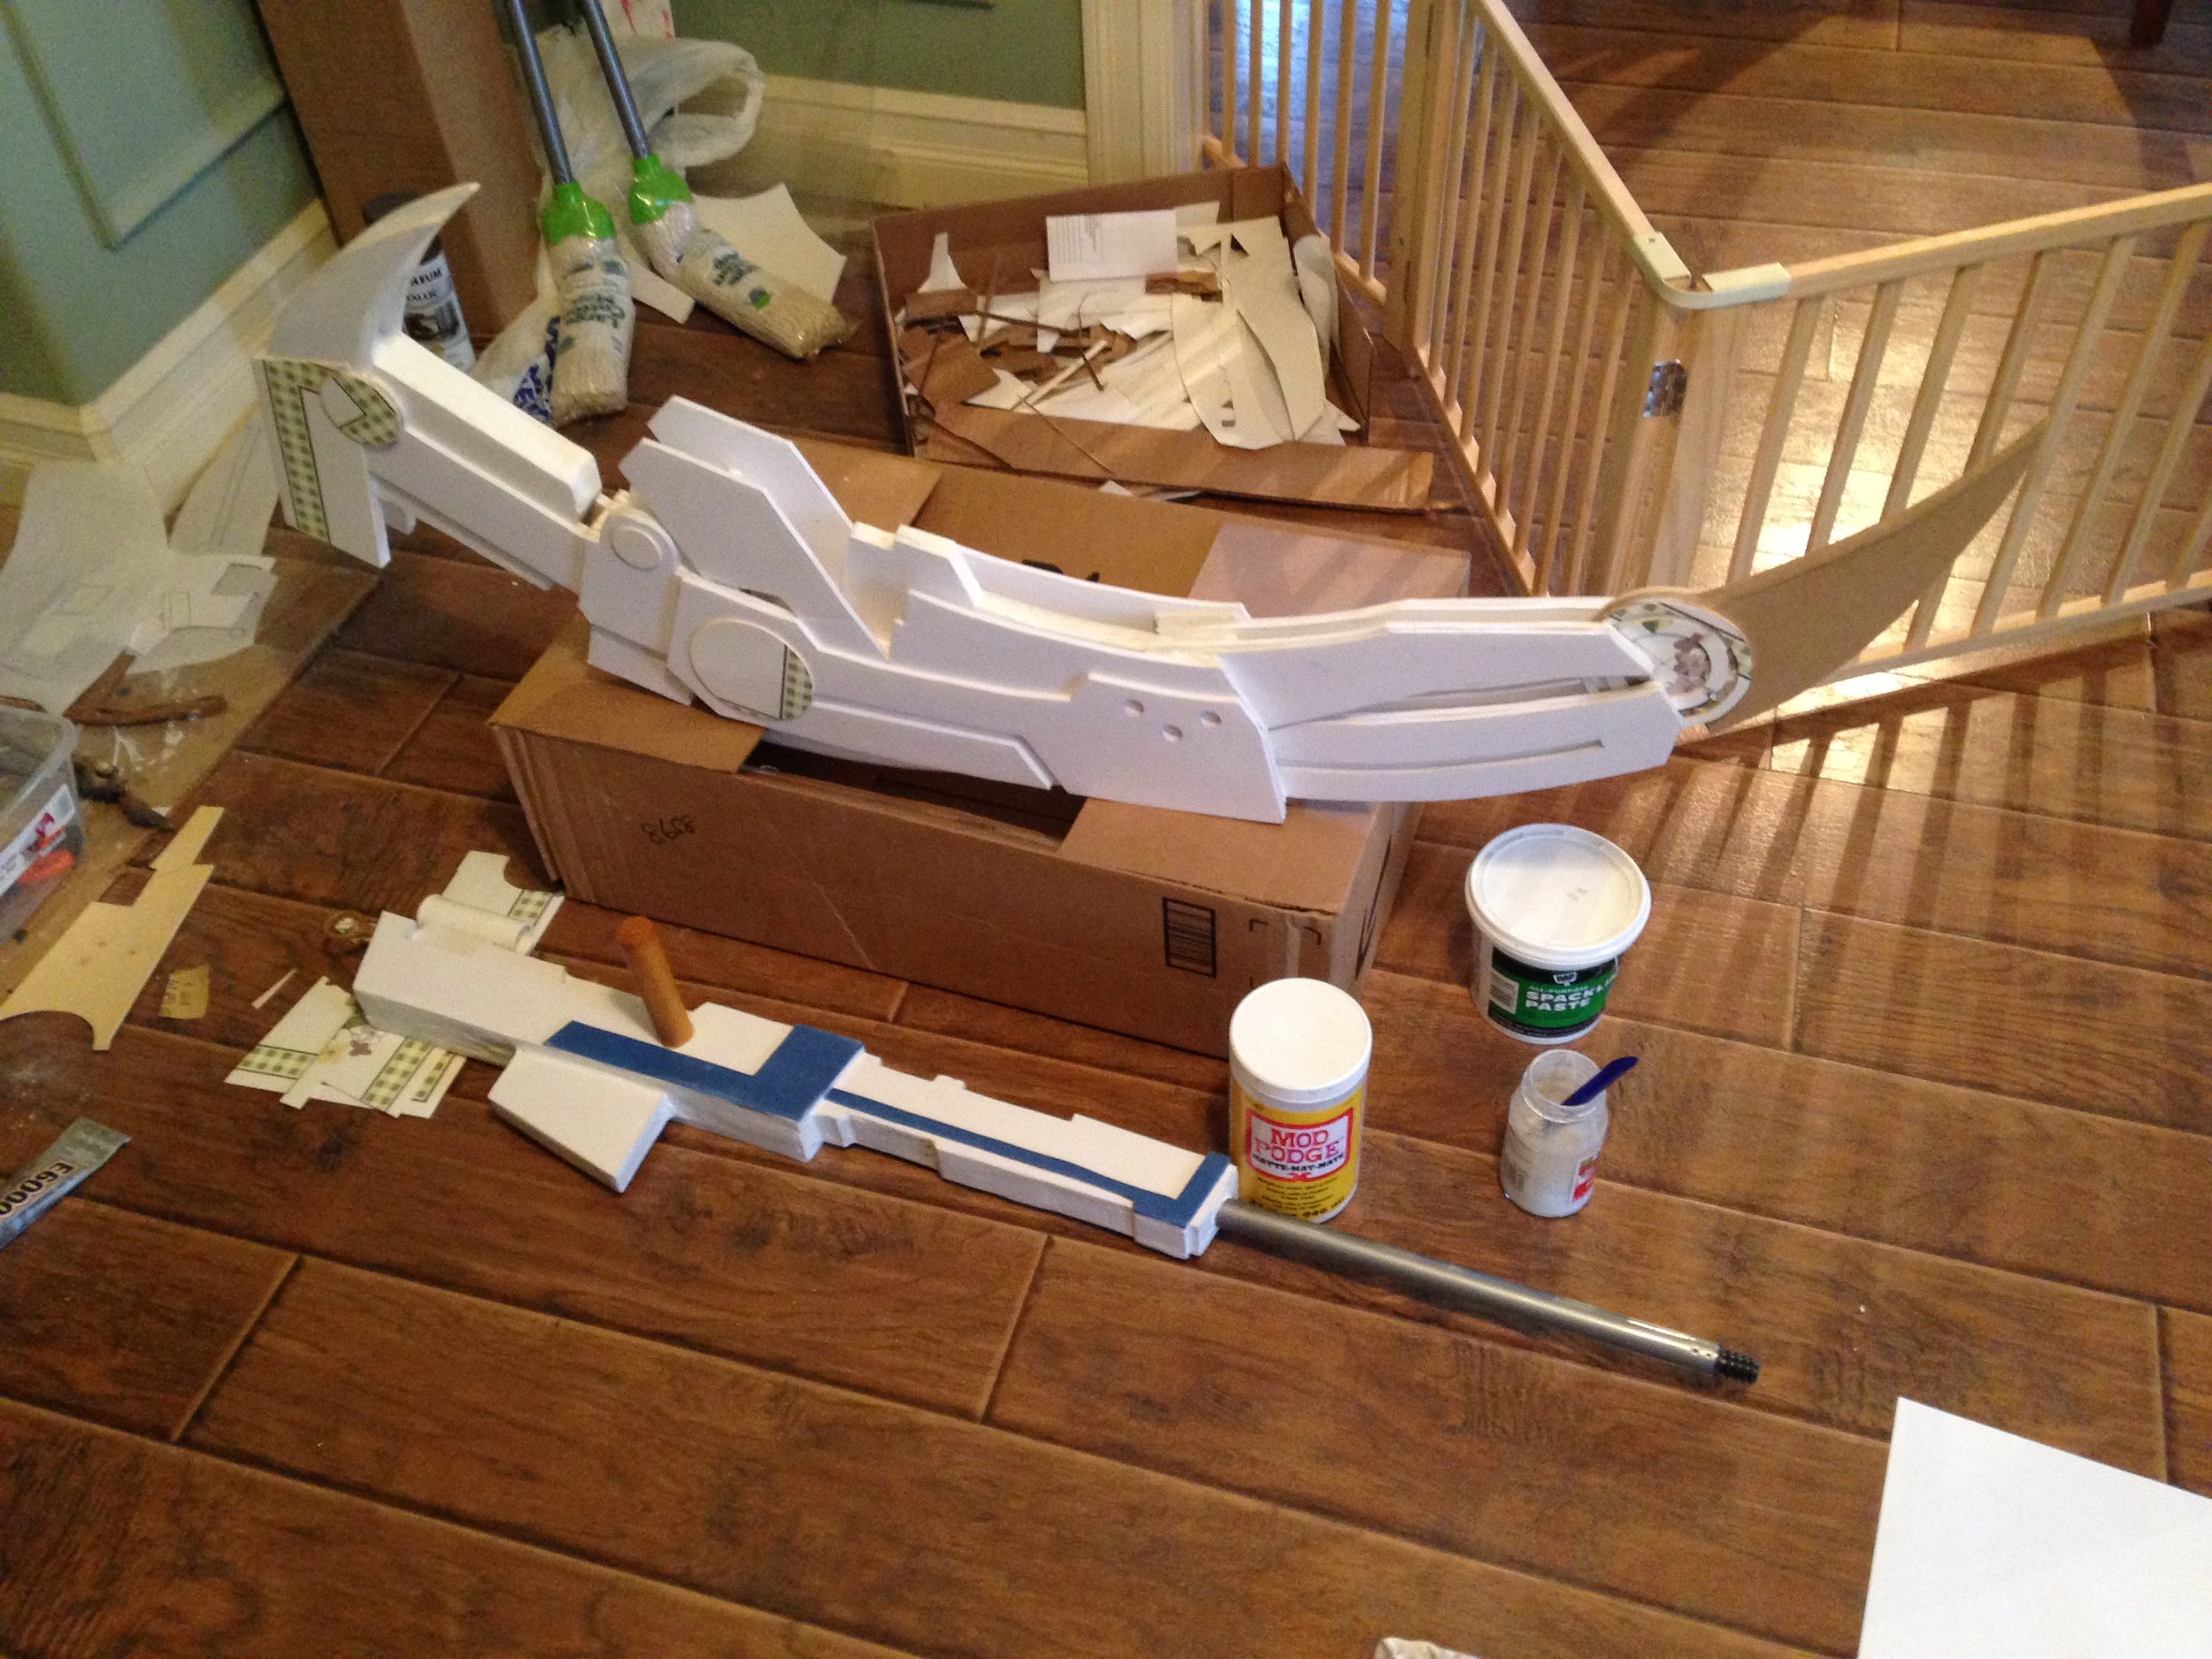
Here's the build mostly put together! Some of the details are craft foam (the blue parts), but a lot have that weird flowery pattern on them: I actually made them out of old vinyl (or something) place mats that I got from my mom. It's tougher than the craft foam so it's more durable and doesn't squish as much. Also, the bolt-action lever is just a wood dowel, and the sight on the gun is an Air-Borne container that I drilled the back out of so you can actually see through it.

Here it is all screwed together!

Here it is all screwed together!

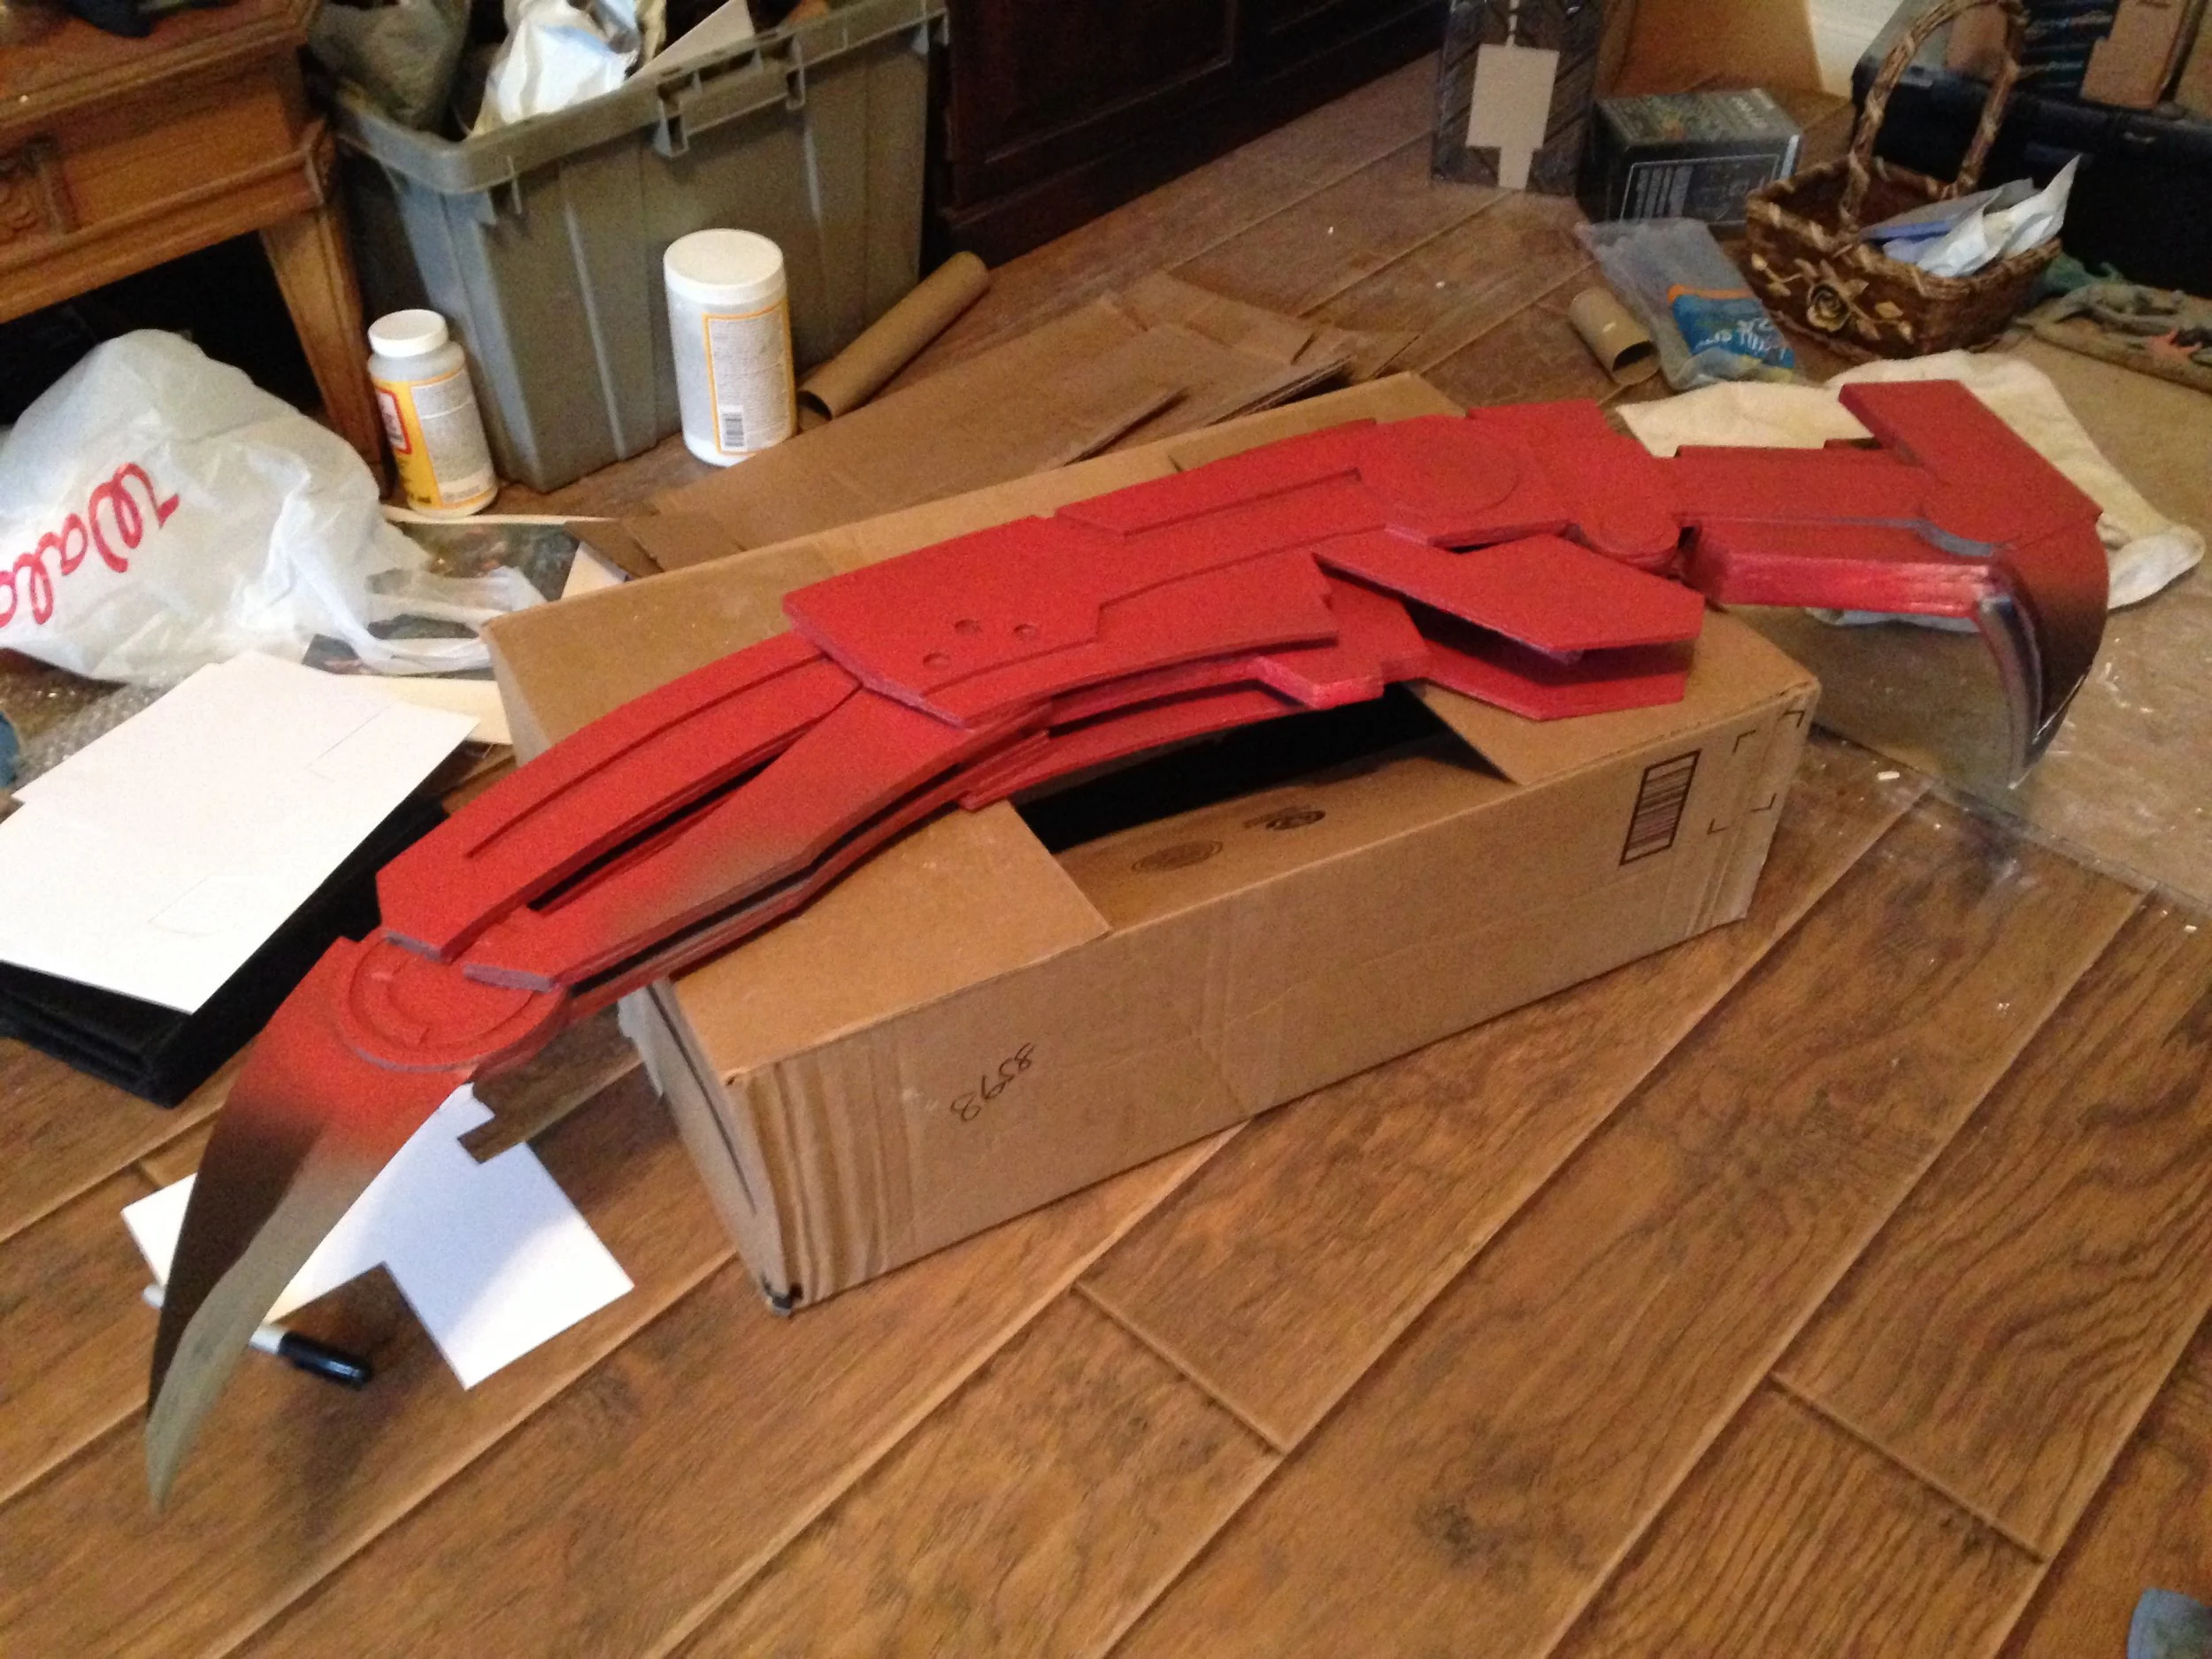
Next up is painting! It happened in stages, and it started with red spray paint, because red is an annoying color to brush paint cause it doesn't cover very well. Detail coats, blah blah, you get the idea. Now, look at the beauty!

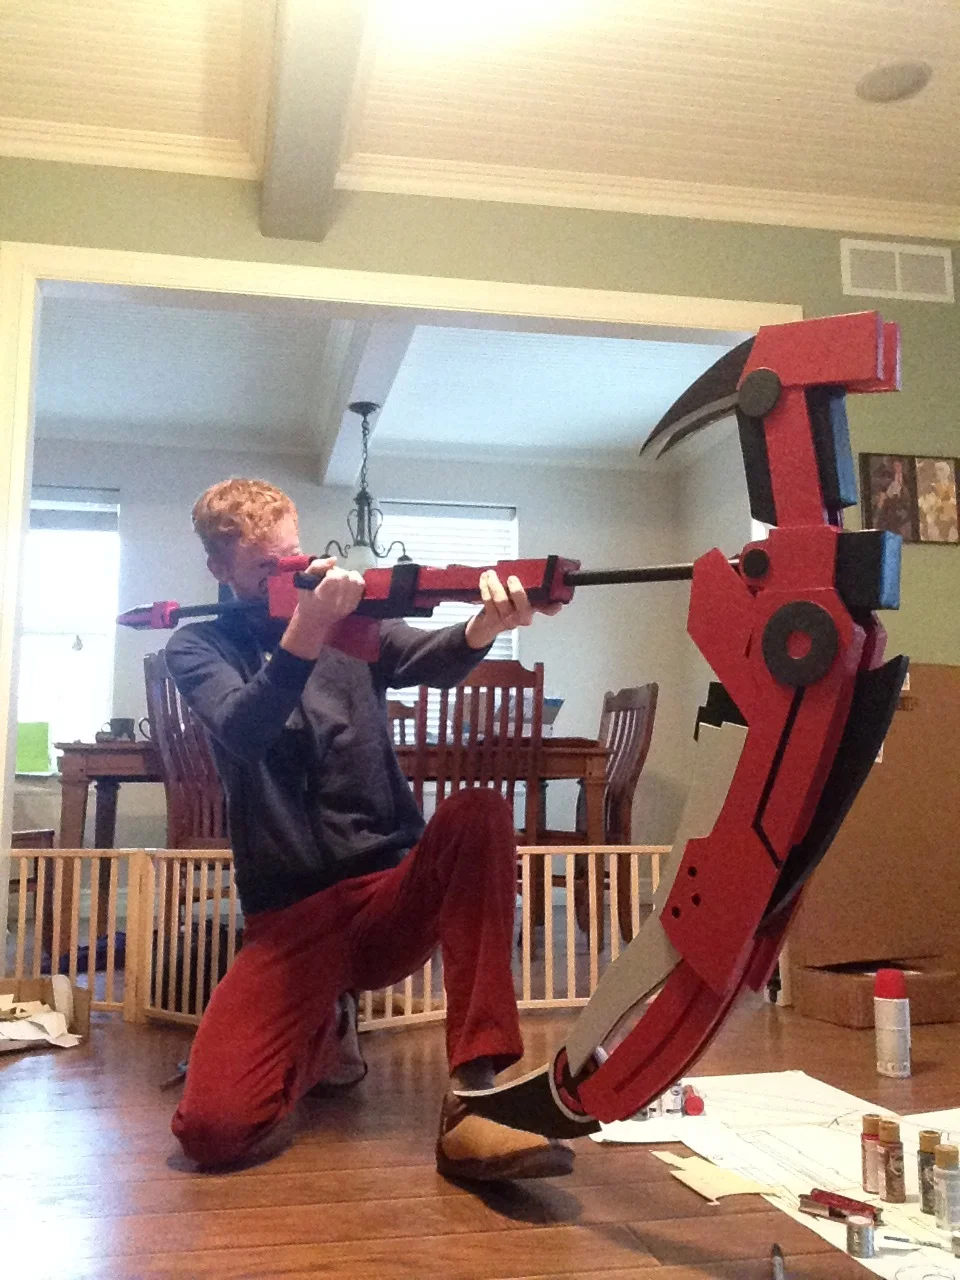
I'm super happy with how it turned out, and there's only one or two things I intend to do differently next time!

The other project I'm working on is some Young Genji armor for my awesome friend Tobi. It's primarily craft foam and worbla, which is how I did Leo's armor. The difference is the breastplate, which I made out of EVA foam. I haven't done a ton with it before, but it's definitely a solid material for cosplayers. The armor's not done yet, but here are some progress photos.

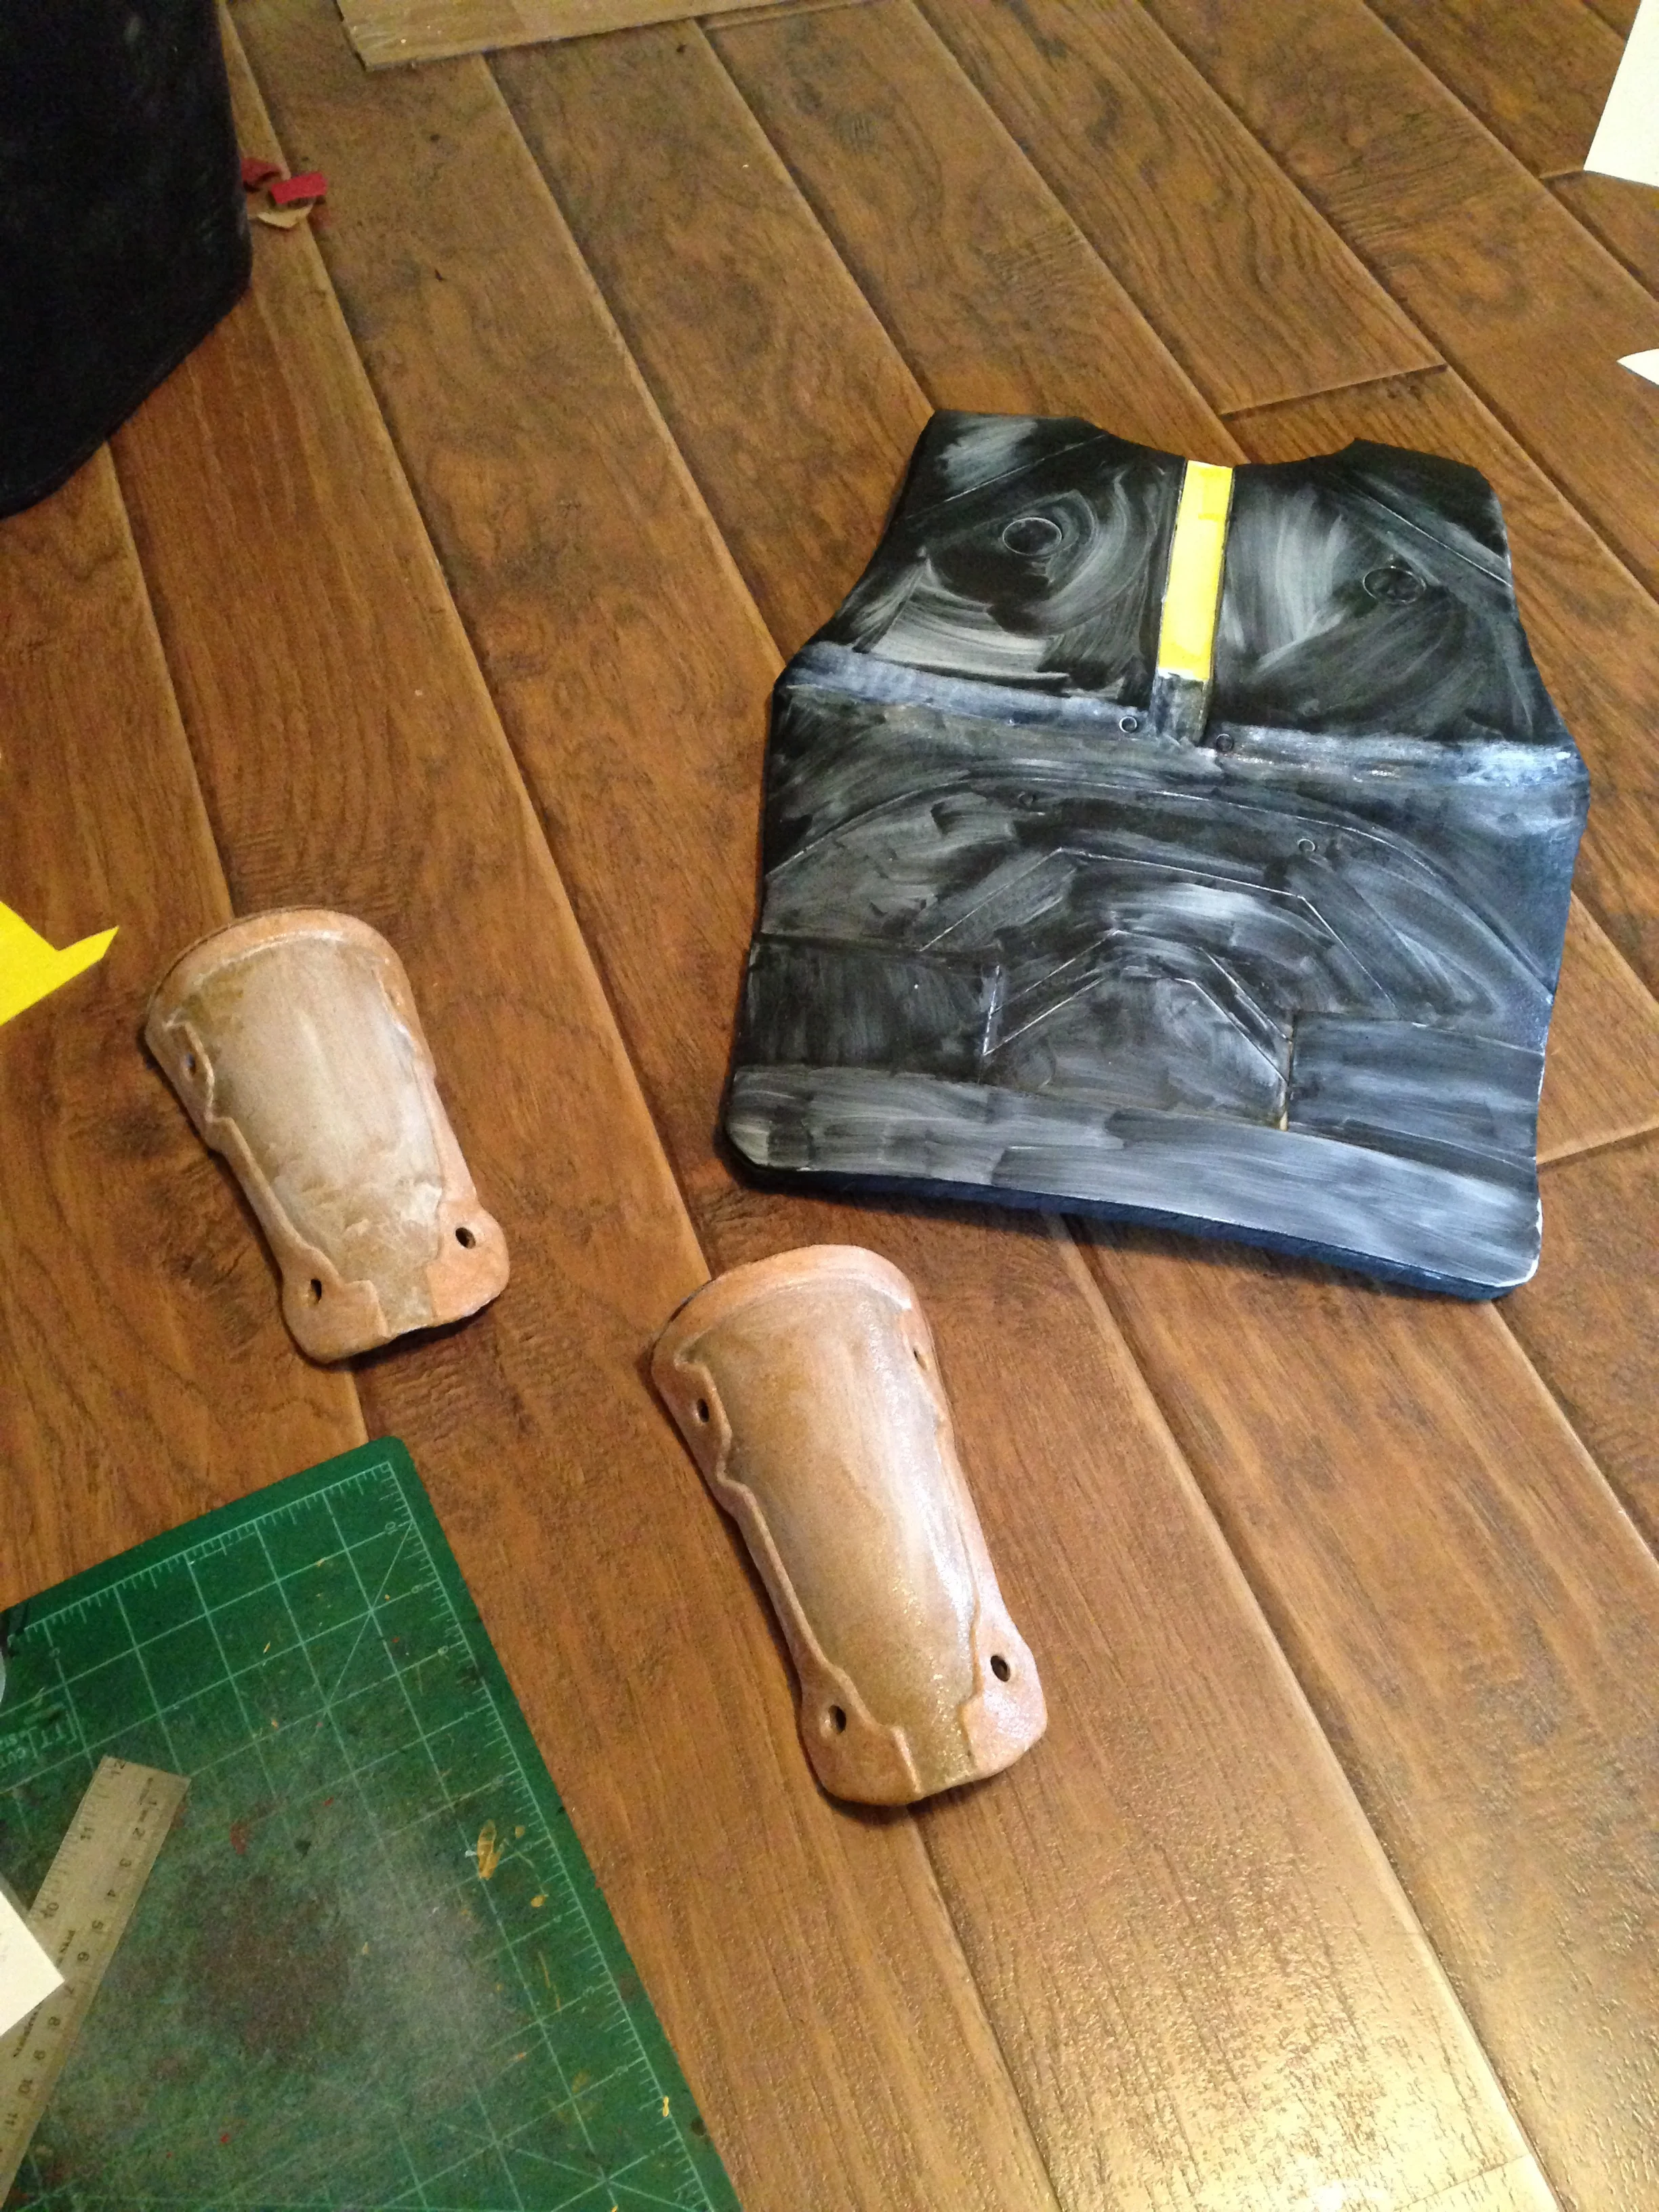
I'm up to the point where I can start painting tomorrow!

And that's all she wrote for this week. Check back soon to hear all about Ohayocon (and hopefully see some fun new photos), and to see the finished armor!

Moving at the Speed of Christmas

Michael MacWolff

Hey folks, so I realize it's been nearly a month since I've posted stuff here, and as usual it's because I've been super busy with a ton of stuff. First up was the Yule Ball up in Cleveland last weekend! I was making a bunch of inventory to take to that, and it was super successful and also totally awesome! Sadly my mom, who is usually my table partner, couldn't attend because she was ill, which was a total bummer, but we've already agreed that we'd like to have a table again next year!

Here's my booth with half of my stuff gone because I sold quite a bit through the evening! I decided to go steam wizard, and of course wore my house colors (Badger Pride!). It was an absolutely fantastic evening and I was excited to see some friends of mine who I've not seen in quite some time. I also was stationed next to the incredibly handy and talented Peter Baum, who brought some fantastic spun wands and who was a big hit in their Diagon Alley area. The other awesome part was that I got to meet these guys, since they had their main stage in the hall where we were set up.

The Eeyloops Owl Emporium presentation was by far the highlight of the evening! They also had lots of fun decor set up; even though I didn't get to spend much time away from my table, I definitely appreciated the ambiance and attention to detail.

Now that the event is over, I've been busting my ass getting all of the Christmas orders I've been getting put together and shipped out. The good news is that I am doing lots of good business, the bad news is I haven't had time to finish any of my Christmas gift projects for my family. Hopefully when we hit the week before Xmas things will slow down because it will be past the point where I can get stuff to people by the 25th, but who knows. I also have a bunch of commissions I need to have finished by certain times in January, so I'm definitely going to continue to be busy through the holiday season and into the new year.

On the bright side, I've been working on one such commission and it's starting to look pretty awesome! Here's my current progress on Crescent Rose, which I'll be making again later next year for my husband, though this one is going to someone else :-)

I'm super stoked for this project, so you can be sure I'll be posting more photos on Twitter as I keep working, and more on here as things come together. Well, that's all for today, hope everyone is staying warm, and has a great holiday!

MDC Measurement Guide

Michael MacWolff

So I know I've already done this, but here I have a brand-spanking new version to share with all of you! It's updated with a few more useful pieces of information, and I wanted to add a basic patterning guide so that you can actually put this information to use yourself! 

So, first things first we have the visual guide:

Vertical Measurements

Heights

All heights are going to be measured in reference to your shoulder. When finding your starting point, the easiest thing to do is use the seam on a t-shirt as reference. Then simply measure from that point to your Bust, Waist, Hips, and to the Floor. This can be done all at once, easy-peasy!

The "Garment Length" shown here is a custom length for the garment you are making. If you're making something that only covers your top, like a shirt, hoodie, etc. the Garment Length will fall just past your hips.
If you're making a robe, dress, cloak, etc. that is longer, you will have to determine this measurement yourself. It's still helpful to have your measuring tape at your shoulder, and simply figure out visually how far down your body you want the garment to be and determine what your measurement is.
The same can be done if you're making a crop top, or something that is shorter than your full torso. Just do the same thing: place your measuring tape, then record the length you want to the end of your garment.

Arm Lengths

When measuring your arm length, you again want to use a shirt seam as your reference point. This time we'll use the sleeve seam and measure down the outside of your arm to both your elbow & your wrist. For most patterns, you'll only use the Shoulder-Wrist measurement, but for some things like armor and other details, it's useful to know were your elbow sits on your arm.

Legs

Inseam and outseam can be tricky to measure on yourself when you're trying to stand, so here's a simple way to avoid that issue:
1) Find a pair of store-bought pants that fits you well and is the length you want.
2) Measure the seam on the outside of your leg (where your hip is, not your crotch) - this is the Outseam.
3) Measure the seam to the inside of your leg (from your crotch to the bottom) - this is the Inseam.


Horizontal Measurements

Remember, while in the visual guide, there's just one arrow, all of these measurements shuold go all the way around  whatever area you're measuring. I imagine most of you know that but we all have brain farts sometimes :-)
Most of these are fairly self-explanatory, but here are a few tips for certain ones:
Crown - You should measure your crown just above your ears, across your forehead. IF YOUR COSTUME INVOLVES A WIG, make sure to wear the wig when you take this measurment.
Bust - This is also sometimes called Chest. You should be measuring under your armpits, and roughly across your nipples.
Underbust - This is only relevant if you have breasts (or your character does). Measure just under the breasts, hence why it's called "Underbust."
**IMPORTANT NOTE** If you are altering your body in any way for your costume (e.g. binding, etc.), you should make those alterations when you're taking your measurements.
Arm Hole - The simplest way to measure this is to put on a t-shirt and measure around the sleeve seam.

And that's that! Now you have all of your measurements and are ready to use them! In my next post, I'll be putting together a very basic patterning guide to use alongside this measurement guide so stay tuned!