Contact Us

Questions? Comments? Concerns? Suggestions? Submissions? Shout-outs?

Whatever you want to tell us here at Mikey Does Cosplay, we're always happy to hear your thoughts and feedback!


123 Street Avenue, City Town, 99999

(123) 555-6789

email@address.com


You can set your address, phone number, email and site description in the settings tab.
Link to read me page with more information.

reflection.jpg

Blog

Here's where the magic happens. I'll be posting about all of my experiences and experiments (both failed and successful ones), introducing you to my costumes, sharing fun stories, linking tutorials and useful products, and who knows what else!


Have Mercy

Michael MacWolff

Welcome back!
As promised I have some construction photos from the second set of Imp Mercy armor I made, since I never really did that for the first set. It's the same bits: hip and leg armor.

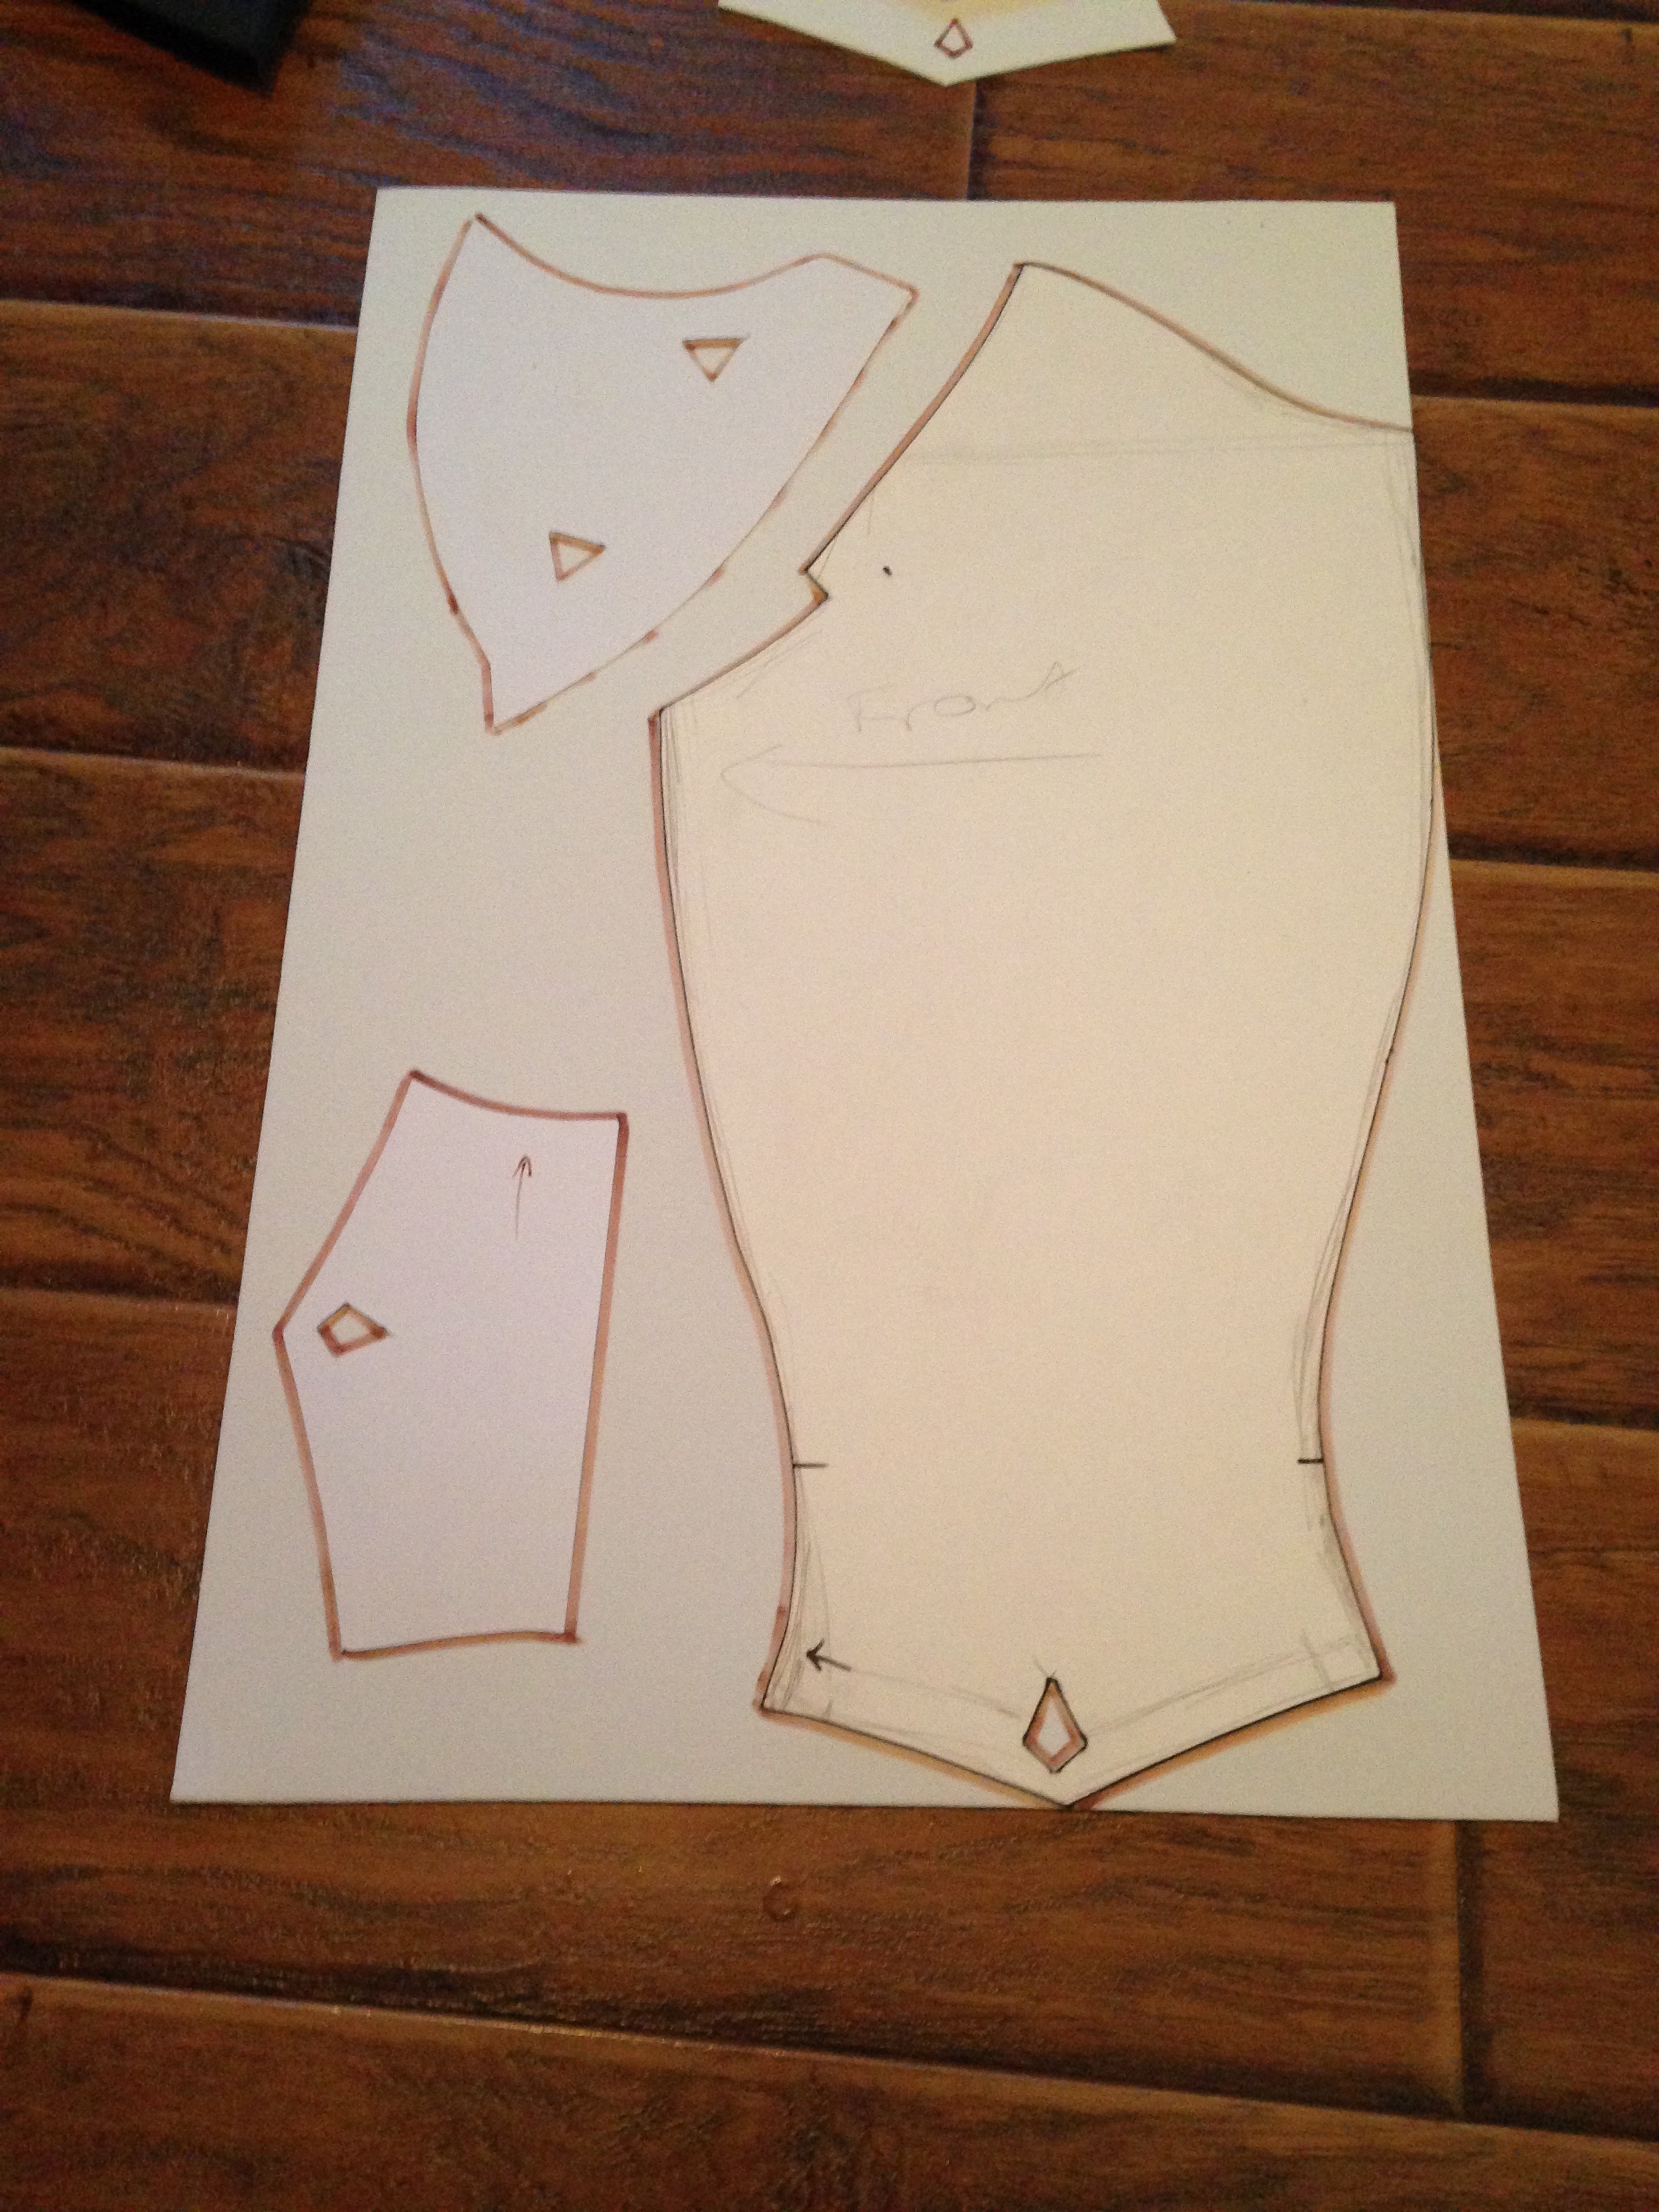
For the leg armor, I started by patterning out the armor on poster board, and then tracing my pattern onto 2mm craft foam.

IMG_9112.JPG

You can see the part that goes over the shin, the ankle piece, and the knee section here. You'll also notice the little diamonds and triangles on the patterns. Those are the details that will be raised on the final pieces: I incorporated them into my original pattern so they'd all end up in the right place and the armor would be as symmetrical as possible.

Each of these sets represents half a leg, so I had to repeat this 4 times to get all of the pieces I needed.

You'll notice the diamonds and triangles on here are yellow now. I cut out the small raised shapes form another piece of craft foam and glued them in place on each piece. When we cover the foam with worbla, these bits will stick out like we want them to.

Time to apply the worbla! Heat up your worbla for each individual piece, we will assemble the pieces later.

IMG_9125.JPG

I don't have photos of the individual pieces before I started assembling them, but you can see one of the leg pieces coming together here. to bring the center seam together, you'll want to heat up the edge of each piece, line them up, and press them together. Be careful not to burn your fingers (have have a few blisters from this assembly) as the worbla needs to be pretty hot to adhere to itself nicely. You can also see the raised detail on the ankle here, I used a popsicle stick to form the worbla around the raised piece of foam.

Once the main part of the leg is done, we'll do the same process with the knee piece, and then add it to the leg armor.

IMG_9134.JPG

There are also long, curved, spike-shaped pieces on the knees. I don't have photos of the pieces on their own, but here's the leg section with the spike added.

IMG_9173.JPG

Lastly, we'll assemble the ankle parts. I left those as separate pieces, rather than attach them to the main leg armor. The reason for that being that it would give better range of motion for your foot while you're walking in them.

With that, the leg armor is almost finished. I used a leather punch to add holes along the back edges so they can be laced together in the back. Then you add your several layers of mod podge to everything, and start painting!

IMG_8477.JPG
IMG_8500 (2).JPG

For painting, I sprayed the silver, then brush painted the black. Remember, metallics are always harder to get a uniform coat, so spraying is way easier. Also, don't forget to seal coat them with another layer or two of mod podge!

Now, on to the hip tassets!

These were made entirely out of foam, I didn't use a worbla layer for them because it wasn't really necessary. The base is EVA foam, and the raised sections are craft foam.

IMG_9106.JPG

I cut the EVA foam with a craft knife and then used my Dremel with a sanding bit to smooth out the rougher parts. For the craft foam, I mostly used scissors, and then an exacto knife for the holes in the center.

IMG_9110.JPG

To get the etched design into the foam, I traced the pattern onto my EVA foam, then sliced into the foam with my exacto knife. It's important not to cut too deep or you'll weaken the foa too much and risk it tearing. Once the foam has the cuts in it, go over the areas with your heat gun and the cuts will become little channels. You'll also want to heat up the whole thing so you can curve it to fit around your hips.

You'll notice that each layer of the foam has the panel cut out of it, that's so the lights can be installed, which is our next step.

To help make the panels as bright and properly-diffused as possible, I used aluminum foil to reflect the light. You can use E-6000 to glue it around the opening in your EVA foam layer.

IMG_9127.JPG

Once the glue is dry on our foil, it's time to install the lights themselves. I used strings of moon lights like these because they work well for cosplay, having small battery packs. You'll take your string of lights, and make a bar that is as long as your opening is wide. You can use other small pieces of wire to keep it together, or clear tape will do the trick too. Make sure to leave some wire at the end near the battery pack.

IMG_9131.JPG
IMG_9130.JPG

I realize you can't really see anything with the foil, but you want to tape down your bar of lights with packing tape along the bottom edge of the foiled foam. Sorry he photos don't help here, it's hard to get a clear picture of it so if you're trying to do this and need help with how, please send me a message and I'd be happy to walk you through it a little better!

The next step is to make a backing for the lights. You'll take annother piece of craft foam and add foil to it. Then youll glue the piece of foam with the foil facing inside to the back of your hip armor piece. That way, any light hitting the foil will be reflected out the front where you want it.

For the front, we're going to add some bits of white plastic grocery bag to help diffuse the light.

IMG_9132.JPG
IMG_9133.JPG

Now that we have our diffusion layer, we'll glue on the first detail layer of craft foam... unfortunately I don't seem to have a photo of that anywhere.

Once our first craft foam piece is on there, we'll want to add our outer panel layer. I used a translucent pink plastic folder for this. It filters the light rather well.

IMG_8461.JPG

Obviously you'll want to cut it first, this is just to show you how it's layered. 

IMG_9169.JPG

Once you glue the pink plastic layer and the top piece of craft foam on, you're almost done!

The diamond-shaped pieces on the sides can be easily added with craft foam if you just want the shapes, but I wanted them to be more 3-dimensional and actually be prism-shaped, so I made a little daimond-shaped prism out of cardstock and made a silicone mold of it. Once the mold had cured, I cast the daimond-shaped pieces in liquid plastic. Once they were all cast, I attached them with contact cement.

IMG_9175.JPG

Now it's time for mod podge! Paint on a bunch of layers and then you can start painting. I sprayed the white sections and brushed the black. If you spray any part of this, you'll want to be careful to cover the top part so you don't get paint on your glowing panels. 

IMG_9198.JPG

I don't have any photos of the underside, but I added loops of webbing/strapping so that they can be worn from a belt.

IMG_9200.JPG

And that's that!

Youma 2017

Michael MacWolff

Welcome back, folks! As per usual, sorry for the prolonged absence! October was a bit hectic, between hosting and recovering from my Harry Potter weekend, and launching full-force into a commission that needed to be done and shipped before Halloween, plus the serious con crunching I did with my last minute necessity of doing an extra cosplay. So, I'll be rolling out all of the details and construction of that stuff this week, but while Youma is still fresh in my mind, I wanted to give you guys that rundown first.

But before I do that, I wanted to plug my social media expansion:

Mikey is finally on Instagram! 

I finally caved after 8,000 people have told me I really should be. And it'll be pretty exclusively cosplay-related photos, because I have no reason to post other stuff there (except maybe photos of my dog, because he is a good boy). So, you can follow me @mikeydoescosplay for the easiest updates on my WIPs and cosplay photos, since you won't have to sift through the inane stuff on my Twitter account.

And with that, on to Youma!!
I'm including primarily photos of my own cosplay here, if you'd like to see the hall shots I got of other awesome cosplayers, check out my Youmacon facebook gallery. 

Thursday

Thursday was super chill and I got up there way earlier than I needed to, but I was glad to since it meant I got a decent parking spot and didn't have to worry about a ton of traffic. When folks finally got there, I did eventually change into Masrur from Magi, since two of my friends wanted to get our little group together at last. Unfortunately, one friend got in super late and the other just never got into costume, so it was just me. But that's ok because at least i finally wore the cosplay I made about 2 cons ago! And I got a few photos! And a few people even recognized me, even though there weren't that many con-goers around yet.

IMG_9303.JPG

I'm super happy with how he turned out, and he's actually not that uncomfortable, other than the breastplate rubbing a bit under my arms. Eventually I'm hoping we can get our little group together but I'm not in any rush now that it's all finished.

Friday

Friday was great because there were still a bunch of city folk out and about in the convention center and I got to watch as they slowly disappeared and more con-goers arrived. I was dressed as Hestu for most of the day, which is the first sime I've worn him since I altered his head.

IMG_9324.JPG

When I initially made his tree head, I just made the whole thing out of cardboard, including the but that actually went around my head. There was some foam for cushioning, but it was still super uncomfortable, and gave me headaches after wearing it for 30 seconds. So I decided to change it up because I want to wear this cosplay more since it's more fun and let's be real, Hestu and I are pretty much the same person... plant... being... thing. So to fix the issues I was having, I found a baseball helmet at the thrift store and pretty much just glued what I already made to the top of it. I added some extra fleece wrapping to cover the helmet, reattached the eyebrows and the velcro to attach the mask, and voila, I had a tree head that didn't make my actual head feel like death any more.!

The best part about wearing Hestu around on Friday was that apparently being a tree meant that I was more approachable/less intimidating that most of the other cosplayers? Because no less than 10 times I had normal people come up to ask me what was going on and/or if they could get a picture with me. One couple in particular was super excited to get photos with me, and the lady and I posed with the maracas. It was fantastic. I also had someone from a local news station come and talk to me but sadly I can't remember what station, nor was I successful at finding a video online, alas.

Once it got into the evening hours I changed out of Hestu and into my brandy-new cosplay that I finished sewing literally 24 hours before I left for the con (and those of you who know me know that's cutting it way closer than I ever do). I'm of course referring to Crow for my P5 Phantom Thieves group. 

IMG_9287.JPG

Despite the incredible frustrations with having to hand sew on the ridiculous amount of trim involved in this cosplay, I am SO HAPPY with how it turned out, and so glad I managed to get it done in time to be a part of this Phantom Thieves photoshoot. I had so much fun and everyone's cosplay was ON POINT.

Photo courtesy of back_of_beyond_cosplay

Photo courtesy of back_of_beyond_cosplay

It was such an honor to be a part of this group of incredibly talented cosplayers. You should check them all out on Instagram because they have a bunch of other wonderful cosplays too:
Skull: climbingtartarus
Queen: madster.photo
Oracle: lightofhope18
Joker: galbadian_aristocrat_cosplay
Panther: lyssalalaa
Noir: I don't have her info but I will share when I find out!
Fox: multiversecosplay

We shot with Robert Tate Photography and I cannot wait to see how the photos turn out! I will be sure to share them when we get the proofs back.

Saturday

Saturday was another awesome day with 3 group cosplays planned, all of which were great!
The morning started with some good old-fashioned Ghibli cosplay: Howl and Sophie from Howl's Moving Castle. Ok, we also had Turnip Head, Calcifer, and Heen. The best thing about doing Howl this time: I had a new wig that wasn't totally disgusting.

IMG_9416.JPG
IMG_9385.JPG
IMG_9387.JPG
IMG_9433.JPG
IMG_9435.JPG

The weather was lovely (if a little chilly) so we got some wonderful photos outside along the riverwalk. I'm hoping some day we'll be able to get my Markl in here too, and perhaps find a Witch of the Waste so we have a full crew!

After spending time wandering the con floor, I went back and changed into Mad King Ashnard for the Fire Emblem shoots. We organized a little Tellius gathering (which only had 4 people but was still great) before the main FE shoot.

IMG_9436.JPG

I love this costume so much, it's ridiculous. I don't care that almost no one recognizes me, because the ones that do are keepers, I made a new friend that was as a matter of fact. And that cape is so freaking luxurious. And the shoulder pauldrons of doom are wonderful. And the giant terrifying sword. I even really like how I look with that wig and weird facial hair. The only thing I need to do is find a better way to attach the shoulder armor to the cape, because every time I moved my arms they would pop off, and I actually lost one of the spikes as a result. But that aside, it was great to get some awkward family photos with my friend cosplaying Soren.

IMG_9457.JPG
IMG_9458.JPG

We also decided to recreate the HERON PUNCH since my Sophie from earlier came back as Reyson.

IMG_9444.JPG

I didn't take any photos at the big shoot, since my phone was dying by that point and I didn't feel like worrying about it, but I did get a nice villain photo with my friend.

23316589_743852759133562_8685571682185550668_n.jpg
Reyson also got a lovely selfie of us with my friend's Ike.

Reyson also got a lovely selfie of us with my friend's Ike.

While the photoshoot was of course dominated by Awakening and Fates cosplayers, I was impressed at the representation there. We had at least one cosplayer from every game except Thracia 776, Binding Blade, and Sacred Stones, which all things considered was pretty good!

After the shoot was over and I was tired of wearing 18 lbs. of velvet cape, I went back to the room to change into Junpei. Unfortunately the rain picked up on my walk back over to the Ren Cen so everything got wet, including my already heavy-as-hell cape. But there was a very sweet guy walking behind me who offered to hold my cape so it didn't drag through the puddles.

When I finally dried out a bit it was finally bro time with my senpais!

IMG_9454.JPG

It was so nice to be back in normal, comfy clothing and I had a blast hanging out with two of my best con friends. It's been forever since we've all cosplayed together so it was nicce to be able to just chill. We got some food and I of course refused to take a serious photo the entire time I was in Jupei.

IMG_9453.JPG

As the evening went on, I ended up splitting from the group for a bit because some guy lost his phone and his friends so I lent him my cell to get in contact with them. Somehow during that time they decided they didn't want to go to the Persona gathering and went back up to the room, evidently having a seriously harrowing journey on the elevators. I decided I didn't want to deal with it so I huffed it up the 25 flights of stairs to the room and consequently passed out.

Sunday

Sunday was actually pretty good, since we got an extra hour of sleep with the time change, so I slept in to what felt like 9 but was actually 8. I got my stuff packed in my car without having to deal with busy elevators and went to breakfast in my Hufflepuff gear with a few extra critters.

IMG_9420.JPG

We wandered for a bit and said goodbye to the friends we ran into. I eventually decided to shell out the $25 for a Sunday badge so I could wander through the dealer's room and I'm glad I did because there was a lot of great stuff. I ended up spending almost all of my cash (but I was smart and kept enough for tolls on the way home).

IMG_9447.JPG

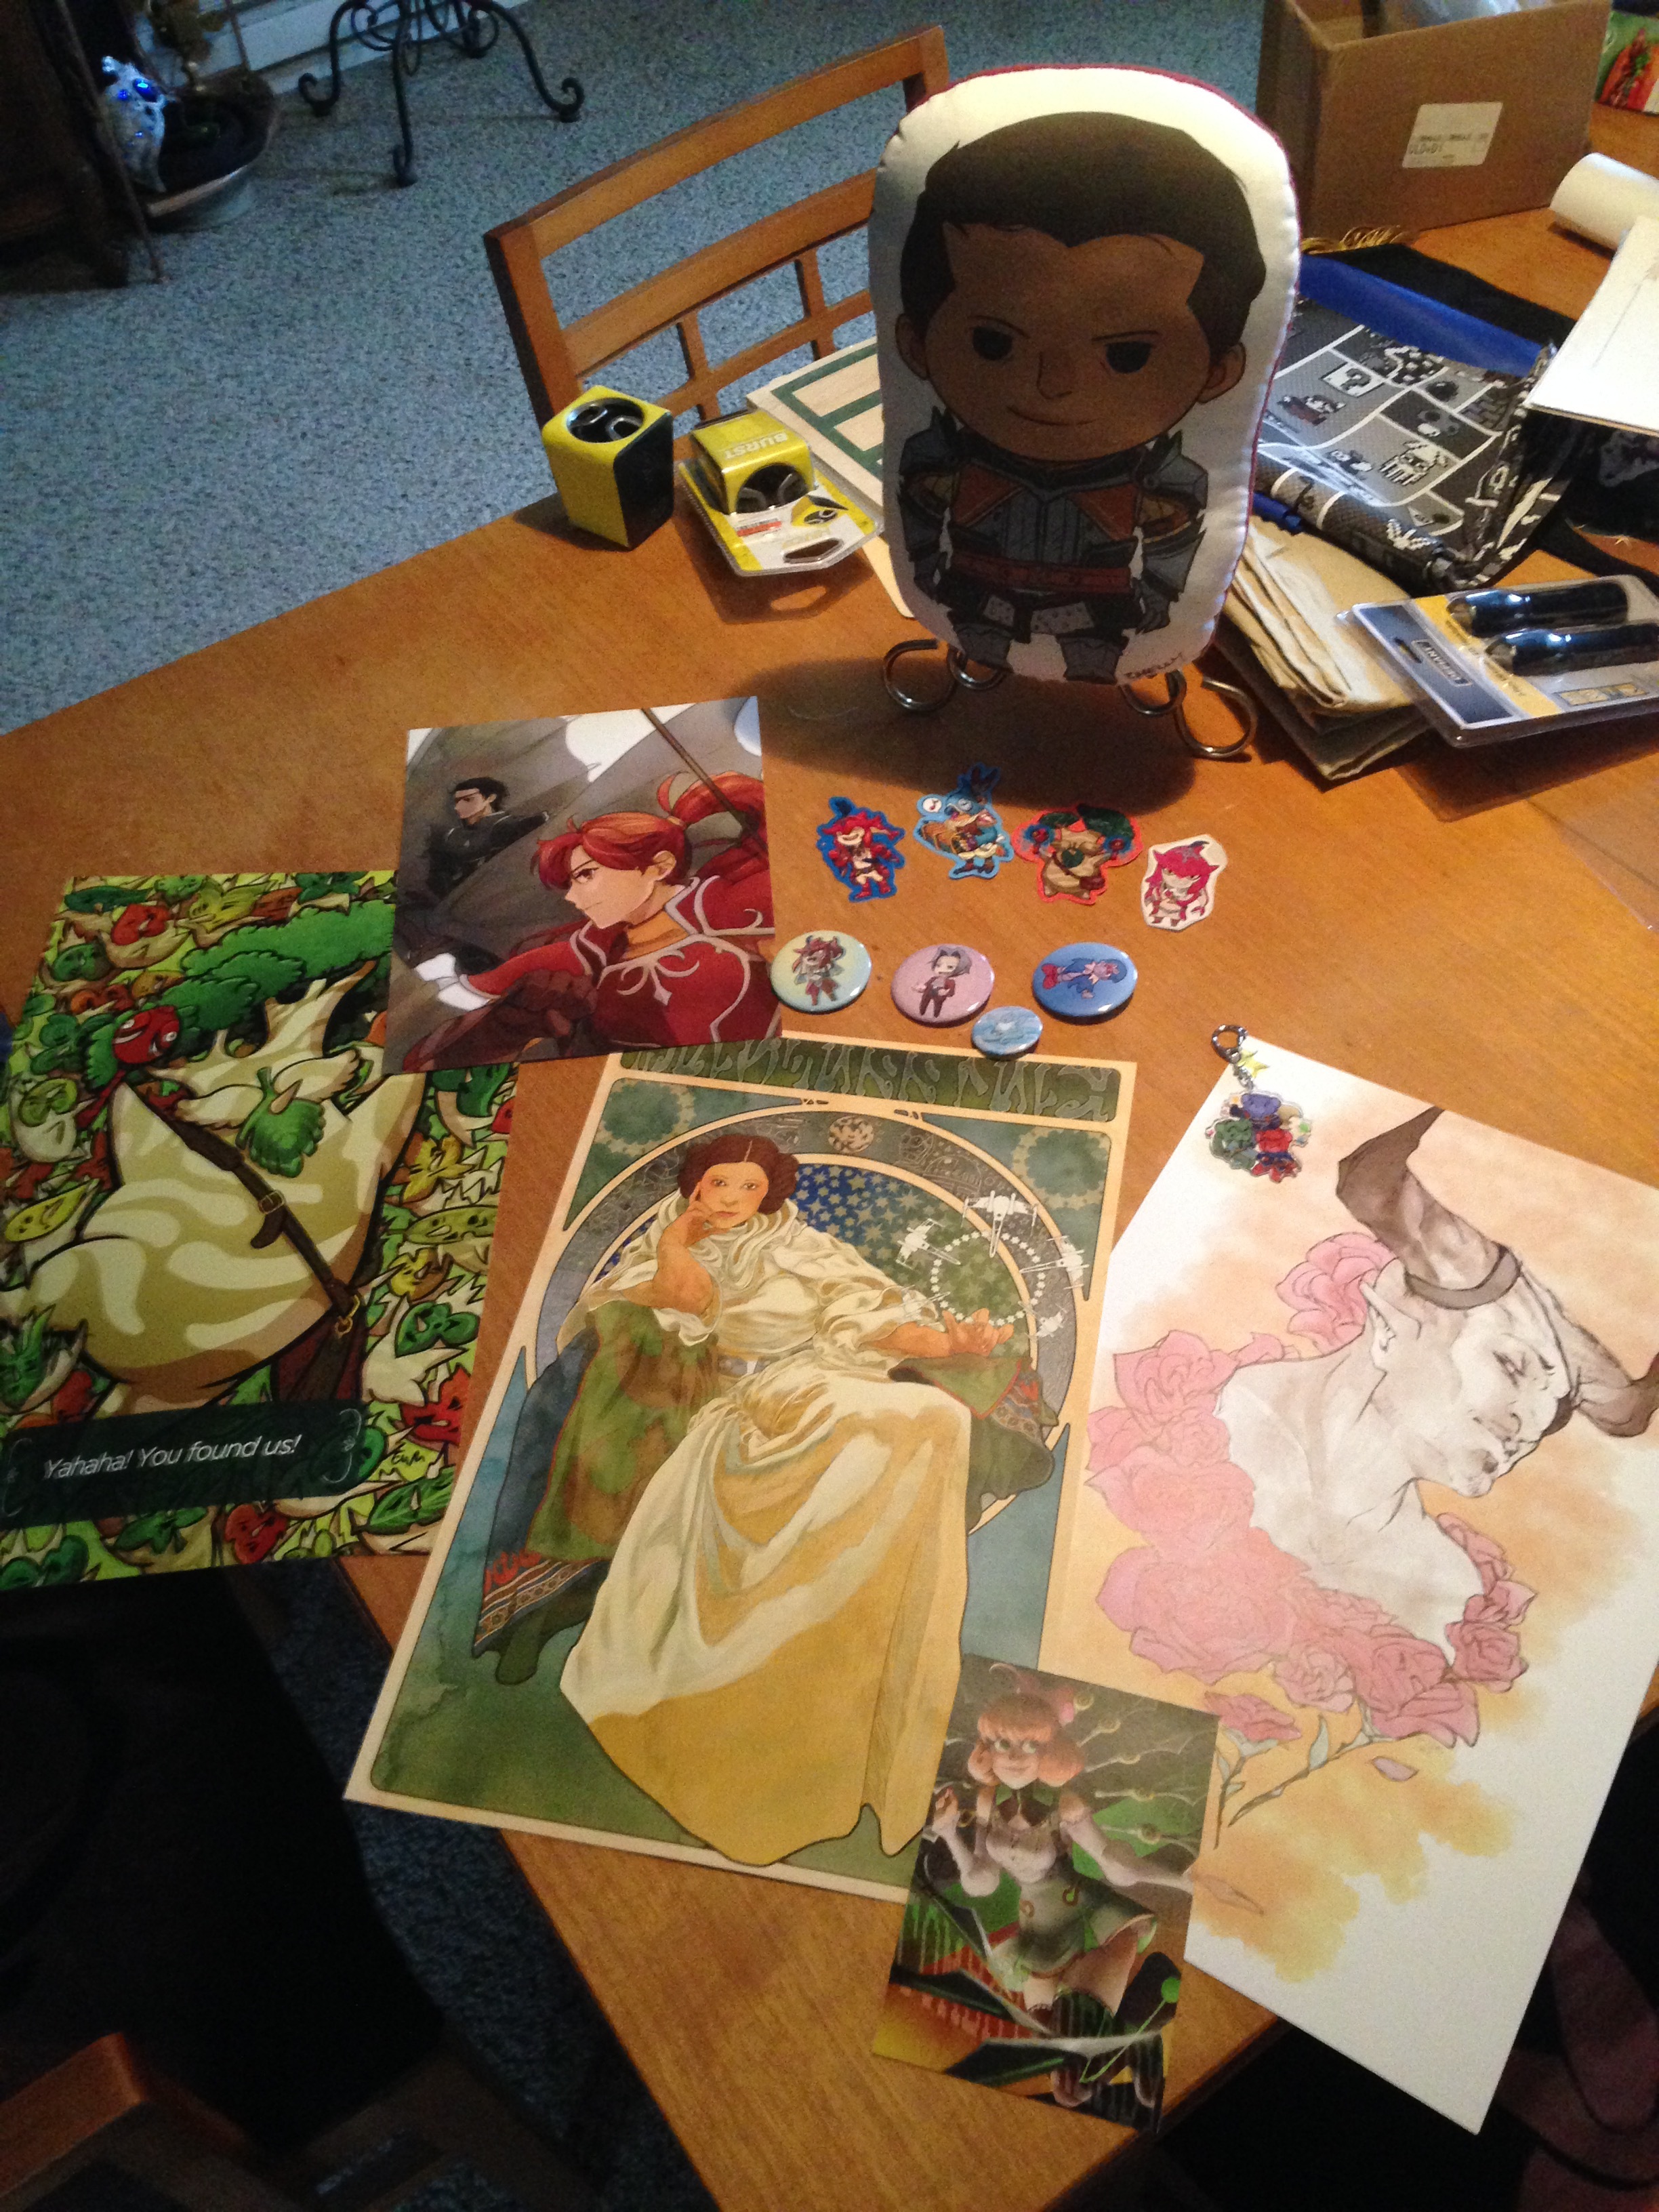
Here's the haul! There were so many awesome artists, and I didn't even see everything because the hall was so big and I ran out of money before I made it all the way through lol. My favorite purchases were definitely the Jill/Haar print, which I got to chat with the artist about Tellius-series FE for a bit and re-motivated myself to fix up Haar for this year. Also the Krem pillow that I have been snuggling with the entire time I've been writing this post.

IMG_9459.JPG

As per usual, coming home from a con this awesome has motivated me to plan out and start working on some cosplays for next year (since I have no more cons this year), and I'm hoping to channel some of that motivation toward some commissions I have to work on, as well as a few more posts about the commission I just finished, the rest of the magical creatures I never posted about, and my Crow cosplay since I did actually take a decent number of progress photos with my recently joining Instagram.

So stay tuned, folks, because there will be a few more posts coming in the next couple of weeks!

You're a Wizard, Mikey!

Michael MacWolff

At last, my Harry Potter weekend has come and gone. It was tons of fun and we're all so tired. But anyway, here's how the weekend went.

Friday
Friday night was arrival for most folks, and the highest attendance. I set up a scavenger hunt around the house for people to explore all of the fun rooms and test everyone's knowledge of HP lore (but only a little).  My favorite clue read as follows: "You can see all your heart’s desires in this magical object. But don’t be fooled, for the things it shows are neither real, nor true. Resist its allure if you can, as you’ll have to gaze into it to find your next clue."

You probably guessed that this one is related to the Mirror of Erised, and you would be correct. The best part, however, was that the clue hidden there could only be read through the mirror, as it was printed backwards.

IMG_9042.JPG
IMG_9043.JPG

Sadly, I messed up a little bit because rather than the clues leading directly to the final location, each clue had a piece of a cipher which would eventually have to be unscrambled to figure out the treasure's final hiding place. Unfortunately, I forgot a letter so that tripped a few teams up. Regardless one team successfully found the treasure chest full of Honeydukes candy OM NOM NOM

IMG_8896.JPG
IMG_8899.JPG
IMG_8902.JPG
IMG_8900.JPG
IMG_8897.JPG

Once snacks were procured for the weekend, we had a little welcome bonfire (which took several Incendio spells to conjure since it rained Friday morning so all of the wood was wet. However, with fire being conjured, we also had a very special performance by one of our talented witches, doing a native Albanian dragon mesmerization ritual. Needless to say, it was quite effective on us, dragon or not.

IMG_9085.JPG

Friday also marked our first brewing of potions and they were moste potente. It certainly made for a fun evening.

Saturday
Saturday morning started with a delicious breakfast prepared by one of our favorite Hufflepuff chefs, followed by a morning wandmaking workshop. People made some awesome wands for use throughout the weekend.

IMG_9057.JPG
IMG_9078.JPG

Our newly crafted wands did take some time to dry so we took our opportunity to visit a local park for a short game of quidditch and a picnic lunch.

IMG_9076.JPG
IMG_9075.JPG

Fun continued back at the Hogwarts sattelite campus with a magizoology lesson and a series of logic puzzles to earn points for the house cup competition. Most of you learned about many of the fantastic beasts covered, but here's a little glimpse of our care of magical creatures area.

IMG_8946.JPG
IMG_8963.JPG
IMG_8965.JPG
IMG_8982.JPG
IMG_8942.JPG
IMG_8968.JPG

Ok, yes, mandrakes are plants and not animals, but those lines can be kinda blurry when it comes to magical flora and fauna anyway.

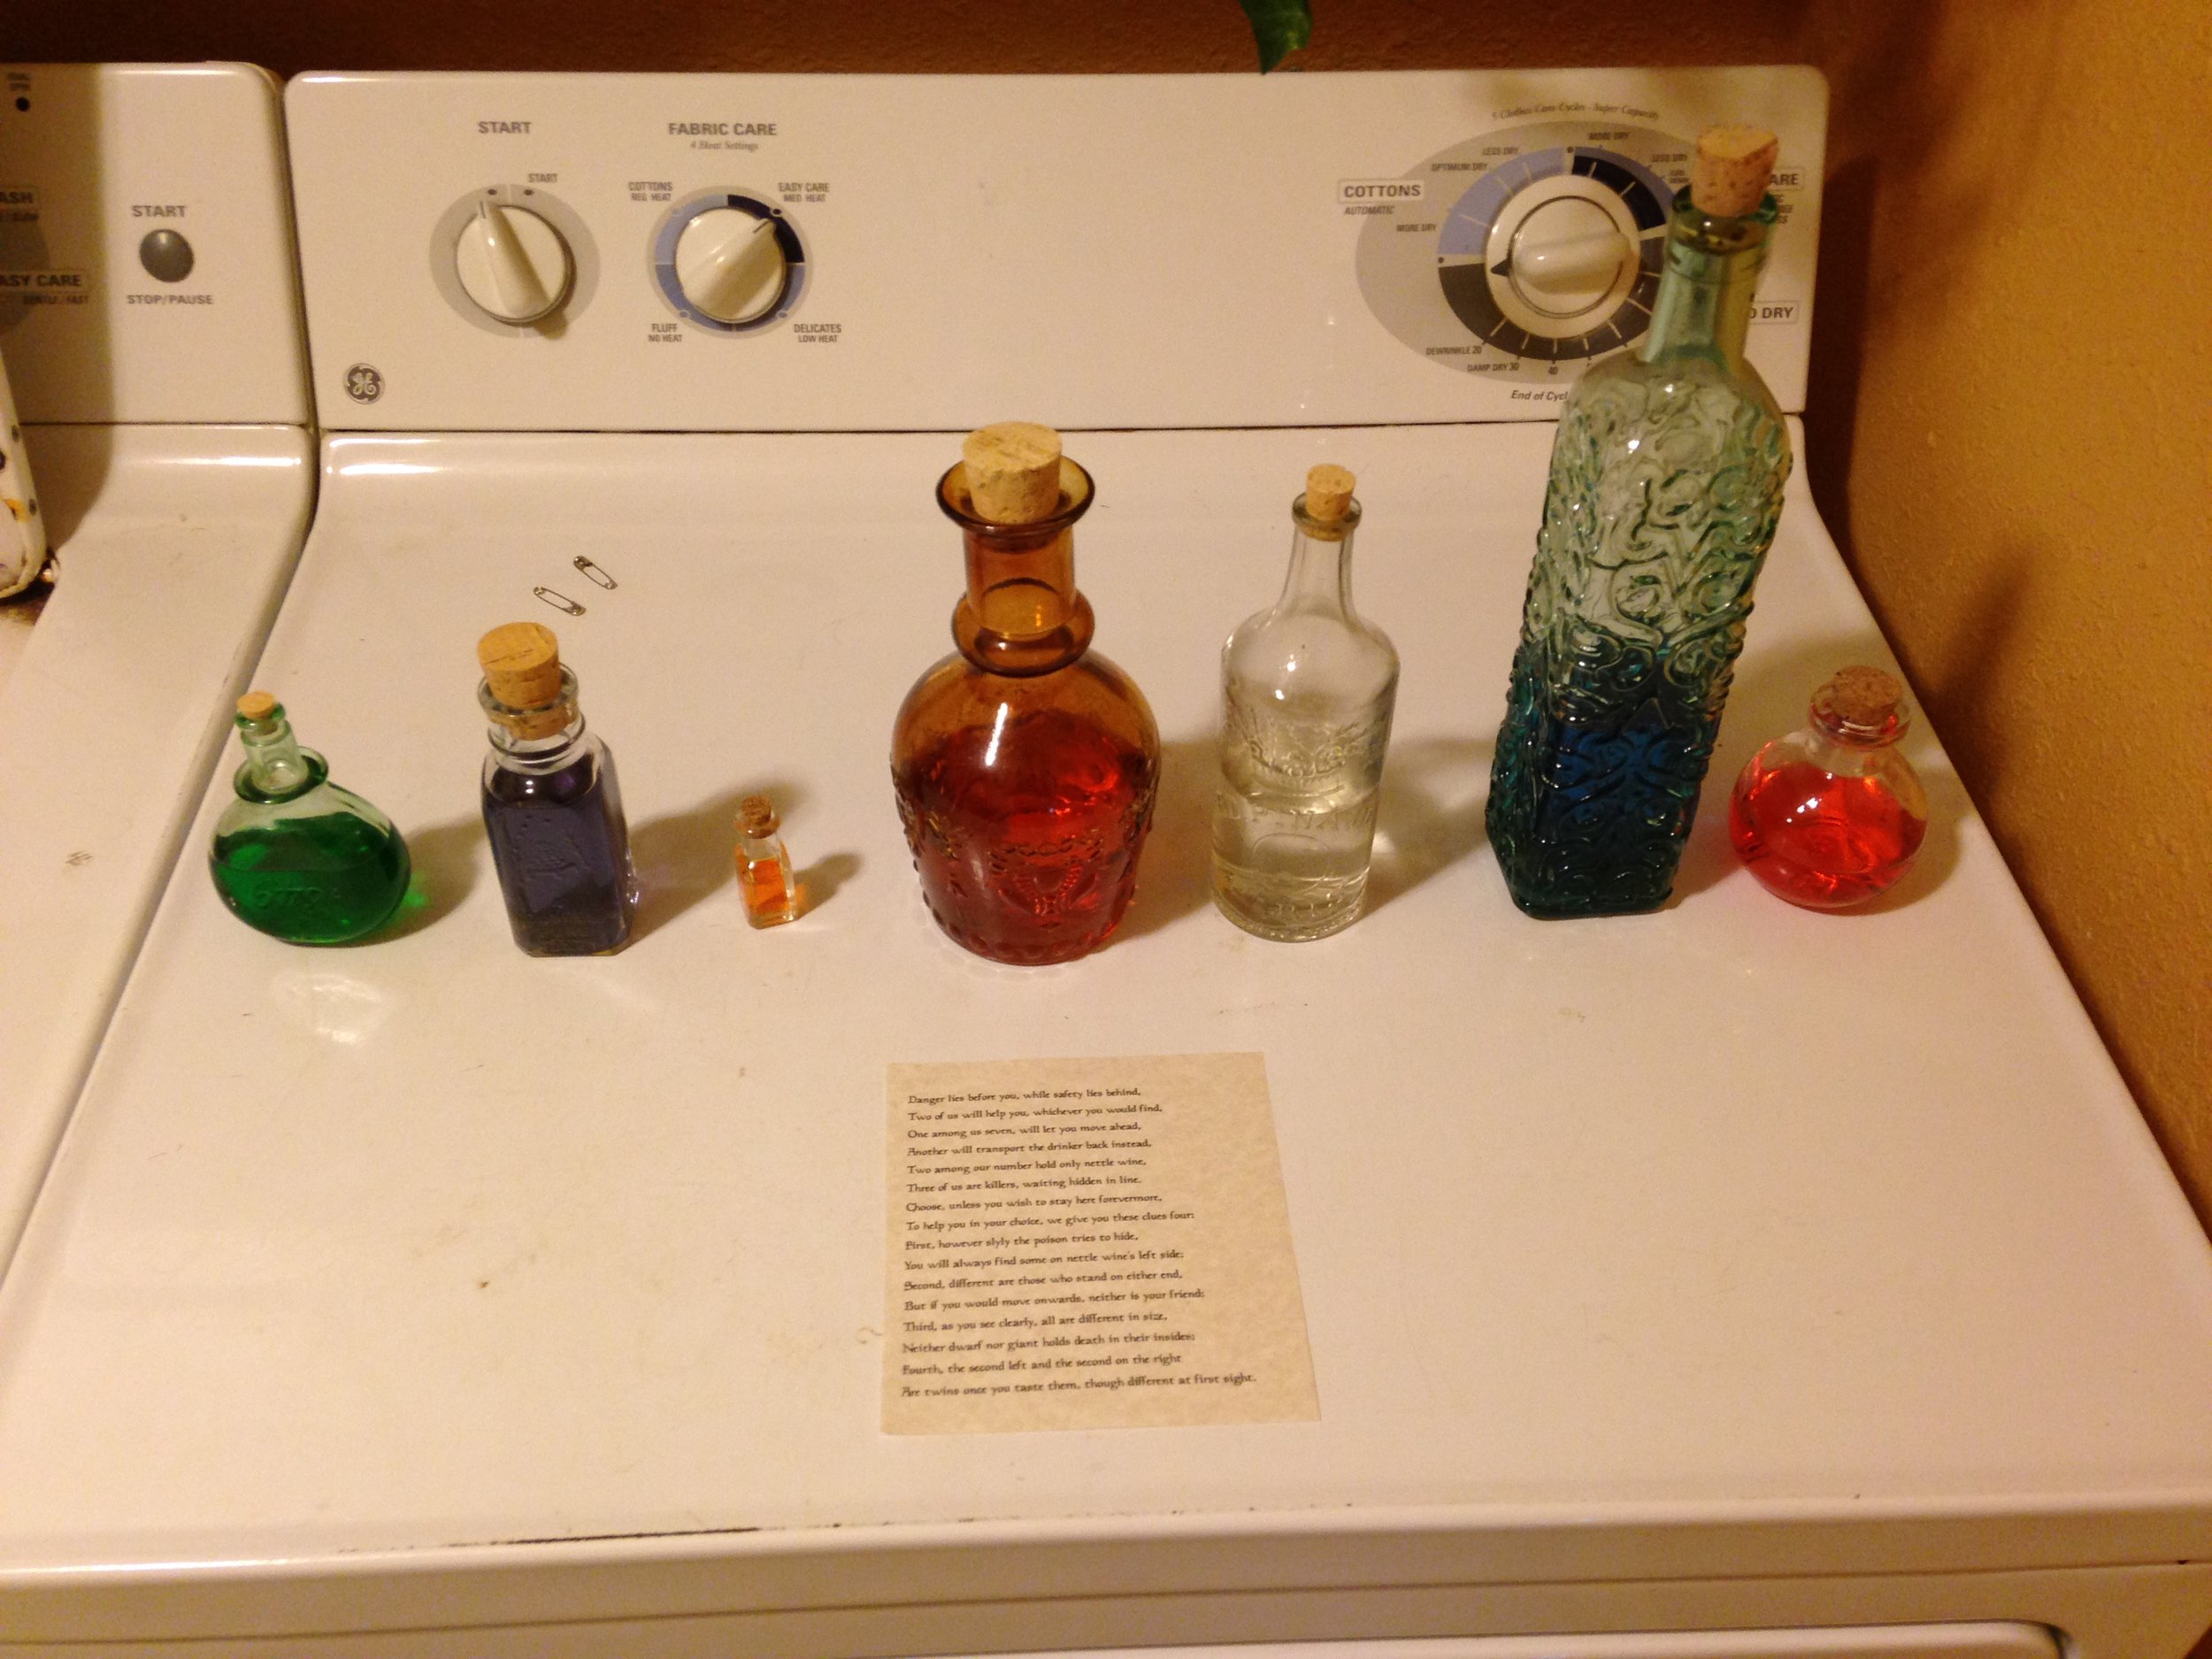
As for the logic challenge, the centerpiece was pointedly Professor Snape's own creation, but involved several other riddles and puzzles for our witches and wizards to solve.

IMG_9046.JPG

While on the subject of Snape's potion riddle, I feel it appropriate to add that the other safeguards protecting the philosopher's stone were also employed, as we had a stone of our own to keep safe.

IMG_9044.JPG
IMG_9047.JPG
IMG_9048.JPG
IMG_9065.JPG
IMG_9045.JPG
IMG_9089.JPG

Saturday evening was by far the fanciest feast we had all weekend, as our head house elf pulled out all of the stops for dinner. Shepherds pie, boiled potatoes, steak & kidney pie, and brussel sprouts were just the beginning of the culinary extravaganza he prepared.

IMG_9094.JPG

With all of the witches happy and full, we moved on to games including the much anticipated trivia game. Ravenclaw had the highest takeaway from the match and we moved on to the much less serious game of Cards Against Muggles. Yes, it's exactly what you're thinking and yes, it's just as absurd as you might expect. The House Cup was a pretty even split at this point.

IMG_9041.JPG

Sunday
As I'm sure you can imagine, Sunday was a bit of a lazy start, and many witches and wizards who traveled quite far to join us had portkeys to catch, but we did practice some patronus summoning, and we had a few extra special creatures join us for the morning. The first being a rather large bird of an unusual quality, and the second being a very sweet pupper with a few extra heads. They got along quite famously.

IMG_9037.JPG

With many happy memories from the weekend, casting patronuses was easy, and our resident boggart-turned-dementor made for good target practice.

IMG_8988.JPG
IMG_8995.JPG
IMG_8996.JPG
No, Kyle, it's supposed to be a happy memory...

No, Kyle, it's supposed to be a happy memory...

That's better.

That's better.

IMG_9012.JPG
IMG_9021.JPG
IMG_9003.JPG
IMG_9023.JPG
IMG_9016.JPG

And how appropriate that we ended with the happiest memories in our minds as everyone began their journeys home. It was certainly a magical weekend, and an event I hope to repeat in the future!