
Much Star. So Wars. Wow.
Michael MacWolff
Welcome back everyone, it's time for another round of commissions! But before we get to that, I have an exciting announcement!

My blog here was ranked in Feedspot.com's Top 75 Cosplay Blogs list! If you take a look at their list, there are some absolutely phenomenal cosplayers on there, many of whom have tutorials I use on a regular basis! To be on the same list with so many amazing and talented people is such an honor I can't express how touched I am. I also love how you can tell they've been reading my blog because of their little blurb about me, check this: "Mikey, a Cosplayer since 2007 is here to bring you tips, tricks, and ideas for all of your cosplay needs, and hopefully all without breaking the bank. And of course a bunch of awesome cosplay work that's already been done!" That's about the most accurate description of this blog I've ever heard, especially the "without breaking the bank" part considering half the time my props are constructed with literal trash XD
Anywho, I want to thank all of you out there who follow this blog and I hope you can find some helpful stuff, or at least a good laugh every once in a while, here at Mikey Does Cosplay!
Now on with the show! I wanted to show off my most recently finished prop commission, and show some progress on the other ones I'm still in the middle of making! And guess what, they're all from Star Wars! I'm super pumped because I love Star Wars and I've not gotten to anything particularly impressive from it (besides dressing up as both an Ewok and a Jawa as a child), so this has been a great opprotunity, and has inspired me to go for one of my Star Wars cosplays... some time in the forseeable future. But enough about me, let's take a look at this prop!
The project was (not so) simple, create a lightsaber based on the Tenth Doctor's sonic screwdriver. Fortunately, it's already a good shape to do it, it was just a matter of finding all the proper materials to put it together and have it actually be sturdy. Also, it needed to light up because what's a lighsaber that doesn't light up? Lame, that's what. I also had the added task of getting it to sound like the actual sonic screwdriver when you press the button. That was a bit outside of the realm of my experience to create my own, but fortunately they make little sonic replicas that make the sound, so I just stole the guts out of one of those. It gave me some nice 3-dimensional references to work with too!

I found this guy on Amazon for cheap enough, and took the whole thing apart, so that just the wiring and interior plastic bits remained. I swapped in my own blue LED, added a resistor and a 9V fixture, and voila! We have sonic-sounding light-up lightsaber blade! If you're wondering about the blade, I actually got it from Ultrasabers.com, as they sell both fully constructed custom lightsabers, as well as the bits and pieces to construct your own (which seems fitting given Jedi lore).
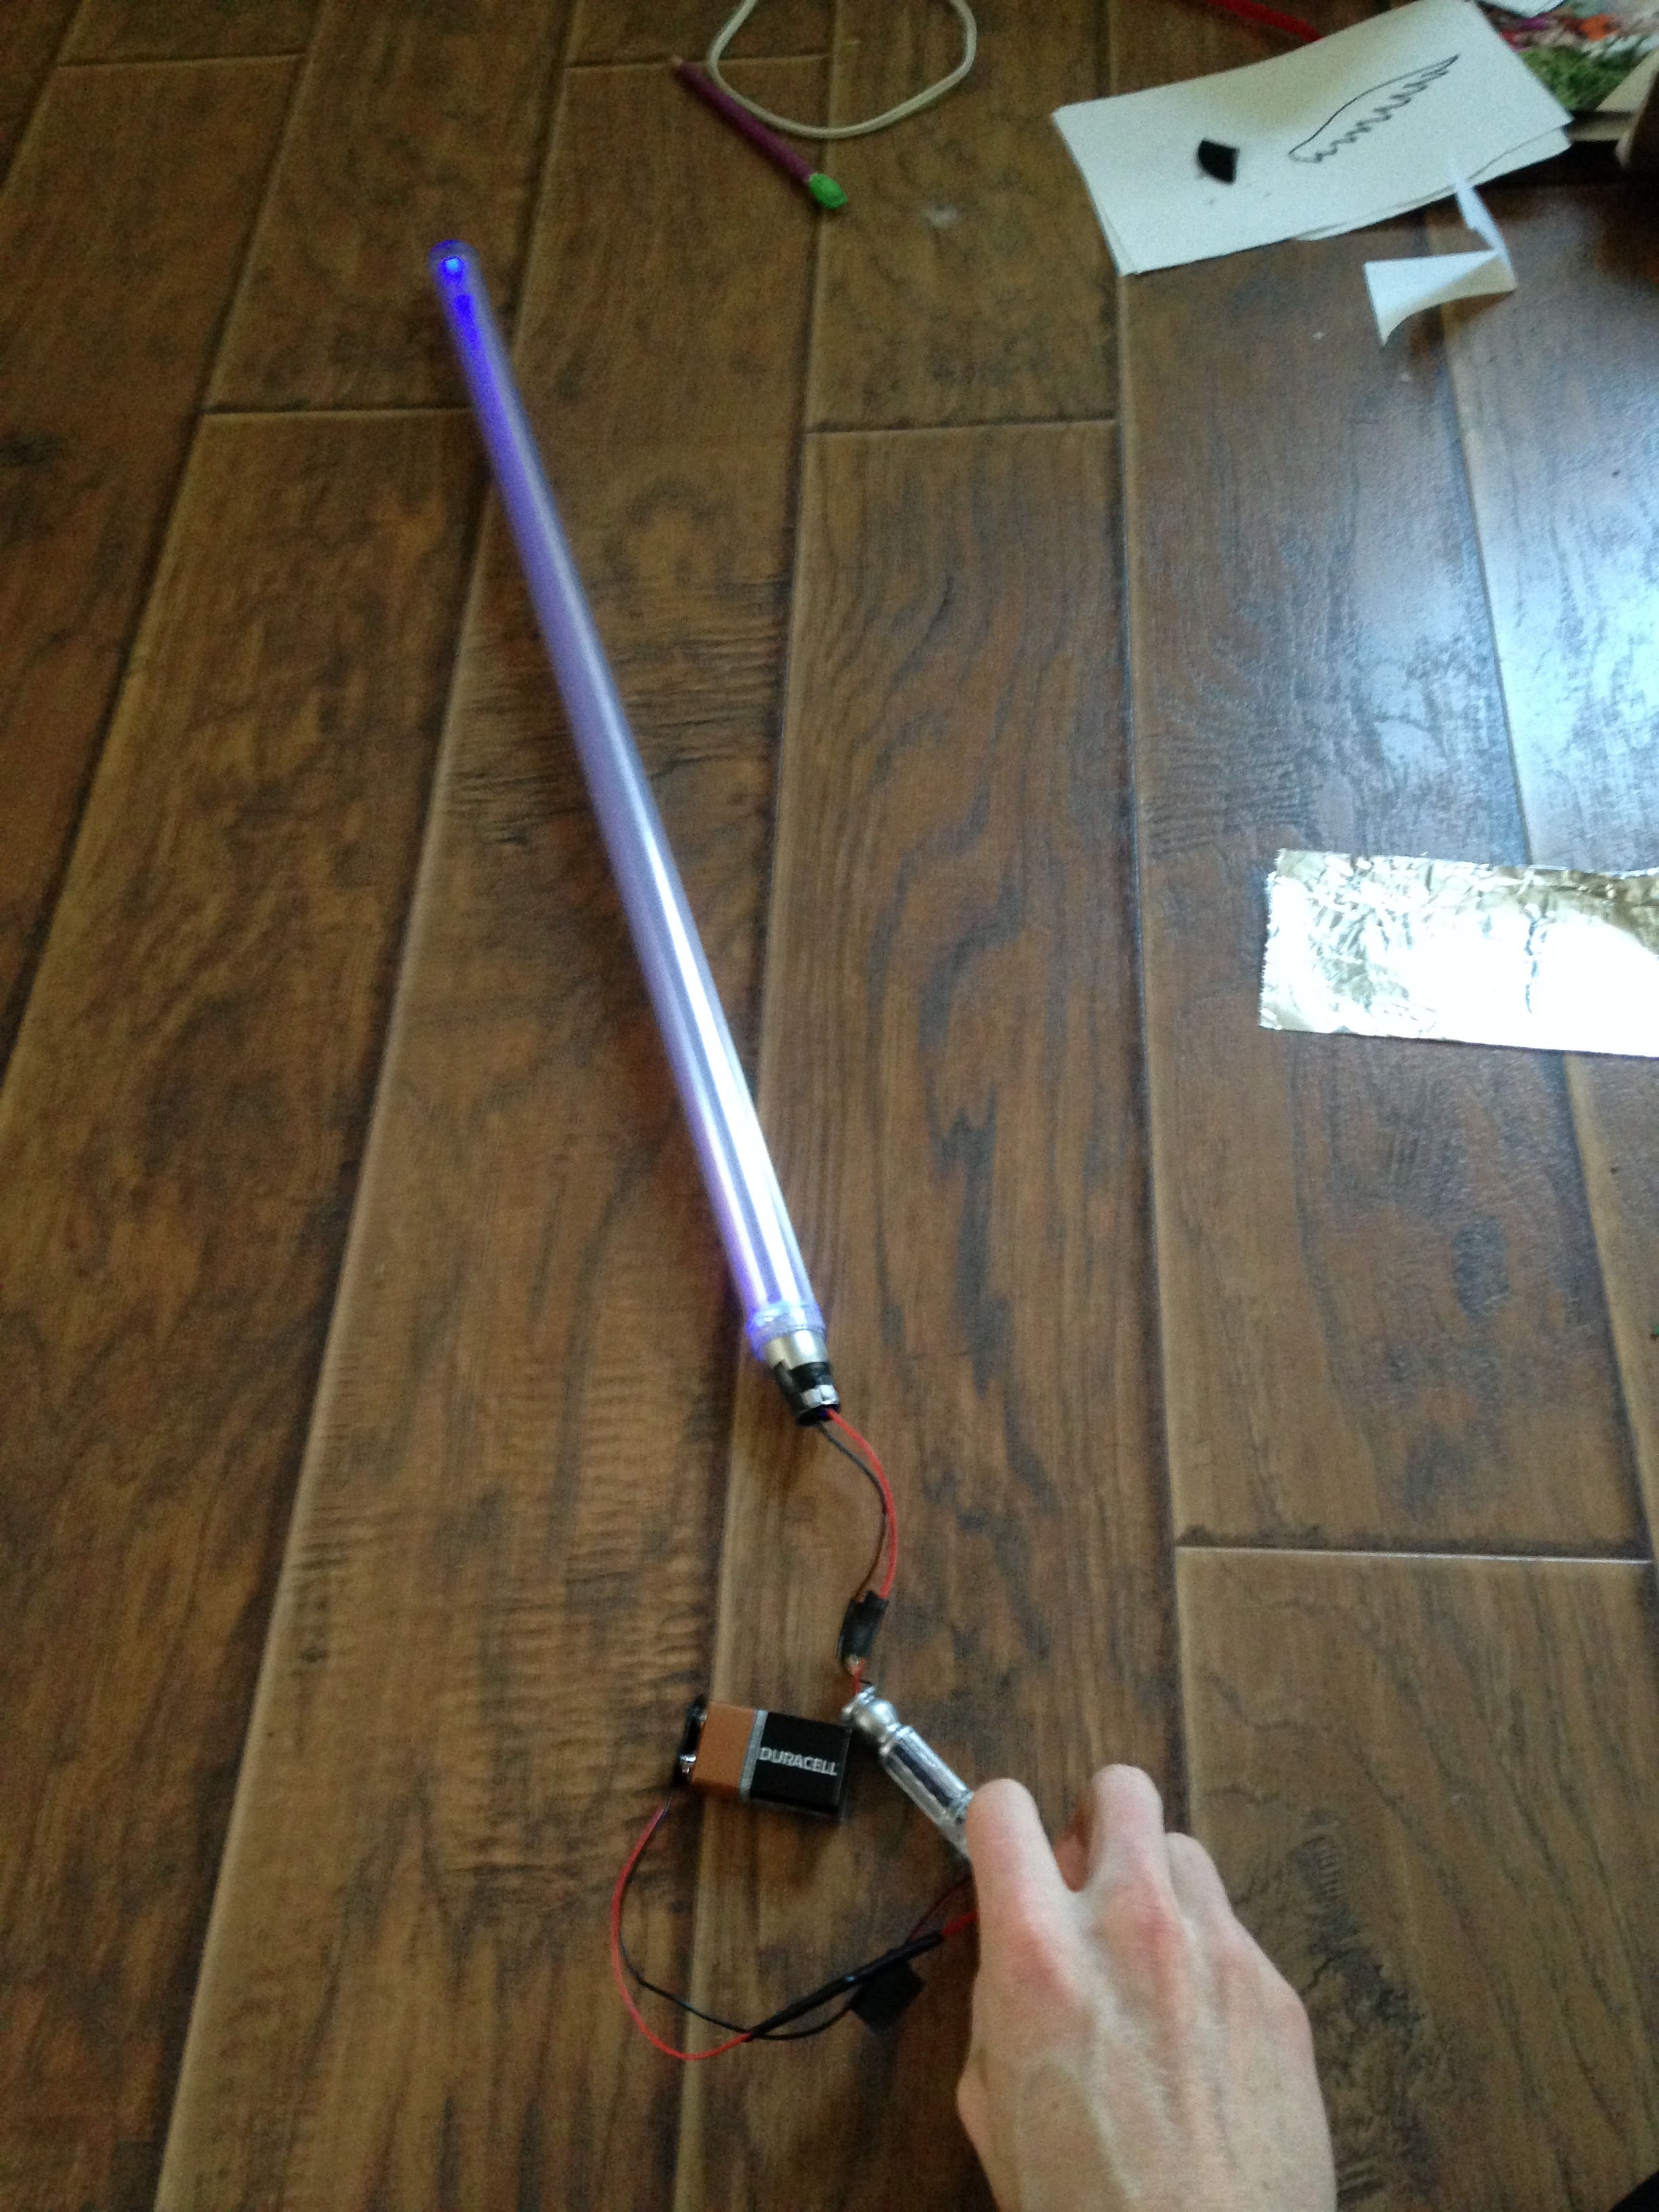
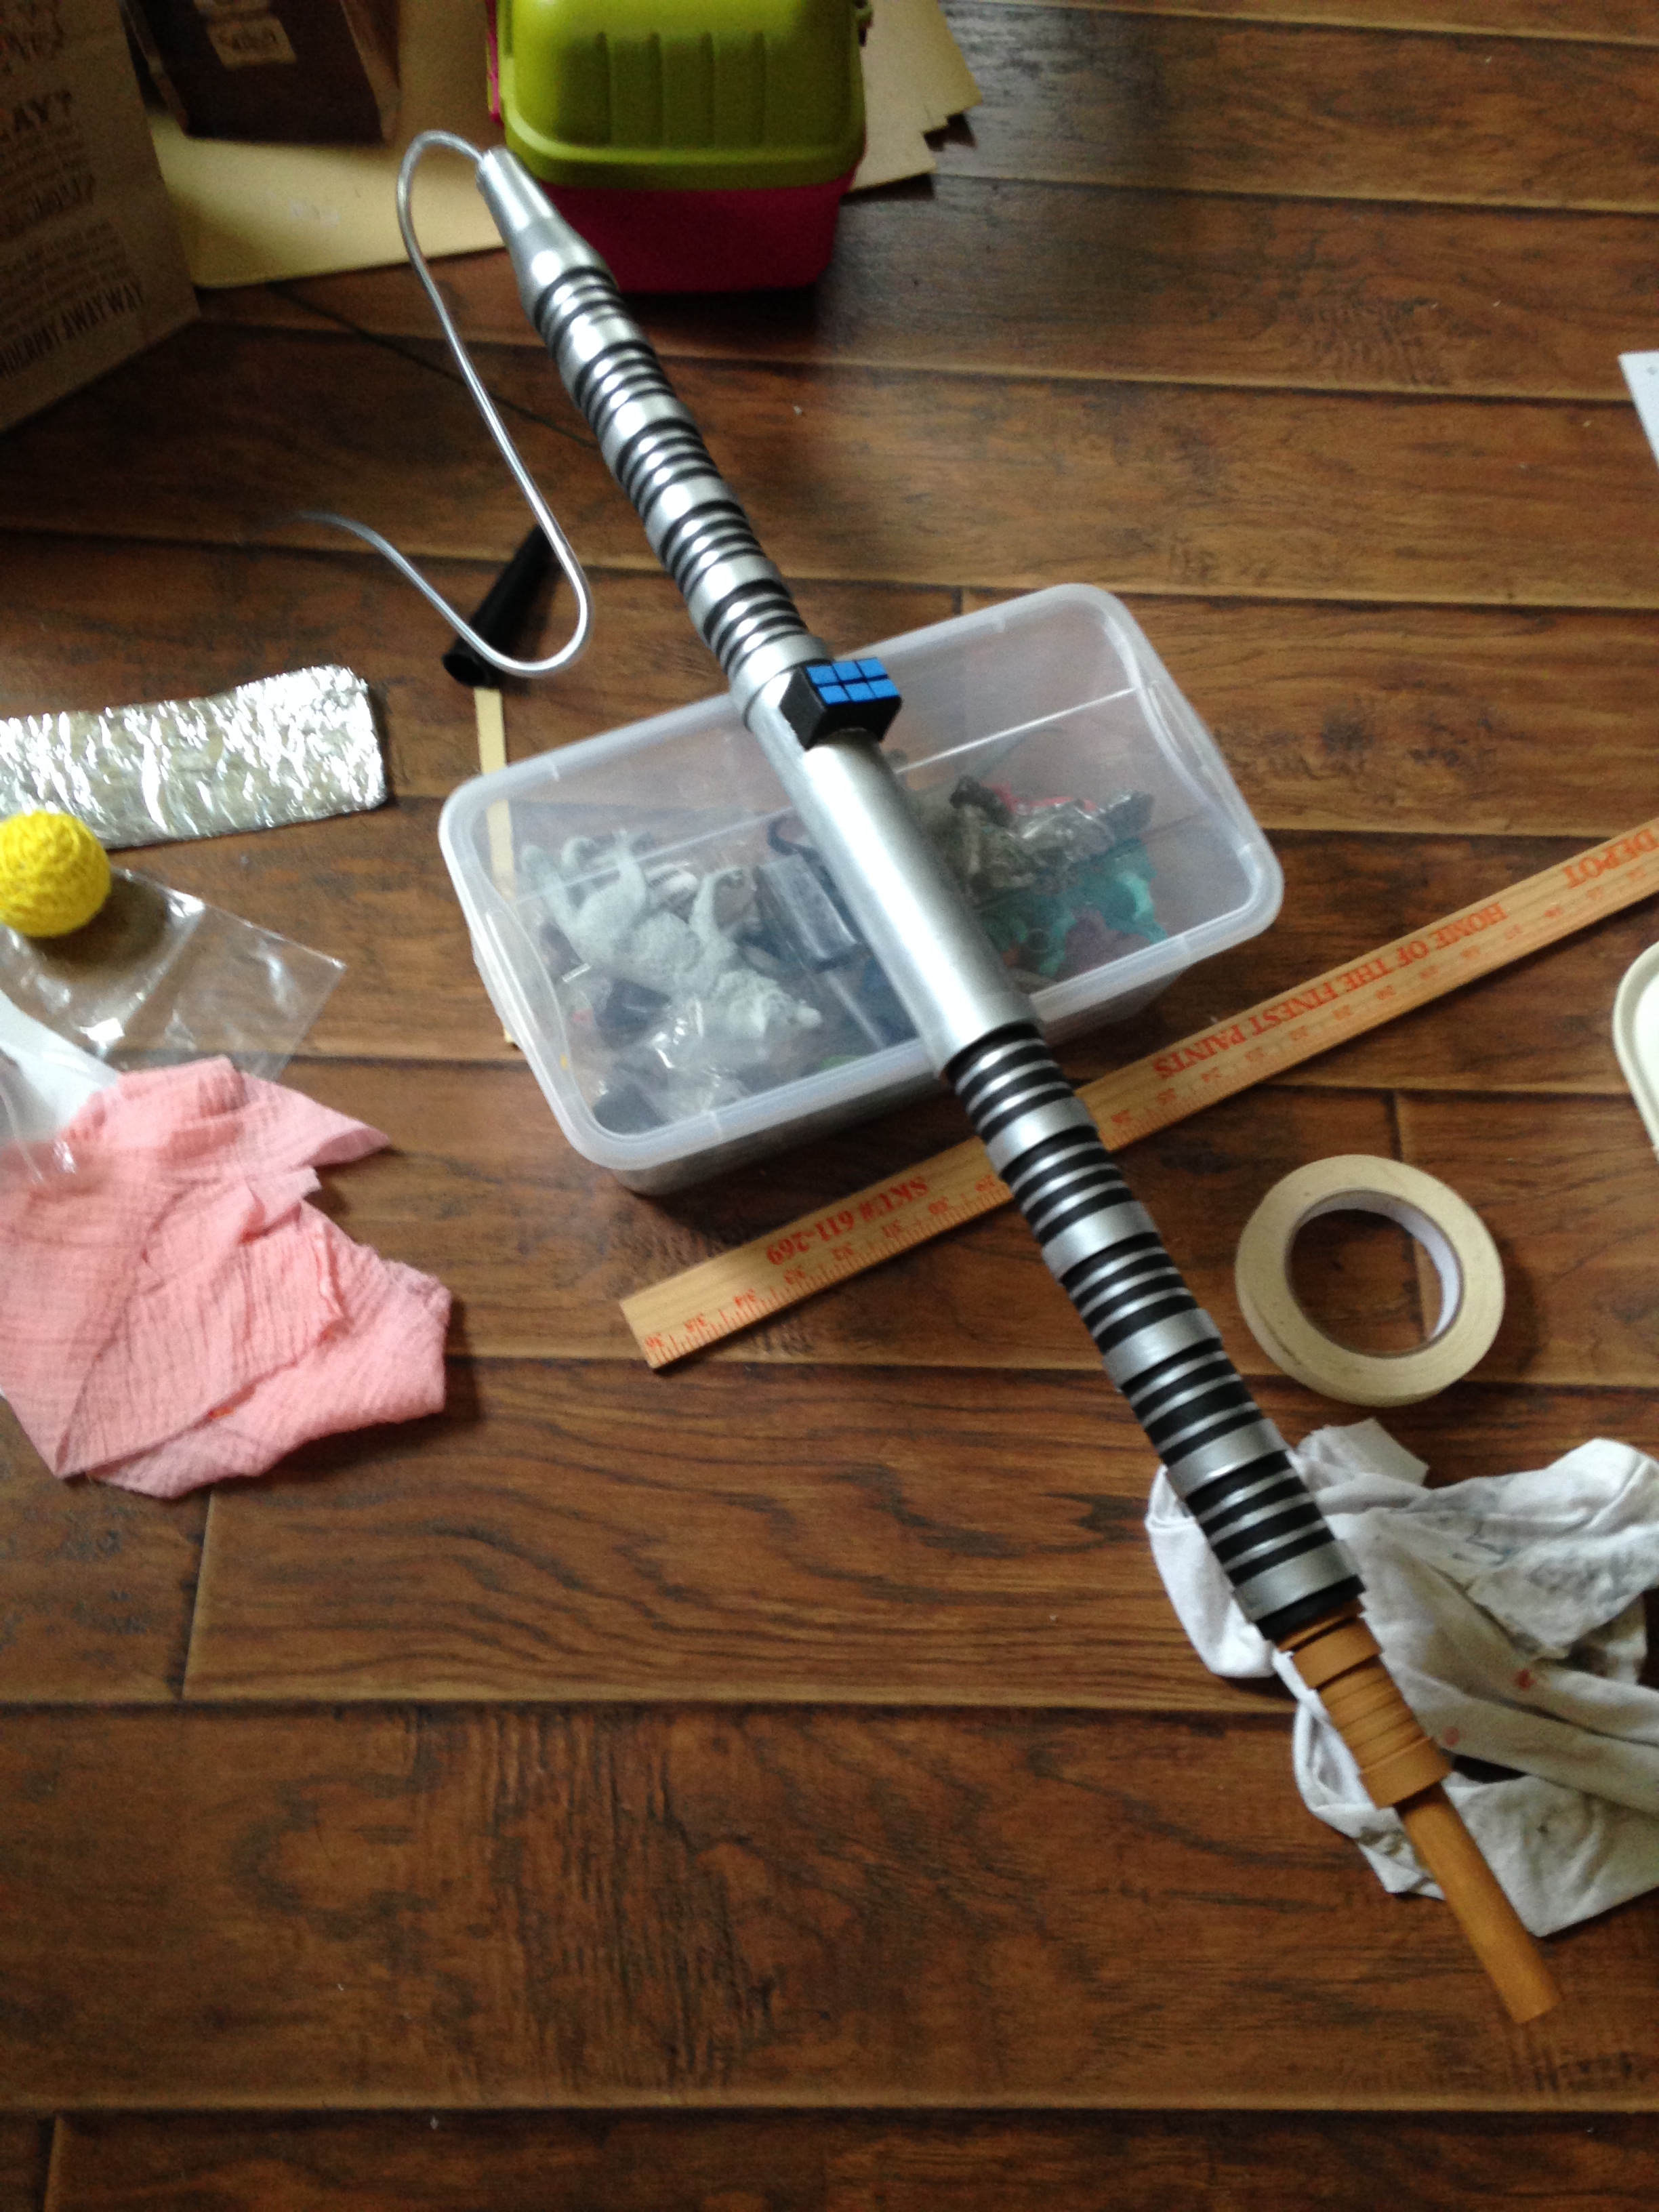
Once I had that part, I hit a bit of a sticking point because I knew my client wanted the top part of the screwdriver extended, and there's a transparent piece in the center that I'd need to have. After a trip to the hardware store, and no success at finding rigid transparent tubuing, I tried the internet. Fortunately it does exist, in the form of aquarium tubing (which you can get on Amazon, as it turns out). They make it in a ton of different sizes, and since I wasn't entirely sure what size I needed, I ordered a few (a rather expensive experiment, but I'm positive I'll use the leftover pieces for projects in the future). As it turns out, the 1" OD tubing was the exact same size as the lightsaber blade, so it worked perfectly for the inner core of the hilt. Also, quite fortunately, the PVC I found fit perfectly around the outside of both tubes, meaning that I'd have the necessary materials to make the blade as sturdy as I needed it to be. From there, it was simple layering and E-6000ing the pieces into place, along with doing a fair amount of drilling and whatnot.


The real trick was lining everything up right so I could install the button that made the lights and sound, but everything came together nicely. That just leaves us with painting!


And that's my sonic lightsaber! I hope I get photos with his costume, mostly because I'm curious what his costume looks like, but I don't often get photos back from people so we'll see.
The next project I'm in the middle of is a set of 3, and one of the most unique requests I've gotten. I'm in the middle of constructing 3 out of the 5 instruments played by Figrin D'an and the Modal Nodes. For those of you who don't know what that means, it's these guys:

Specifically I'm making the instruments for number 1, 3 & 5 in the photo above. The first one I tackled was the simplest, the basson-like instrument on the end. I started with a heavy-duty cardboard tube, a funnel, a dowel rod, a pill container, some vinyl tubing, heavy-gauge wire, vinyl placemats, and a bunch of cardstock.

The cardboard tube was obviously the base, and the funnel was used for the tapered part at the top. I then made strips out of cardstock and my vinyl placemats (which I'm running out of and very sad about that) to do all of the raised rings around the instrument.


The pill bottle and dowel rod are the bottom end, which the only reason I used the pill bottle was because the cap fit perfectly and snugly into the end of the tube. Those got wrapped with their little rings too [The methodology there: E-6000 in a line down the back and affix the one end of each ring, then let it dry (see top photo). Once it's securely affixed on the one end, paint a bunch of mod podge down and wrap the strip around, taping it down on the far side. Once that's all dry and securely attached, you can go back with an exacto knife to trim the extra ends off of the strips so they lay flat in their ring-shape].
The vinyl tuping was threaded with my heavy gauge wire so it could be shaped, then I stuck it into the end of the funnel. The thing keeping it there is a plug made from EVA foam.
The last bit was the little part that sticks out with all the buttons. That's just a few layers of foamcore with more vinyl placemat for the buttons.
Several layers of Mod Podge and paint later, we have a finished instrument!
The next one I didn't do as good a job taking photos, but the base is a plastic wash basin I found on Amazon. I used half a large plastic ornament, the lid to a container of spackling paste, some craft foam, worbla, more vinyl placemat, and a couple of plastic bottle caps for this one.


I cut the slots out of the washtub with a knife, and assembled the foam details on top of the plastic lid before covering the whole thing in worbla. You can see the vinyl placemat and the one bottle cap in the photo.
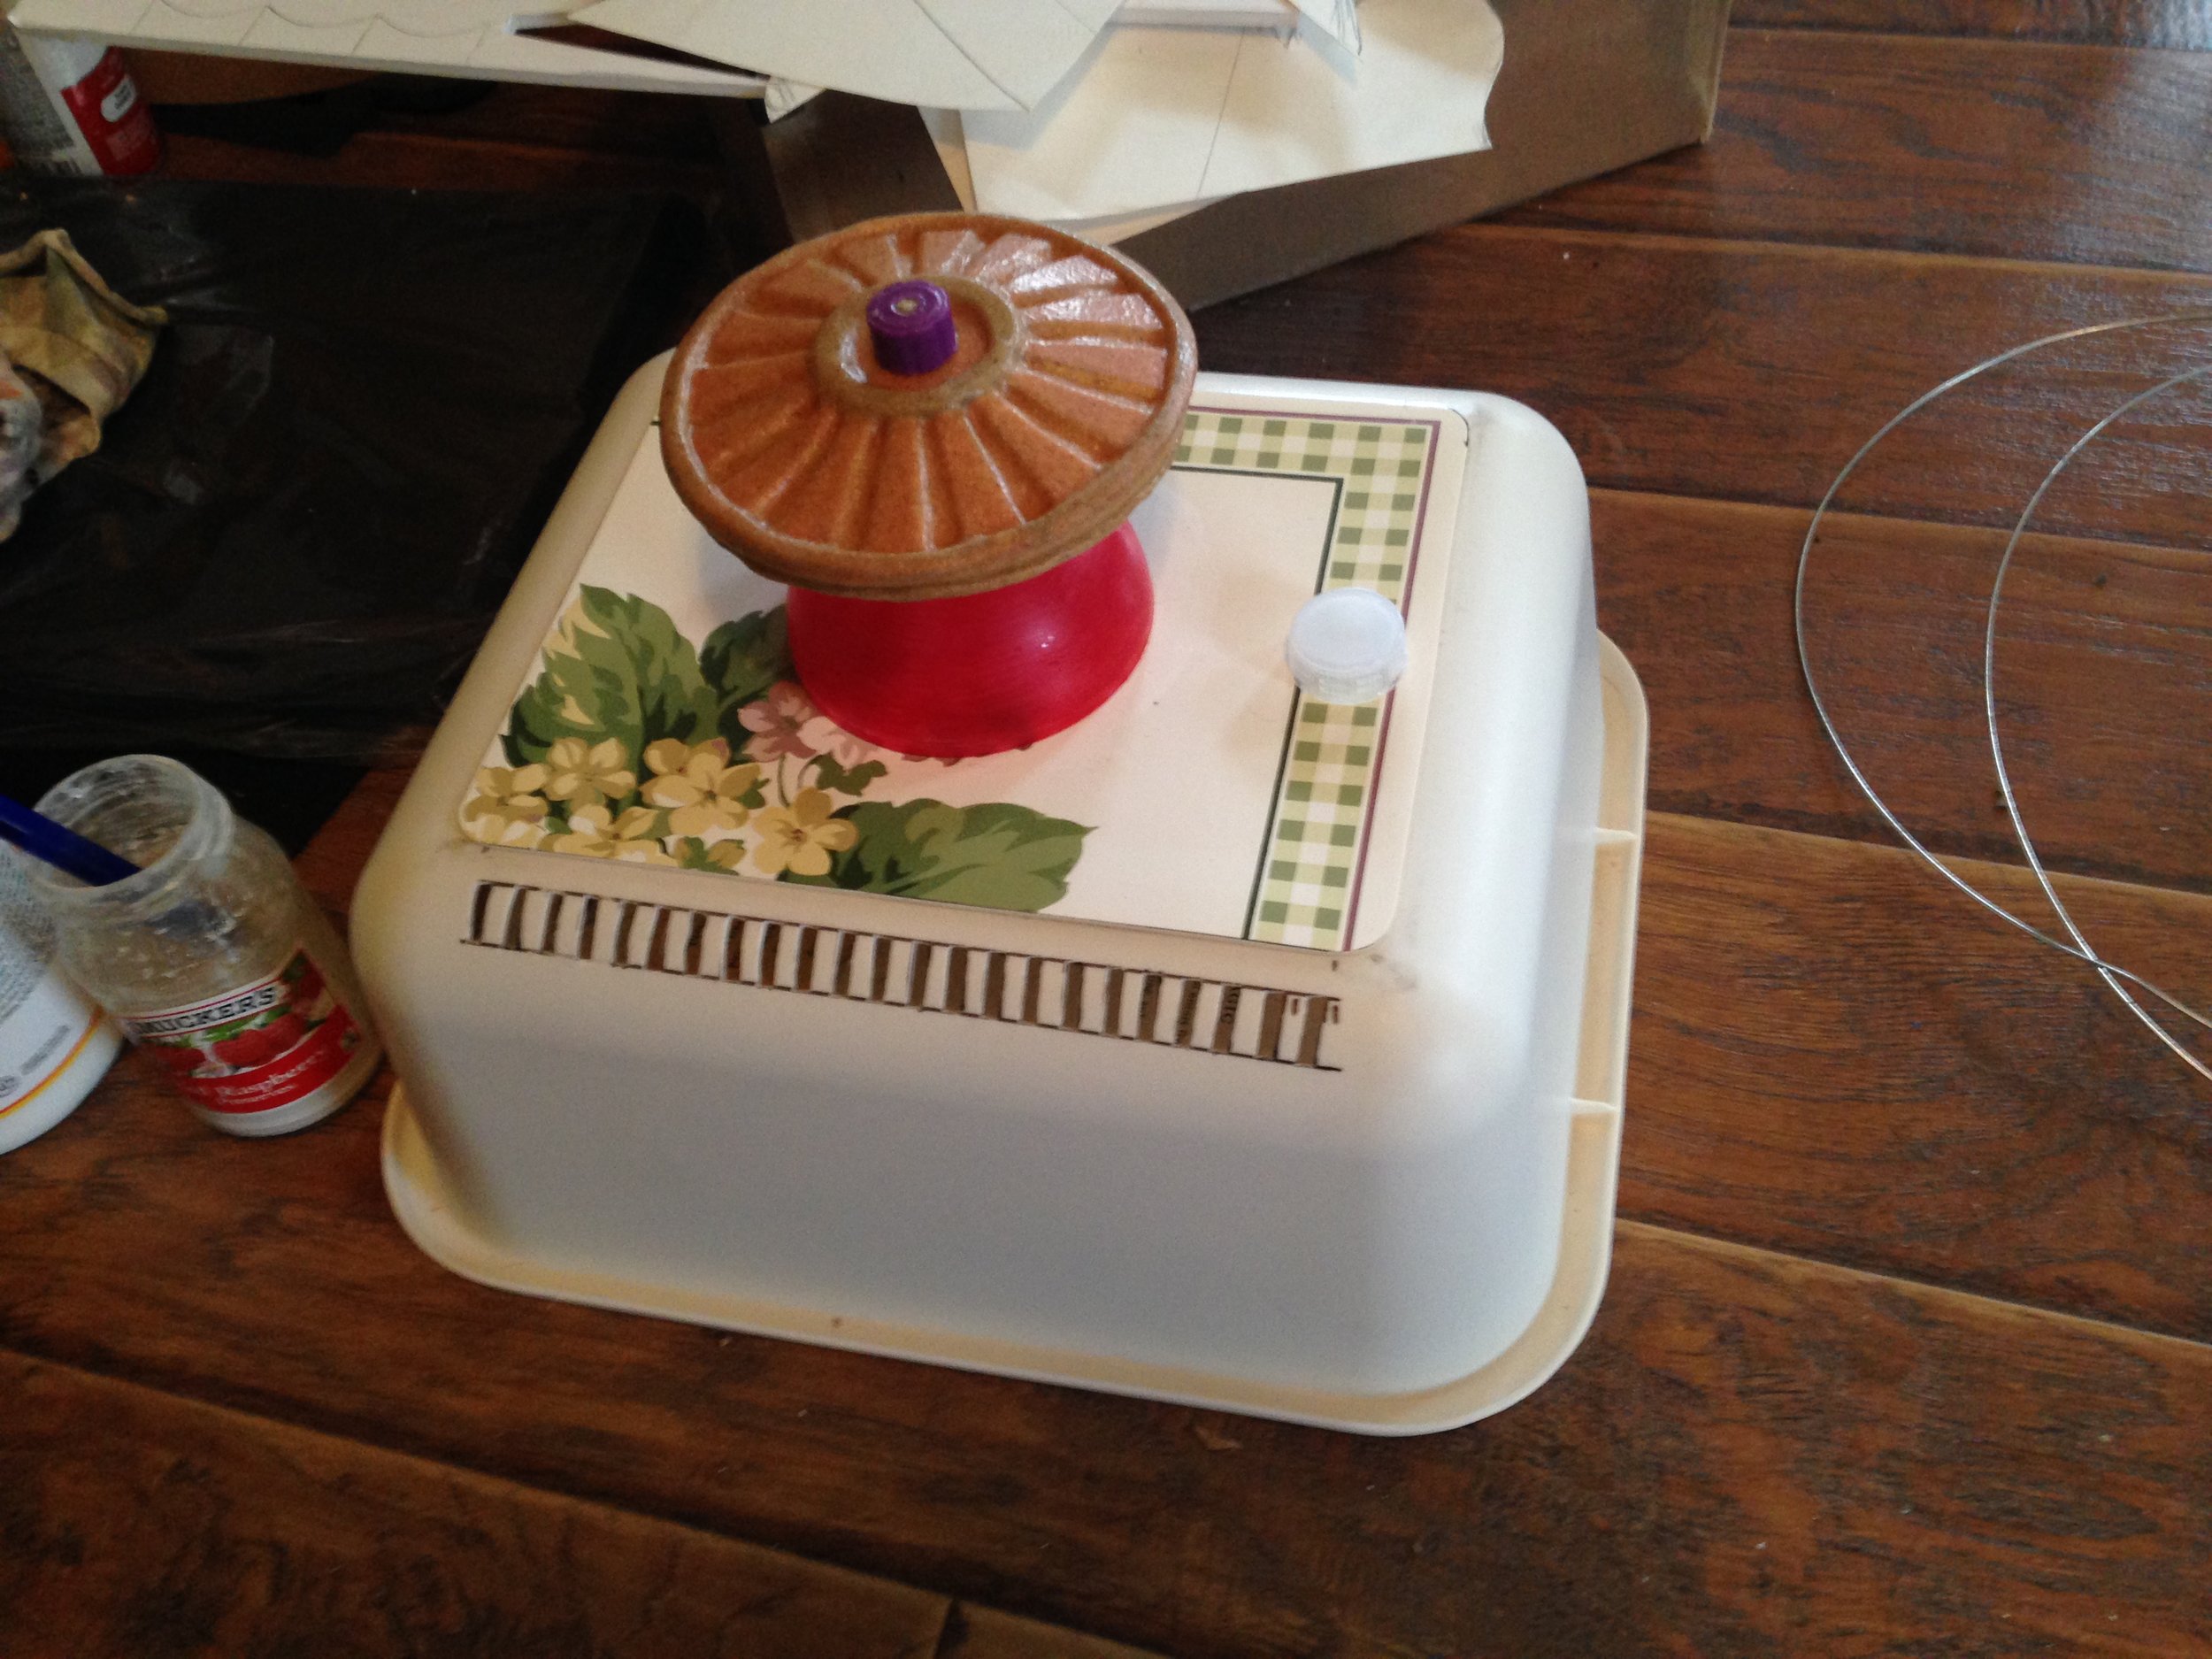
The half-ball ornament is the base for the little disc part, and the thing on top is actually the bottom of a glue stick that I managd to saw off of the rest (once again, I am a master of incorporating literal trash into my props). That's as far as this one has gotten, I'm just waiting for a day that's above 40* so I can spraypaint a base coat on it.
Last up is of course the most complicated of the bunch, and naturally involves a bunch more trash and other stuff! I started with a base of a giant styrofoam ball (Amazon) and some foamcore board.
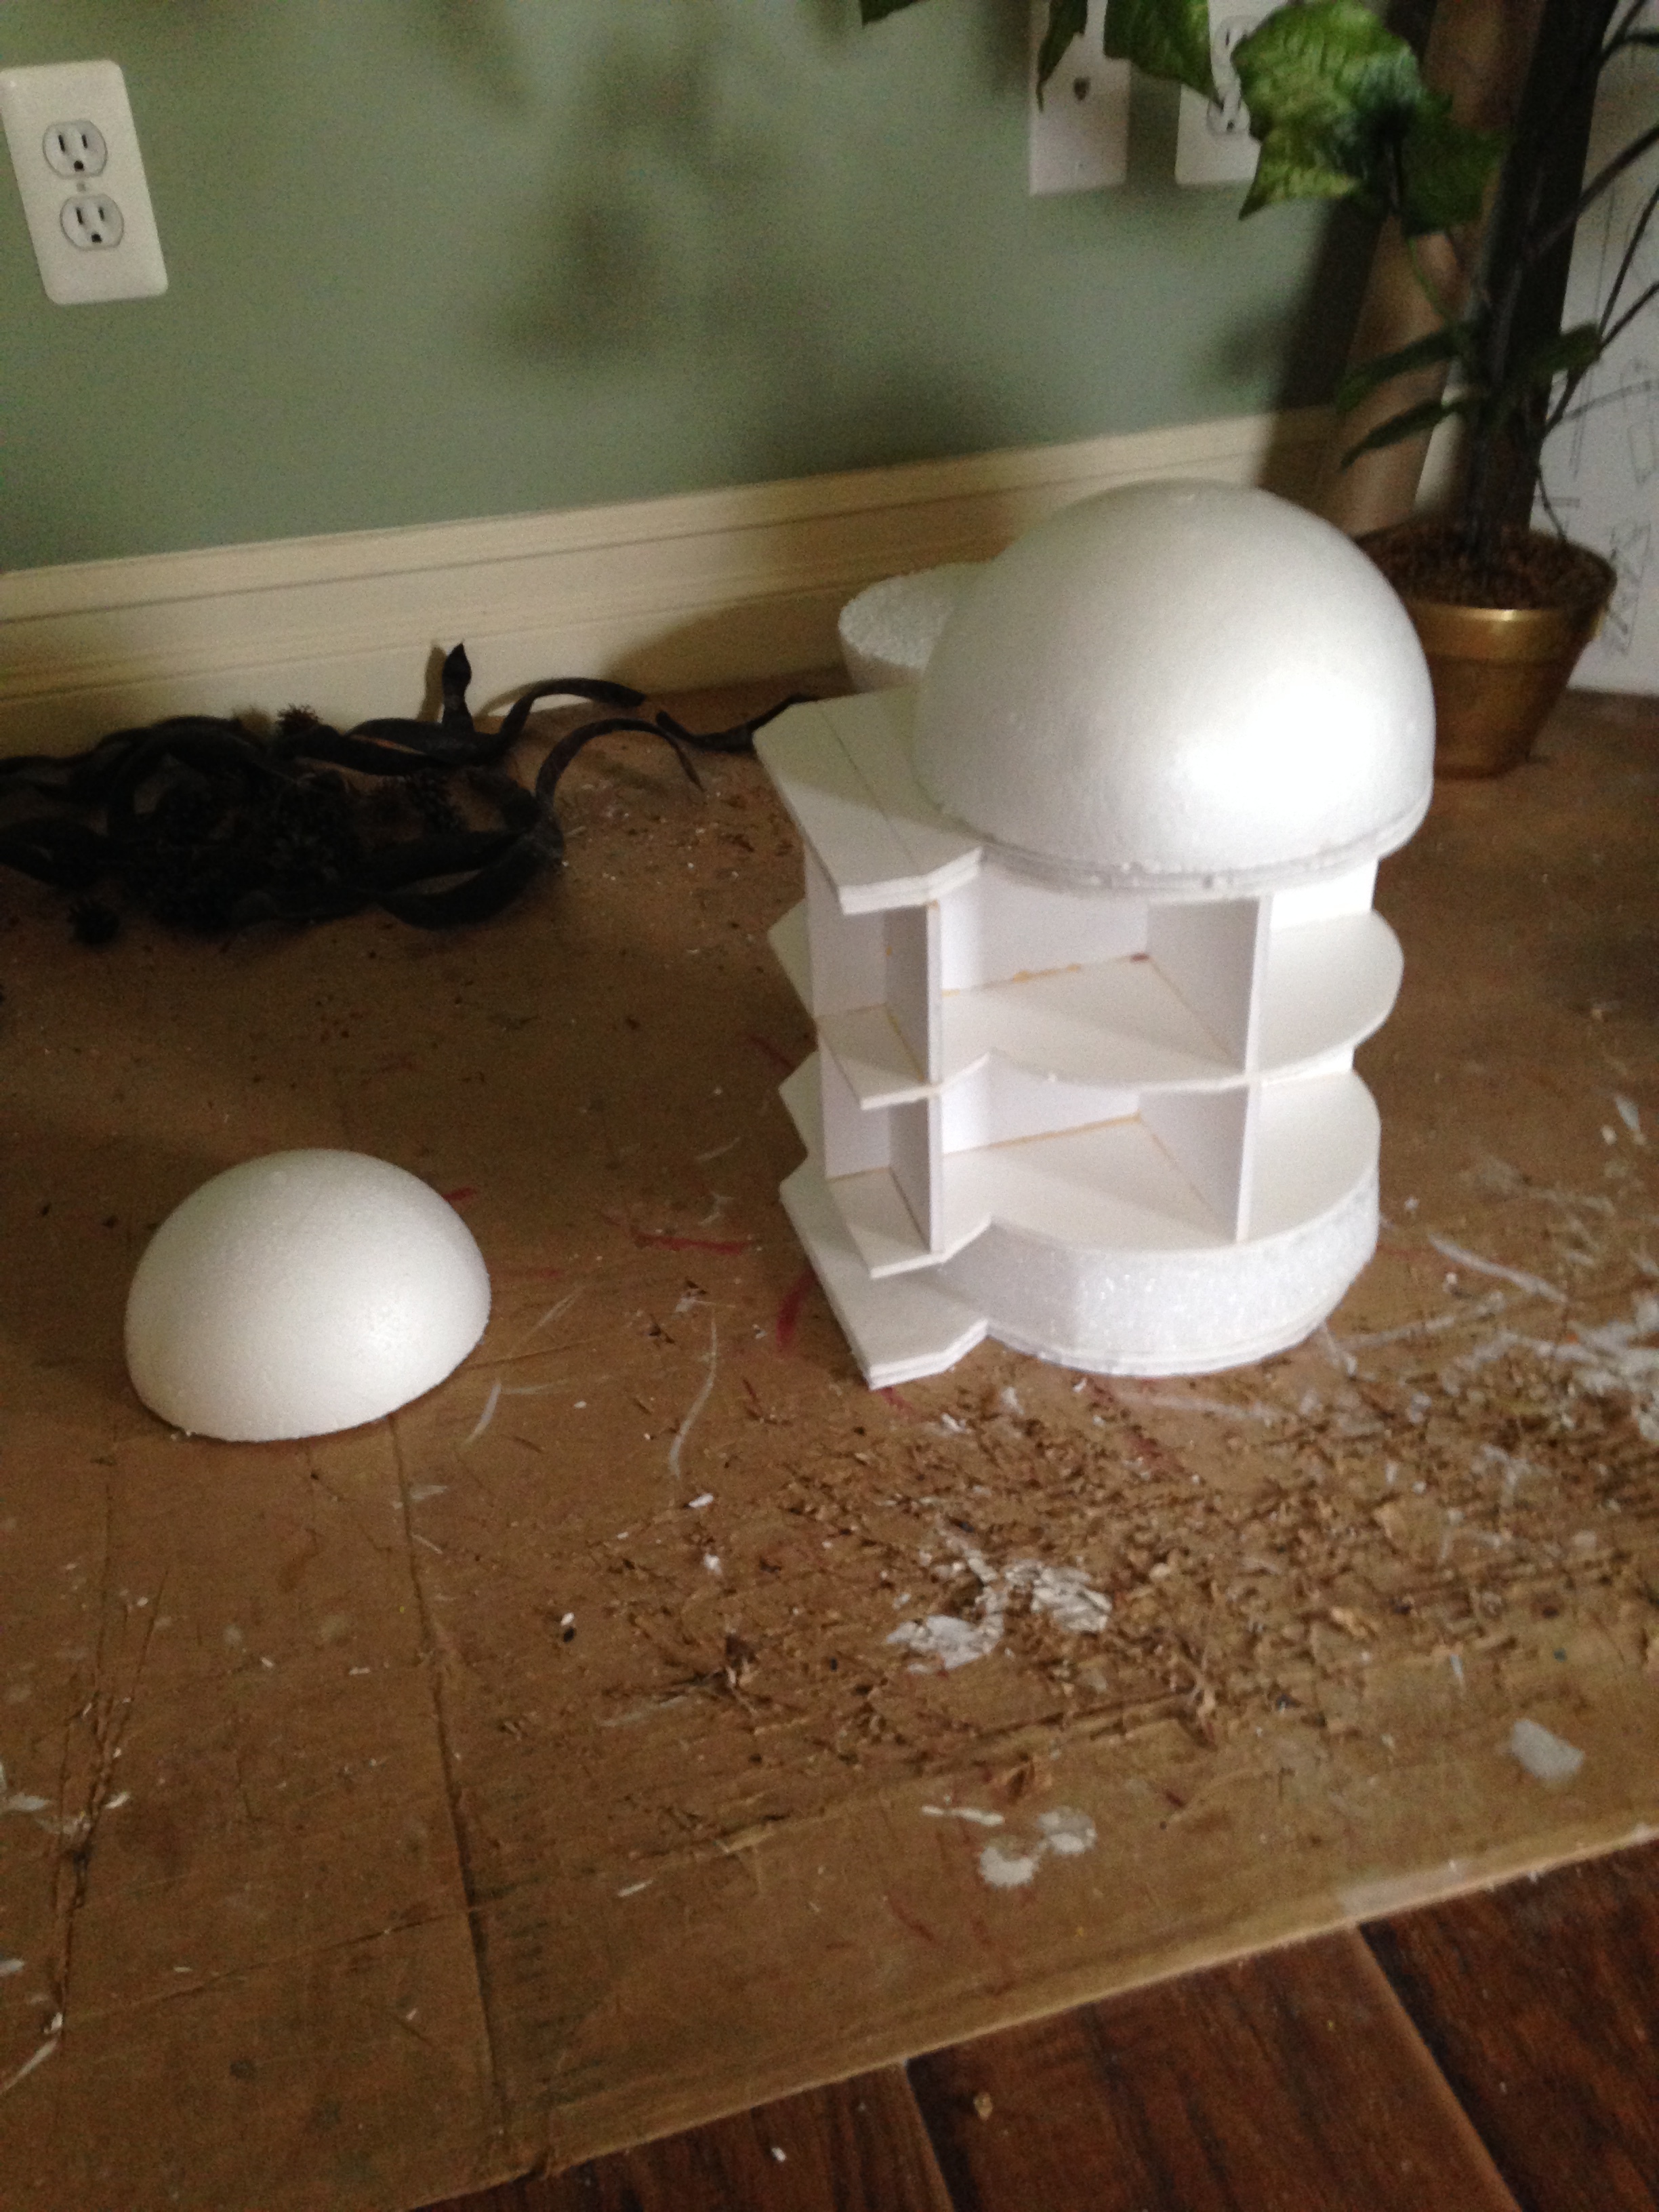
I had to saw that ball in half myself (which was an interesting experience), and I decided to try another method for filling in all the gaps, which is a common material used for cosplay, but not something I've ever worked with myself: Expanding foam (I found it at my local hardware store, but here's a link for Amazon). This was also an interesting experience but it worked out surprisingly well!


I filled in all the big empty spaces and then started shaving away the excess foam. I used a serrated cooking knife I found at the thrift store, and it worked wonders. I've seen a lot of other folks use a retractable craft knife for this, which I'm sure works great, I just liked having the serration so I could easily saw through the foam.

Once the foam was all shaved down, I paper mached the outside for a smooth (well, as smooth as paper mache can achieve) surface. Once iit was all dry, it was time to start adding details!


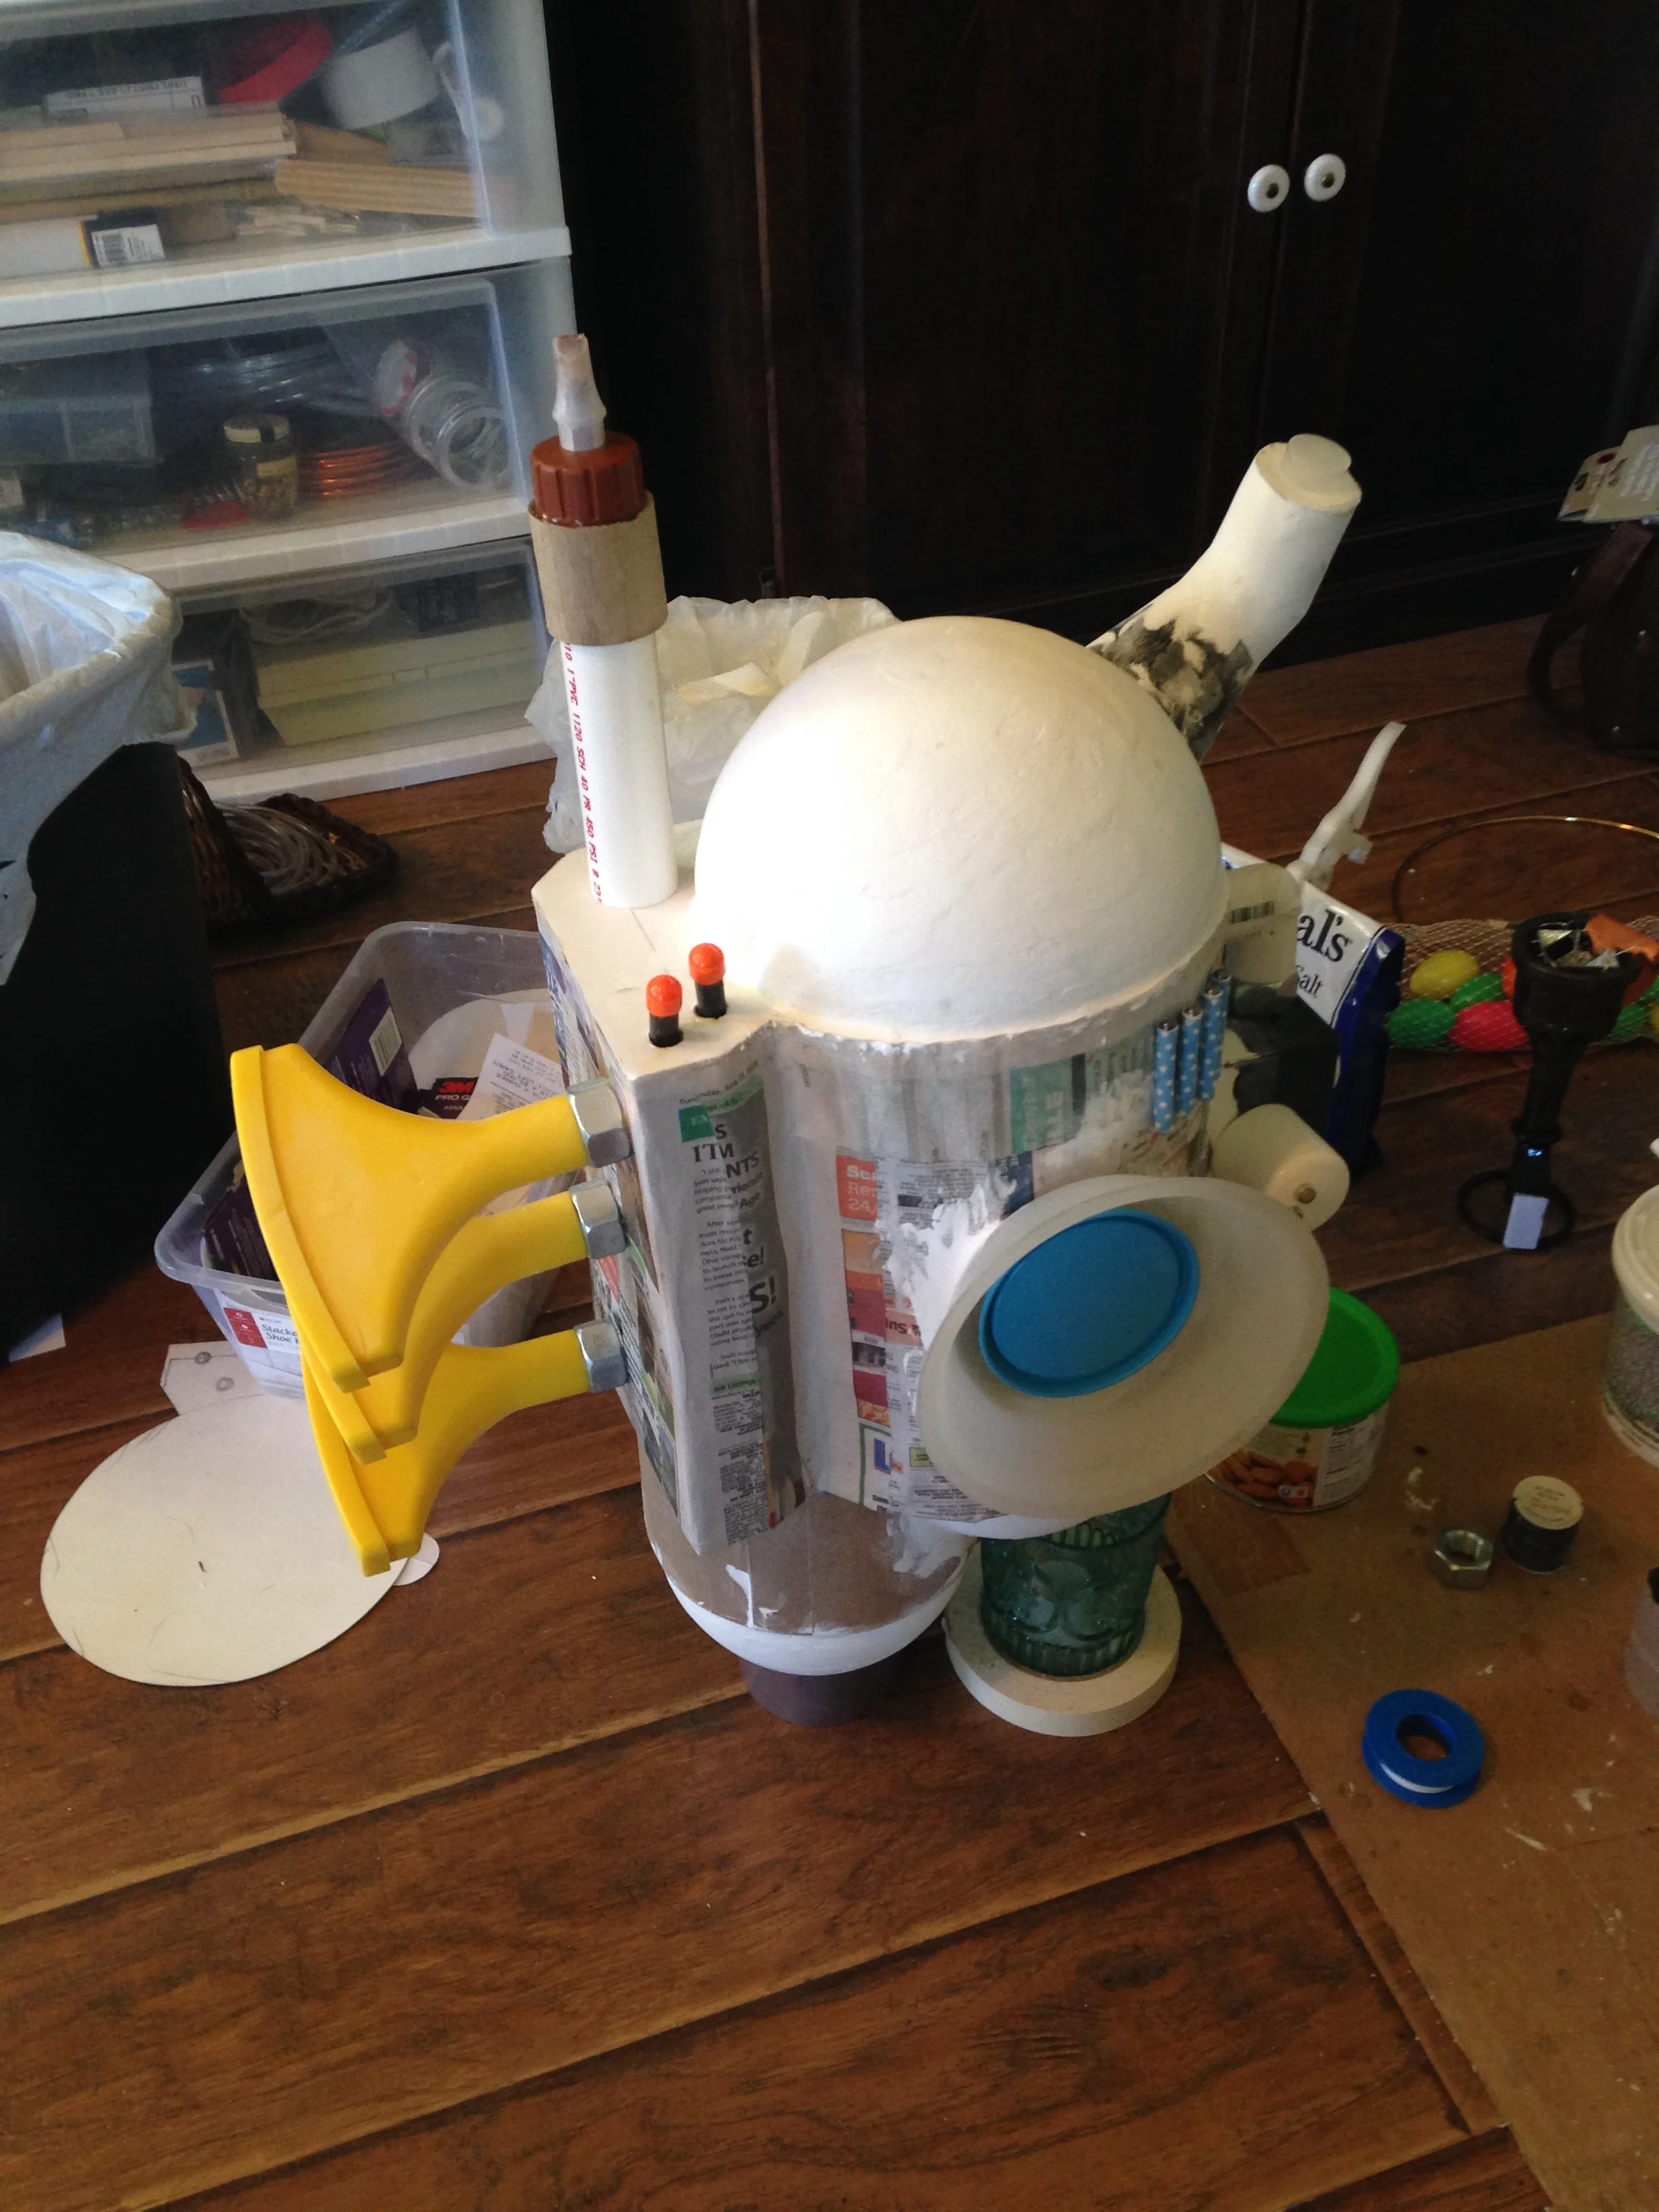
Here's a run down of all the random bits and pieces I used for the details:
- The part of the funnel I'd sawn in half for the first instrument
- 3 Plastic garden hose fan spray nozzels (Amazon)
- Lots of large hex nuts
- A plastic bowl I found at the thrift store
- a blue metal lid I found in my pile of random trash
- Another, smaller, styrofoam ball I sliced in half (Amazon)
- Some PVC pipe, and several fittings of different shapes and sizes
- Two small watch batteries
- A small cardboard box
- The plastic tubes found at the center of a roll of plastic doggy cleanup bags
- Orange plastic things that came off of a squirt gun (I honestly don't know what they were for, as I deconstructed that squirt gun many months ago, but they fit perfectly on the little plastic tubes)
- The squeeze cap from a bottle of wood glue
- a plastic bottle cap
- a cap from a glue stick
- some polymer clay that I shaped into a piece I couldn't find
And there you have it... it looks odd now still, but once it's painted it should be a pretty good replica of this crazy thing. Although I'm realizing now there are a few details I missed on the bottom. Oops, well I have't started painting them yet so I guess I still have time to add them!

Well my dearies, that's about all I have time for today, and about all the stuff I have to show you anyway! Stay tuned for the final paint job on those last guys, and for the myriad of other commissions I'm constantly in the middle of!