Contact Us

Questions? Comments? Concerns? Suggestions? Submissions? Shout-outs?

Whatever you want to tell us here at Mikey Does Cosplay, we're always happy to hear your thoughts and feedback!


123 Street Avenue, City Town, 99999

(123) 555-6789

email@address.com


You can set your address, phone number, email and site description in the settings tab.
Link to read me page with more information.

reflection.jpg

Blog

Here's where the magic happens. I'll be posting about all of my experiences and experiments (both failed and successful ones), introducing you to my costumes, sharing fun stories, linking tutorials and useful products, and who knows what else!


Filtering by Tag: prop

Commission Progress (WIP Wednesday)

Michael MacWolff

Welcome back everyone! I know I’m supper sporadic with posting here but I do have some progress updates on the commissions I’ve been working on that I wanted to share!

Let’s start with the projects you’ve already seen the beginnings of:

IMG_1067.JPG

Silas’s armor is coming along nicely, though unfortunately I’ve run out of worbla so I can’t make any more sections until that arrives.

IMG_1160.JPG

Next up, Opal’s bow is done with construction and I’ve started painting. The gradient painting is a huge pain in the ass but it does look pretty cool.

IMG_1316.JPG

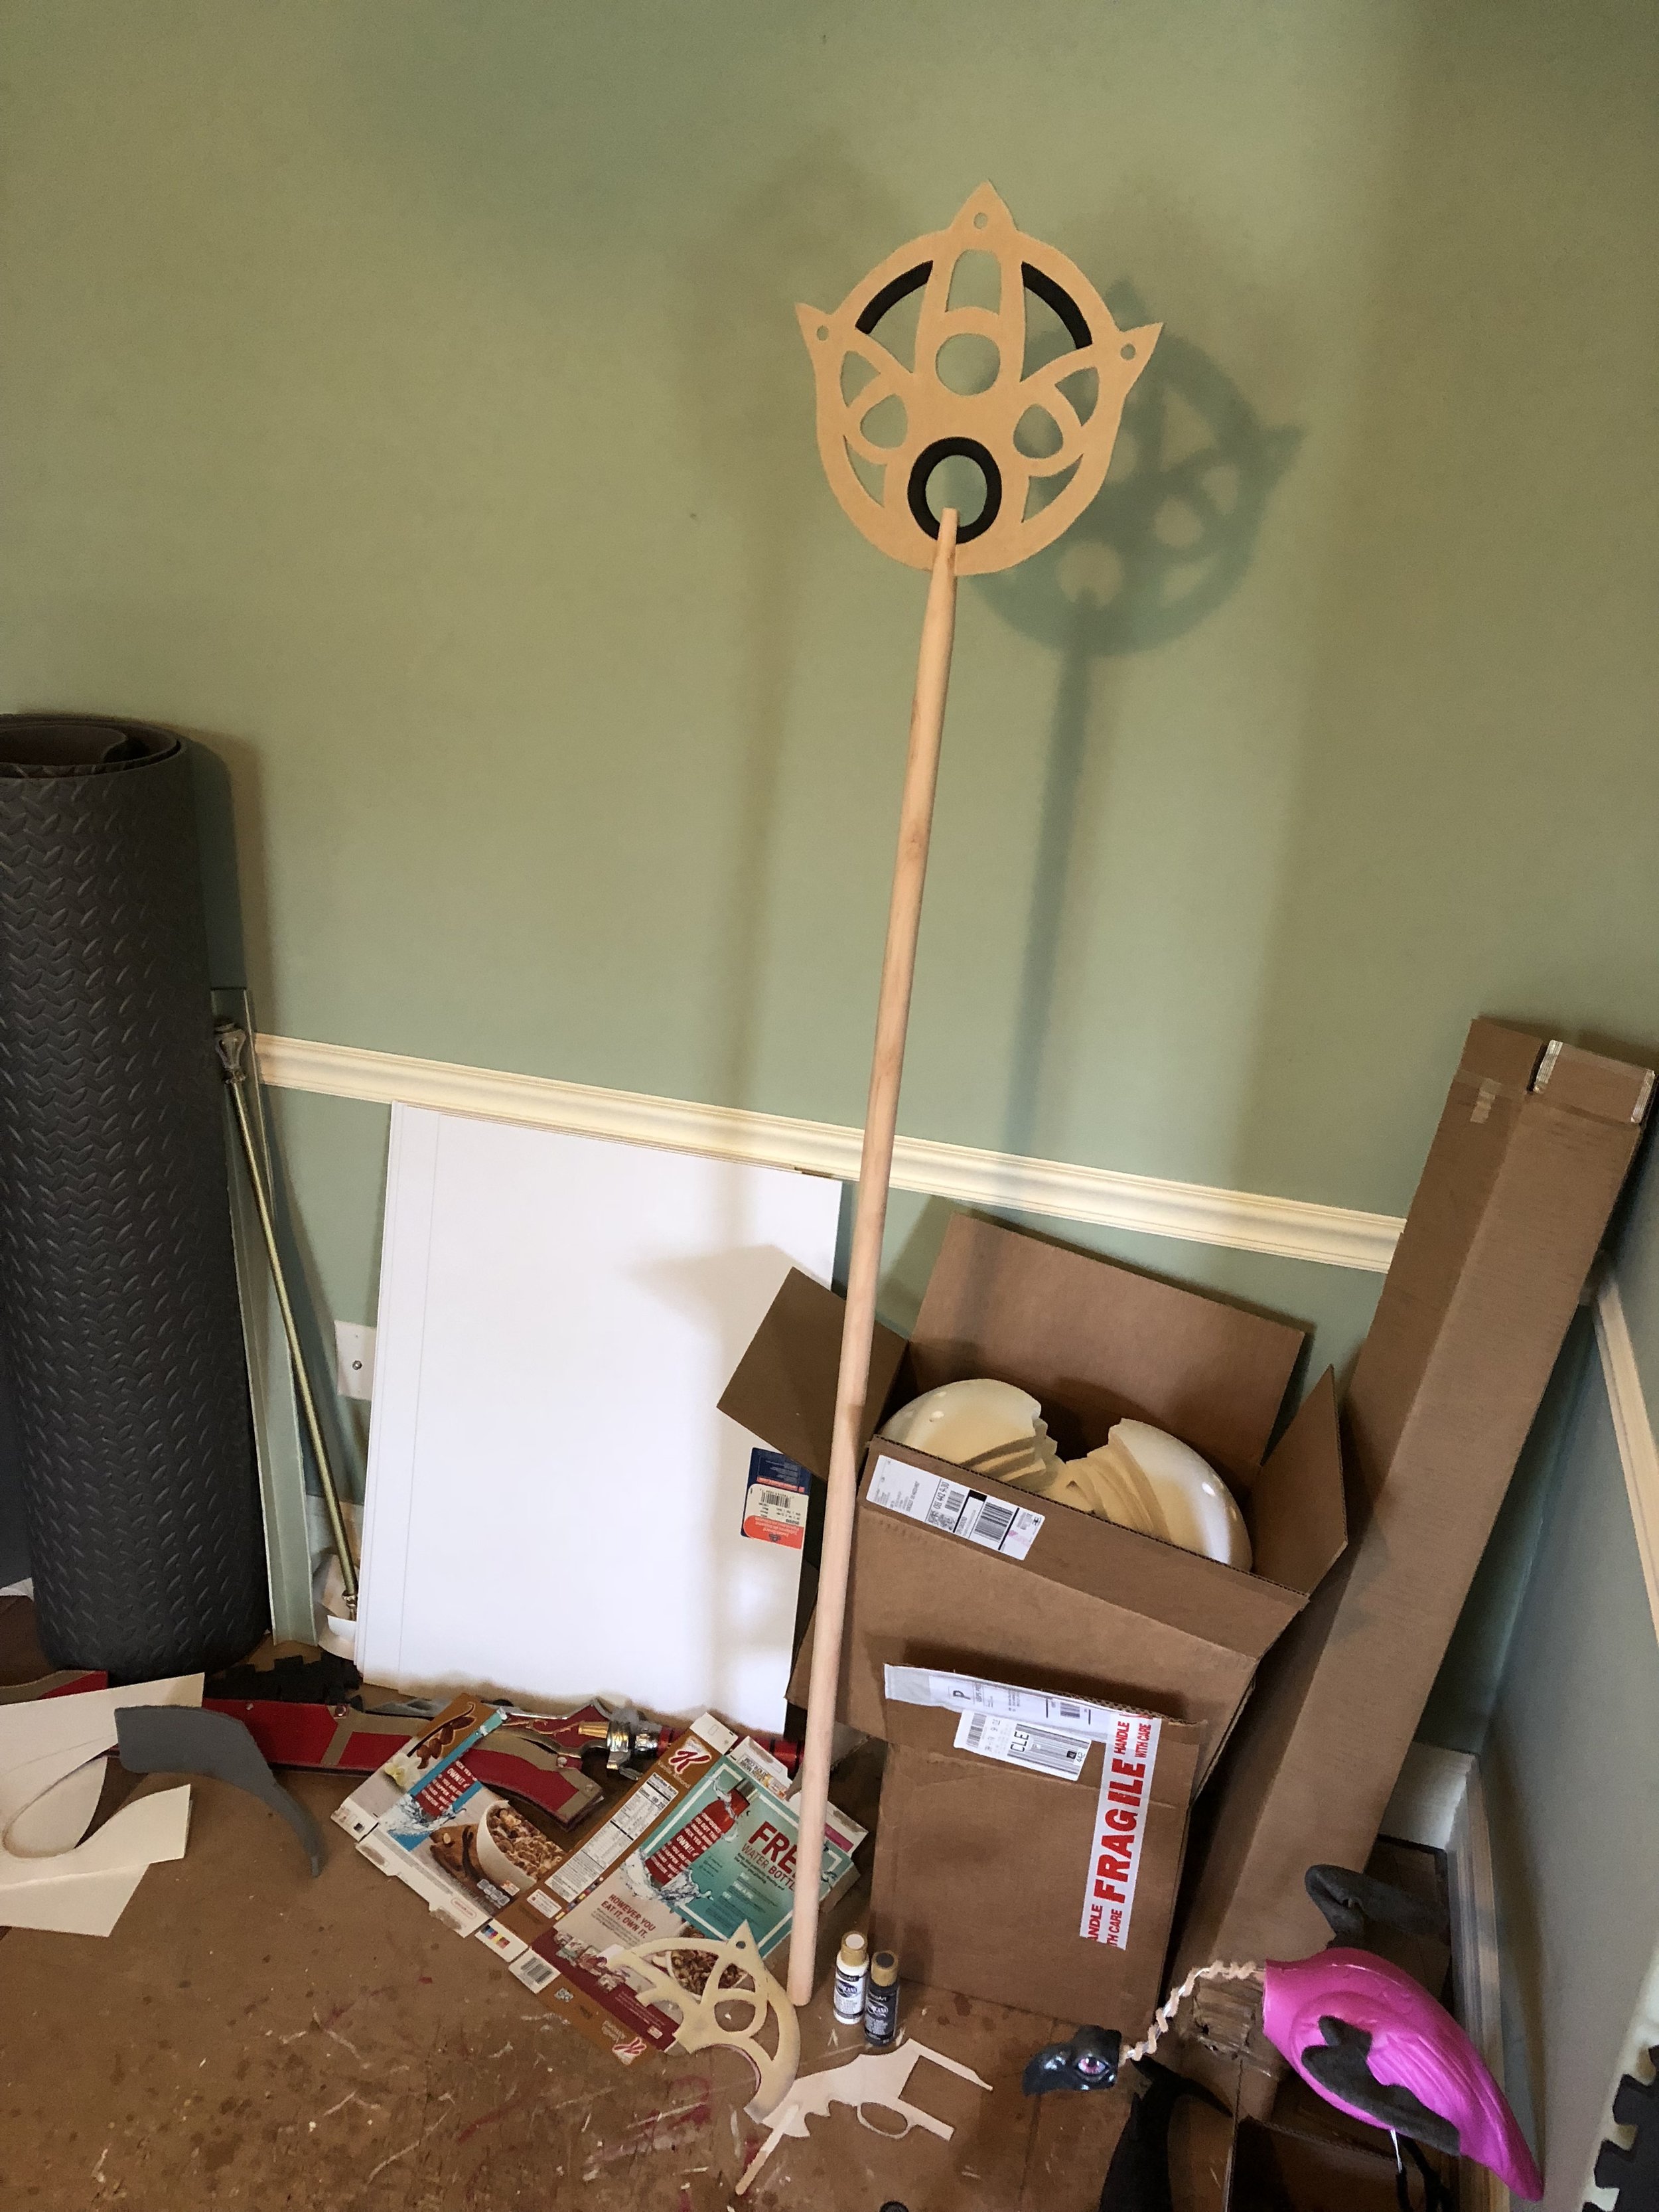
Now, on to new projects which I’ve somehow magically gotten further on than the stuff you’ve already seen! I’ve started working on Yuna’s staff from FFX. It’s the staff you traditionally see her with in all of the official artwork.

FFX_Artwork_Yuna.png

For the head, I used 1/4” MDF and thick craft foam to make the little blue details on the gold head. The shaft is a wooden broom handle I got at Home Depot.

IMG_1279.JPG

The blade on my scroll saw broke in the middle of trying to cut the staff head out, which was slightly terrifying. Thankfully neither me nor the prop was hurt, I just had to finish cutting it out with my jigsaw instead.

IMG_1280.JPG
IMG_1314.JPG

Here’s the head all painted! Next step is to paint the shaft blue but I haven’t gotten to that yet.


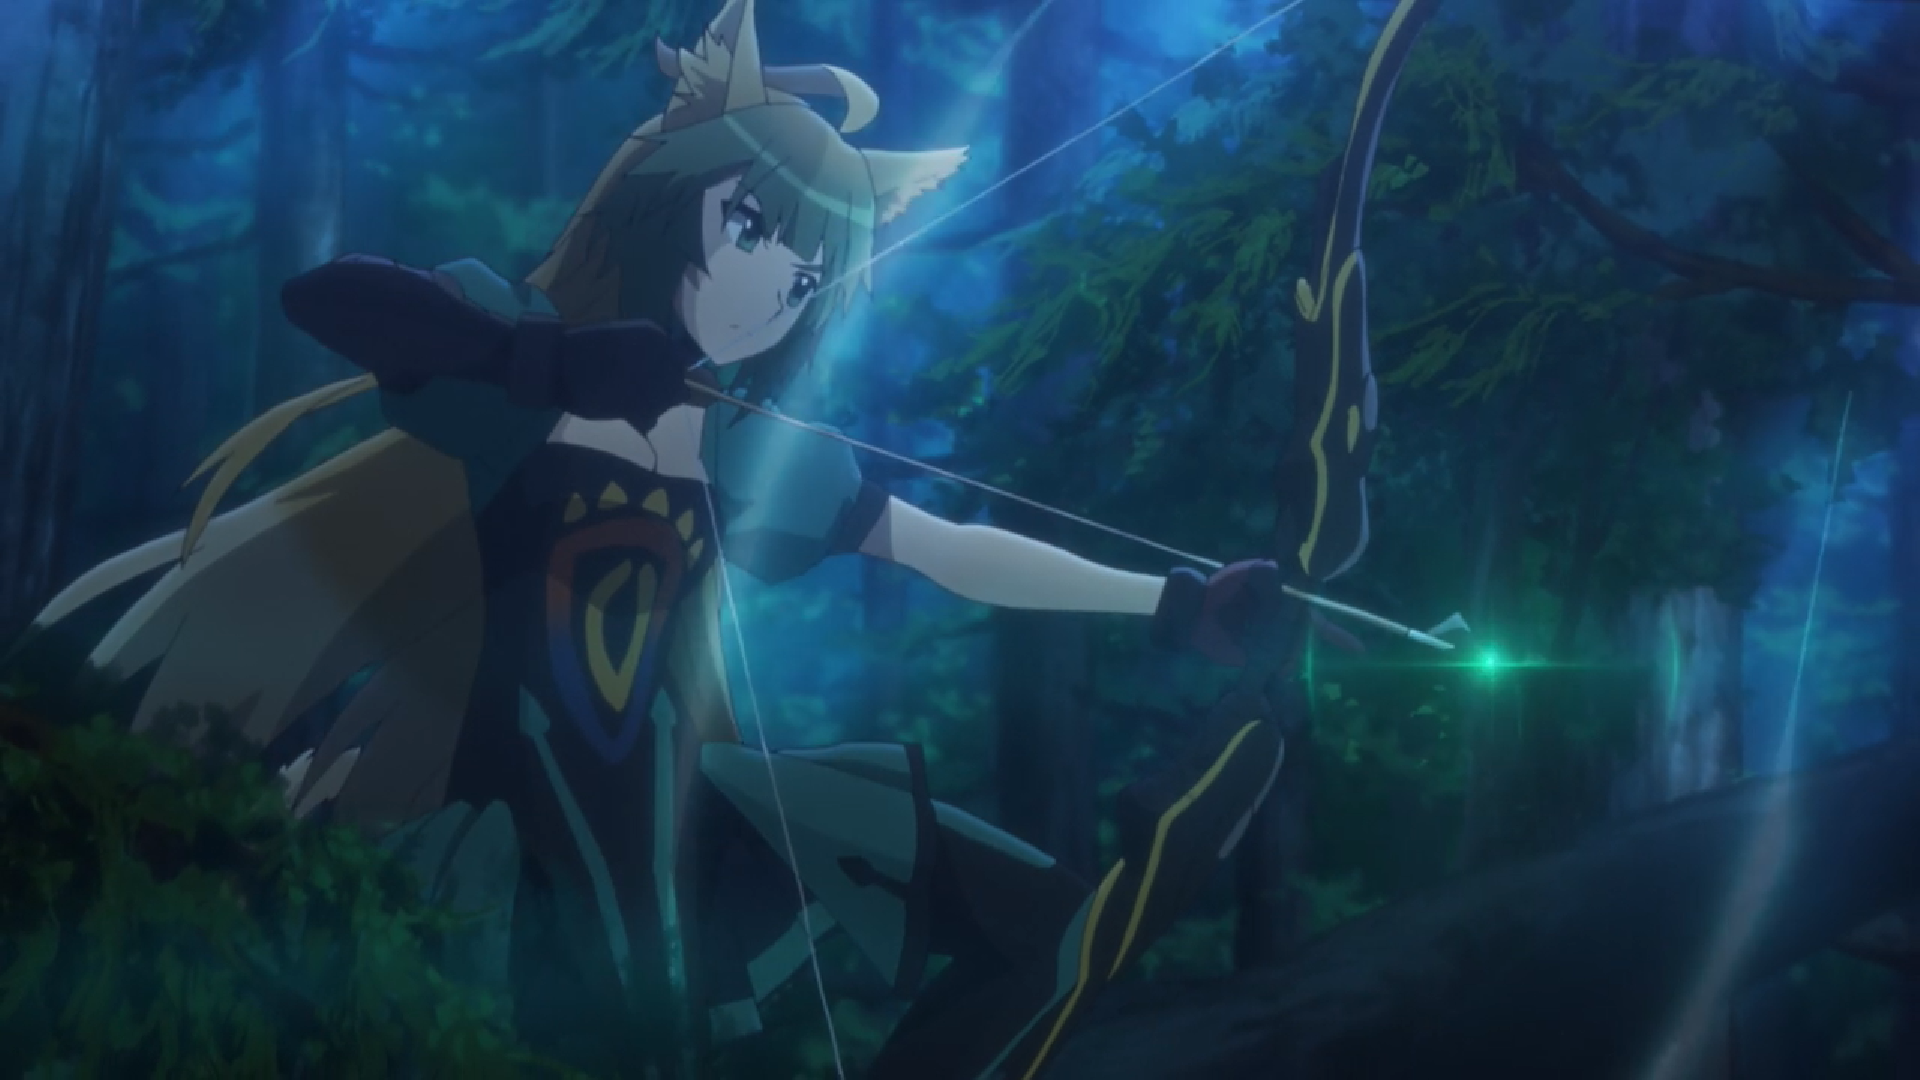
The last new item on my list is Atalanta’s bow from Fate/Apocrypha! I’m making this for a friend of mine and we’ll be cosplaying together at Youmacon.

2018-09-08 (1).png

Much like Opal’s bow, the base is wood with a section of broom handle as the grip. Despite the overall shape of the bow being a little more intricate, this actually took way less time to put together than the other bow because it didn’t involve two layers of wood together (which took a LOT of sanding to even out) and the weird round spiral bit that also took a lot of time and work to get fit together and looking right.

IMG_1064.JPG
IMG_1068.JPG

The raised details are all made from either craft foam or cereal box… you can probably tell from the photo above which sections are which ;-)
The bits around the grip are covered with worbla scraps that I heated up and mushed together.

With the details done, all there was left to do was paint and add the bowstring. The simple black & gold color scheme is what really made the difference as far as time spent detailing compared to the other bow I’m working on.

IMG_1277.JPG

And that’s all the commission work I’ve gotten done recently. I was out of town all last week visiting friends and going to my brother-in-law’s wedding so I was not as productive as usual. This week I’m aiming to get Yuna’s staff and Opal’s bow done so keep an eye on my instagram to see more progress photos! I’ve also been working on my new cosplay for Youmacon which is mostly done at this point, so I’ll be posting again later this week or some time next week with all the photos and construction notes on that!

WIP Wednesday

Michael MacWolff

Hey everyone! I've been busy working on commissions and trying not to get too sidetracked by personal projects and vidya games (I've only had moderate success in that respect) but even so I've made some good progress on stuff so I wanted to share.

First up is my most recently finished commission!

IMG_0339.JPG

This is the Zweihander from Dark Souls. This photo might not properly show how big this thing is, so here's a child for context.

Photo courtesy of ashenonecosplay

Photo courtesy of ashenonecosplay

So yeah, it's 5' tall and it was a pain in the ass to ship. But fortunately one of my worbla boxes was tall enough to wrap almost the whole thing, with an extra box to fill the gap.

This guy is made entirely of MDF, so it's nice and sturdy, which was important given the length and width of the blade (it does get a little droopy if you hold it with the flat part of the blade parallel to the floor). There's also a few small details made from cardstock and worbla.

IMG_0176.JPG
IMG_0183.JPG

As you can see, the sword is so long I couldn't make the whole thing in a single piece of MDF. Fortunately the split is in the hilt portion, so there's no worry of having a weak point because it's sandwiched between two other solid pieces of MDF.

This was a pretty straightforward prop since there's not a ton of intricate detail, the only cumbersome part is it's size... which just meant I had to spend about 4 days sanding the damn thing.

IMG_0200.JPG

But once that part was done, it was a quick two days to get the whole thing sealed and painted! I'm super  happy with how this one turned out, and I'm loving the MDF for projects like this, it just work so well for blades! I'm going to be making Mordred's Clarent Blood Arthur for Colossalcon and I'm pretty much making it the exact same way. There's a bit more detail on that one so there will be more craft foam and/or compressed paper board to use but it'll be a comparable build (thankfully it's not 5' long like this one).

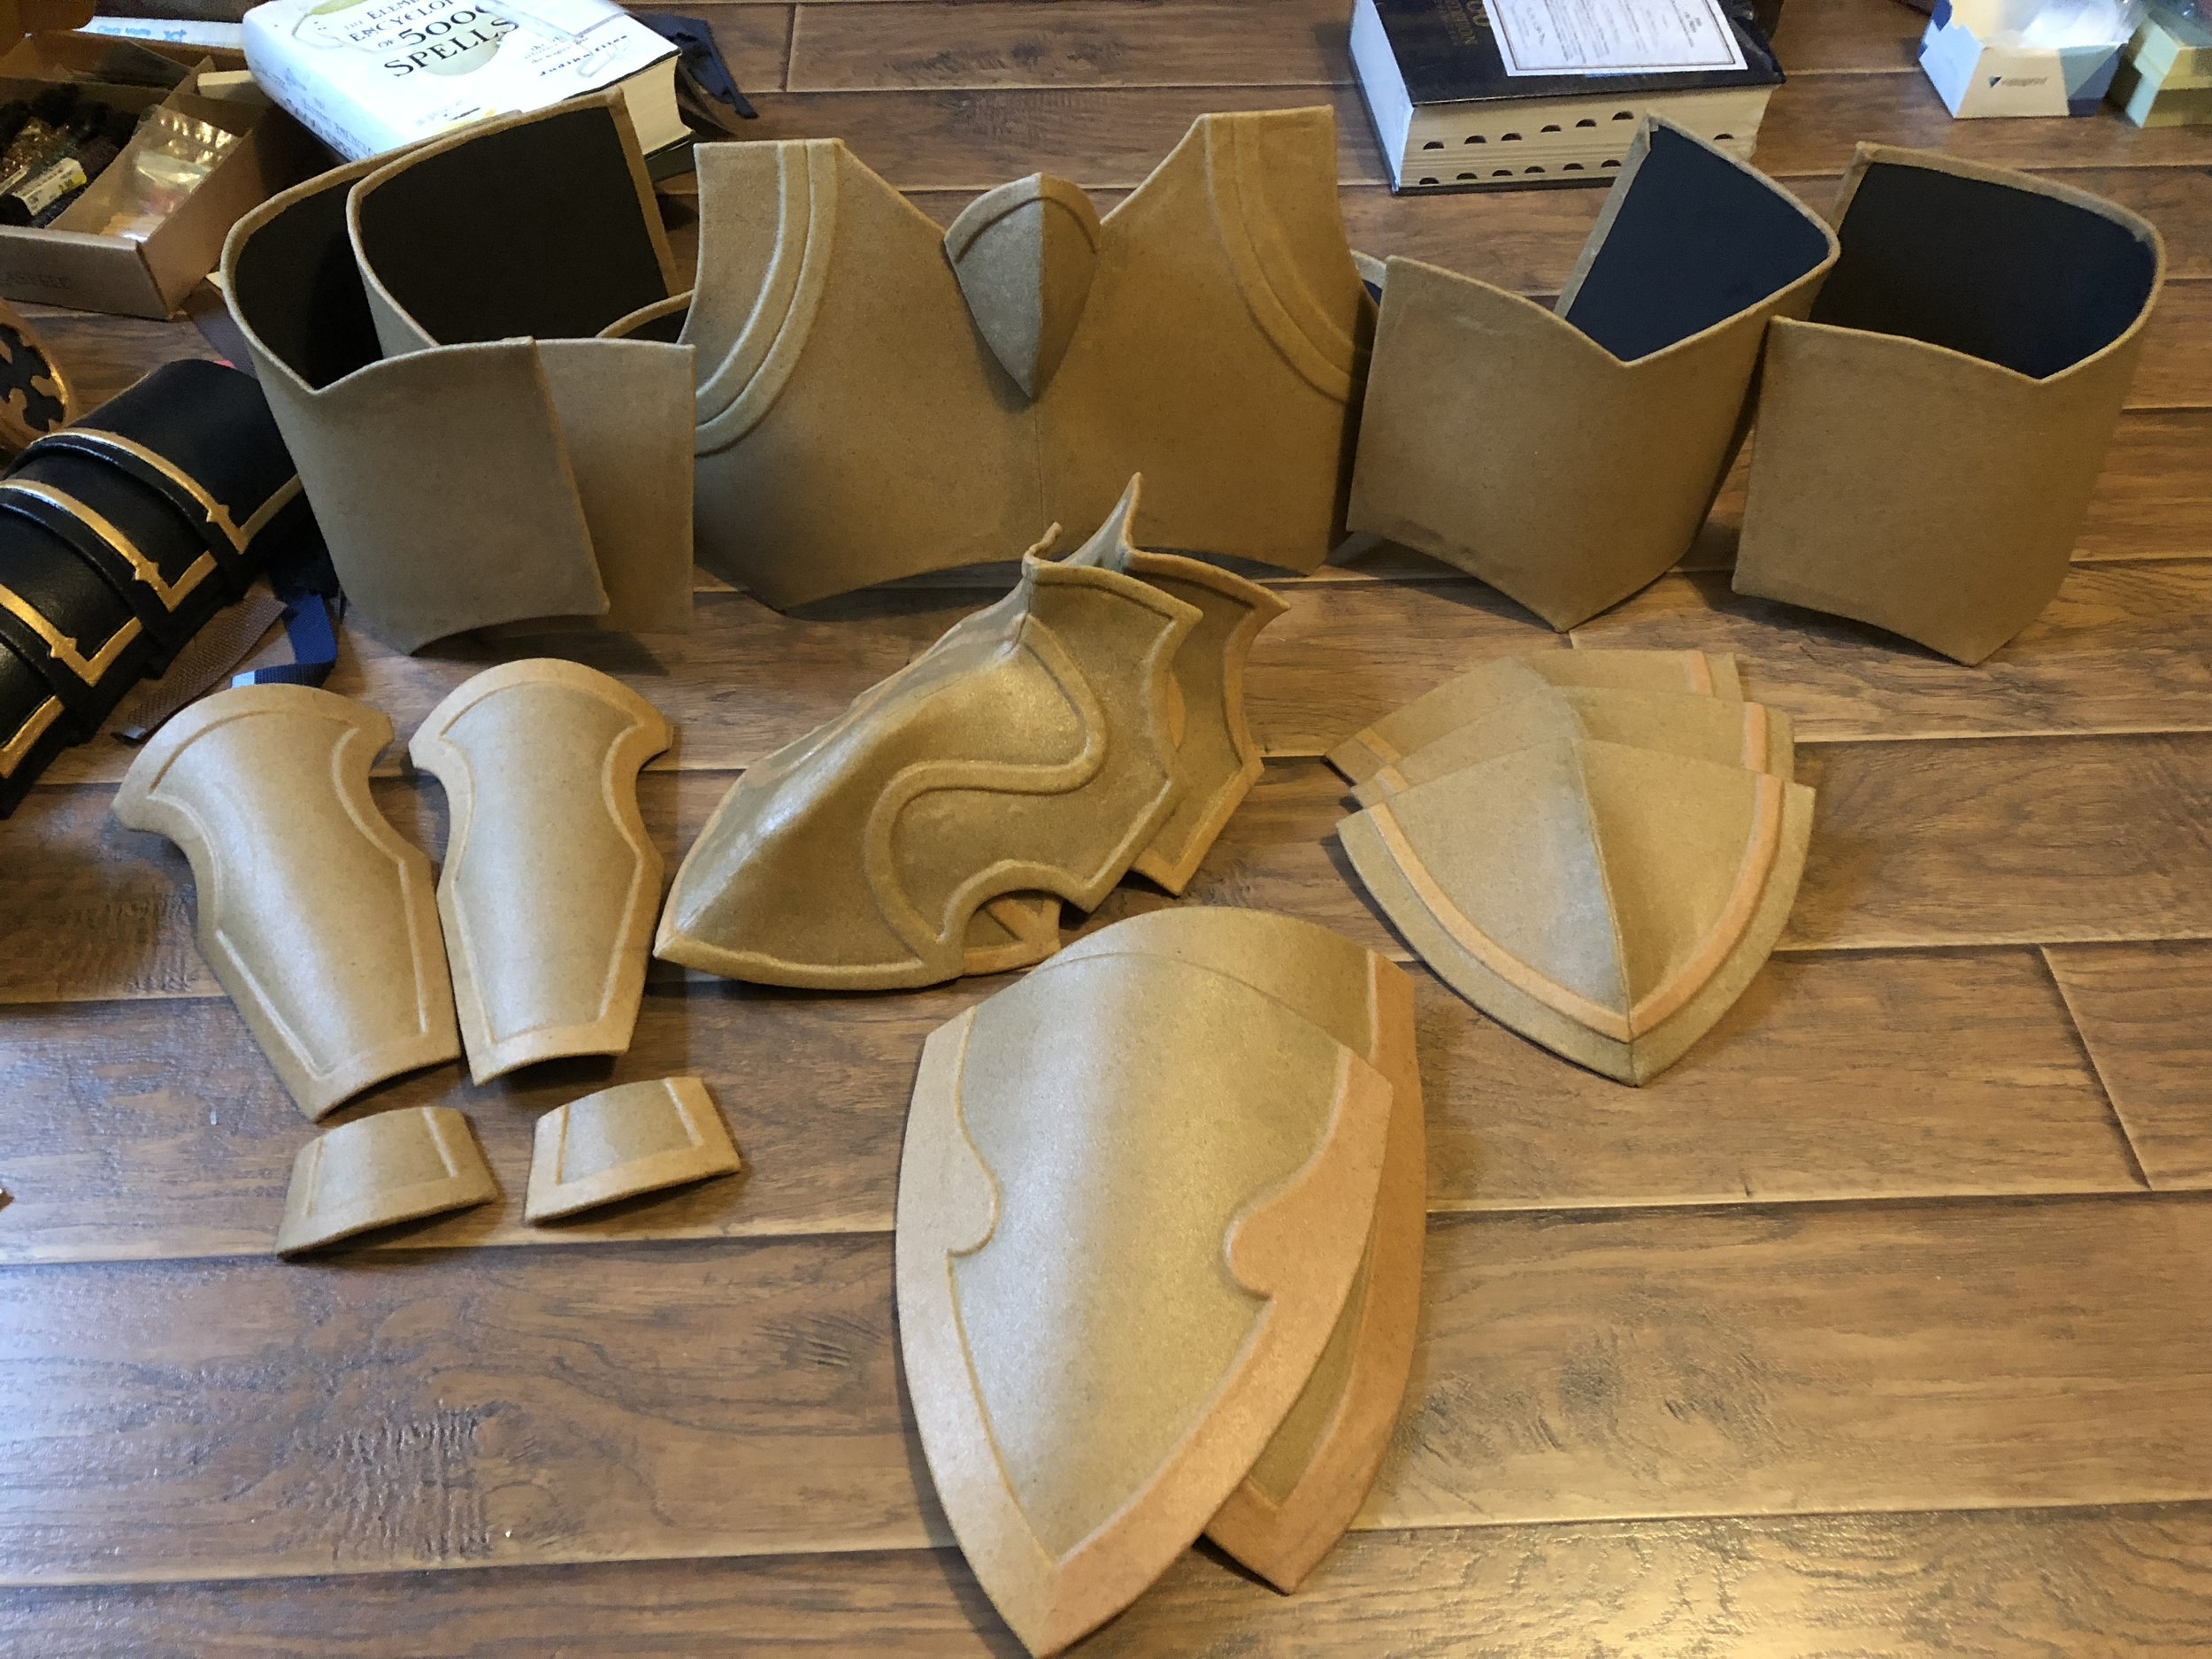
The other big project I've been working on is Xander's armor from FE Fates. It's been a project long in the works, if any of you even remember when I made Seigfried (hint: it was in 2016), that's when this project was initiated, but it wasn't until the beginning of this year that I actually started working on the armor. Things have come together pretty quickly, which is good because I need to get it finished and shipped off soon!

IMG_0177.JPG
IMG_0196.JPG

I'm building it the same was as I did with Leo's armor, and most of the other armor pieces/sets I've done. The base is craft foam and/or cardstock, and then craft foam and EVA foam for the raised details. Wrap all of that in a layer of worbla and you have your armor section!

IMG_0263.JPG
IMG_0376.JPG
IMG_0369.JPG
IMG_0379.JPG

At this point, all of the pieces are built and sealed, so all that's left is a few days of painting and some strapping and it'll be ready to go! I'll definitely be posting more photos once things are painted and put together, though you won't see the full suit put together until my client actually wears it nice my dress form is not sized right so I'm going to have them piece it together and get the velcro placed so it actually fits well.

Well, that's all for now, time to get back to painting!

A Roll in the Hayseed

Michael MacWolff

Hey folks! Quick post today since I finished a commission I've been working on and I wanted to show it off!

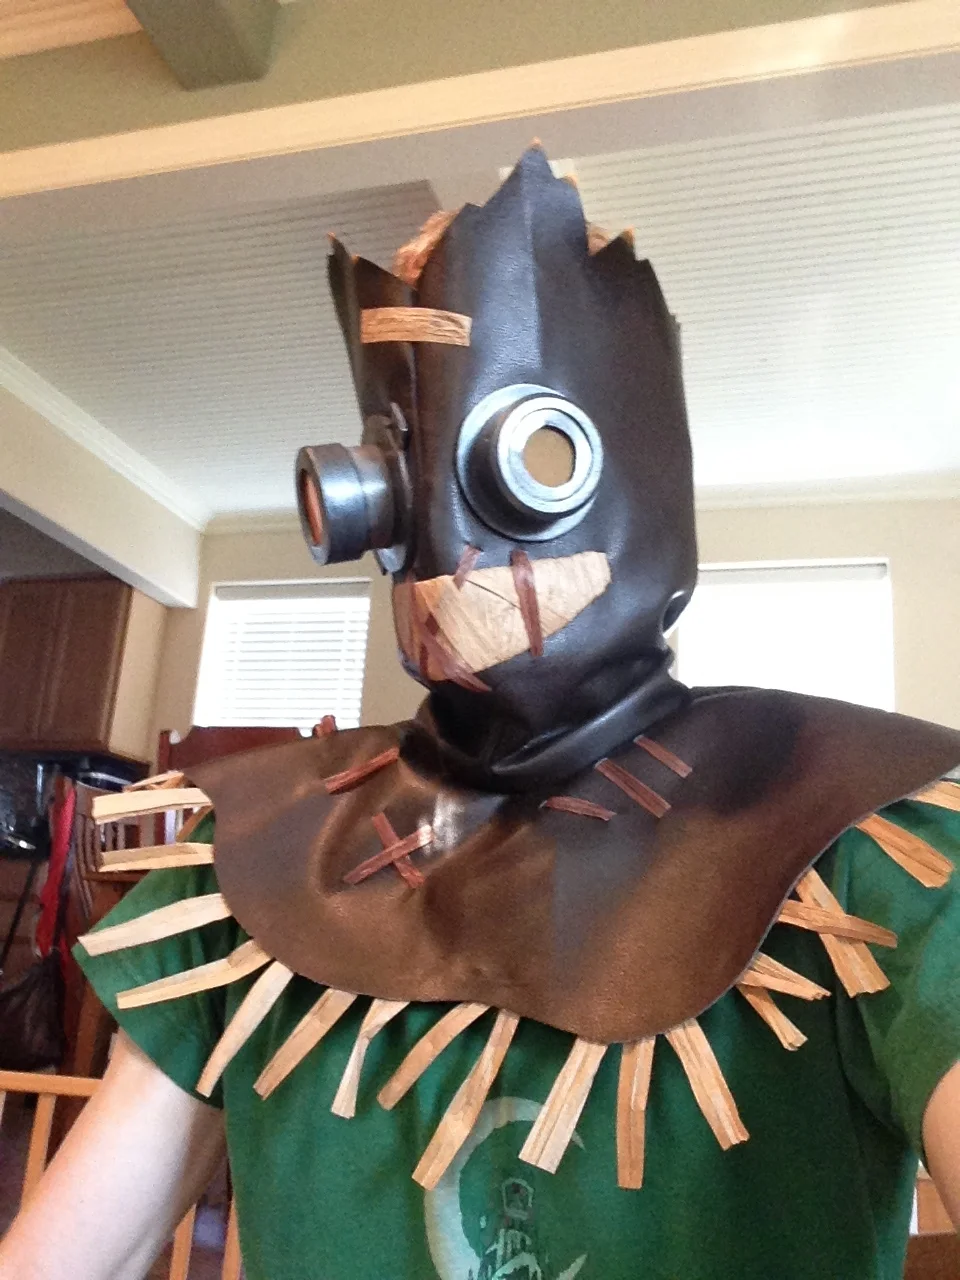
First off, I was tasked with another Overwatch thing, and of course the other outstanding commission I have is more Overwatch. What is my life?

maxresdefault.jpg

A longtime customer requested the Haysee Junkrat mask. Which at some point I may also be making his weapon for it, but we'll see about that.

The main ingredients for this project were:
-Dark brown faux leather vinyl
-Raffia ribbon in brown & tan
-Craft foam
-Some other random junk

I started by building the mask itself, unsing the vinyl. It velcros down the back for easy wearing and removal.

IMG_8635.JPG

For the mouth, I cut another piece of vinyl in a smile-shape, then hot glued all of the raffia ribbon to it. Once the glue cooled I stitched it to the mask. For the ribbon above the eyes, I actually made two slits in the vinyl and threaded the ribbon through, hot gluing it into place on the back. I did that for all of the other ribbon that's attached as well, which you can see here (apologies for the blur).

IMG_8639.JPG
IMG_8699.JPG

For the goggle-eye parts, I started with a PVC piece for the smaller one, and a length of cardboard mailing tube for the larger one. For the orange lenses, I used tranparent colored plastic folders... specifically these ones. They didn't look very orange with just one layer, so I doubled it up for each lens. The rest of the shaping on the eye pieces are all done in craft foam.

IMG_8634.JPG

I attached them after painting them to avoid getting paint on the vinyl. I used my trusty E-6000 to do the job. 

IMG_8697.JPG

As you can kind of see in this photo, I added the scorched/still smoldering details to the top of the mask. I used a black sharpie for the black, and smudged it with my finger along the bottom edge to get a slight gradation to it, and blend the color into the brown of the vinyl. Then the smoldering tips I simply painted with orange acryllic.

IMG_8708.JPG

The last step was to add the lights to the eyes, which I used a set of moon lights, coiled around the inside of the goggle lenses. the wire was then stitched to the inside of the vinyl in several places, and velcro was added to the battery pack so it could be attached and easily removed to change the batteries.

IMG_8700.JPG

And that's that! Another finished product and another (hopefully) happy customer!

Last thing today is an exciting announcement! Apparently my blog is popular enough, perhaps due to its being featured on Feedspot.com's top 75 Cosplay Blog List, but I've started getting affiliate offers that might help me generate some extra money! And let's be honest, I could really use the additional income. So my first official affiliate is Sclera Lenses!

They're an online contact lens store with a huge selection of colored lenses, including special designs, UV-reactive lenses, and, obviously, sclera leanses. You should definitely check them out because they are already very reasonably priced and they have a summer sale going on right now and you can get 15% off using the code SUM15 (and please use the link provided to help support Mikey Does Cosplay!)

Any time you want to find them in the future (since you probably don't want to have to come back to this page), just scroll down to the bottom of my home page and look for my affiliate banners!