Contact Us

Questions? Comments? Concerns? Suggestions? Submissions? Shout-outs?

Whatever you want to tell us here at Mikey Does Cosplay, we're always happy to hear your thoughts and feedback!


123 Street Avenue, City Town, 99999

(123) 555-6789

email@address.com


You can set your address, phone number, email and site description in the settings tab.
Link to read me page with more information.

reflection.jpg

Blog

Here's where the magic happens. I'll be posting about all of my experiences and experiments (both failed and successful ones), introducing you to my costumes, sharing fun stories, linking tutorials and useful products, and who knows what else!


Filtering by Tag: mask

A Roll in the Hayseed

Michael MacWolff

Hey folks! Quick post today since I finished a commission I've been working on and I wanted to show it off!

First off, I was tasked with another Overwatch thing, and of course the other outstanding commission I have is more Overwatch. What is my life?

maxresdefault.jpg

A longtime customer requested the Haysee Junkrat mask. Which at some point I may also be making his weapon for it, but we'll see about that.

The main ingredients for this project were:
-Dark brown faux leather vinyl
-Raffia ribbon in brown & tan
-Craft foam
-Some other random junk

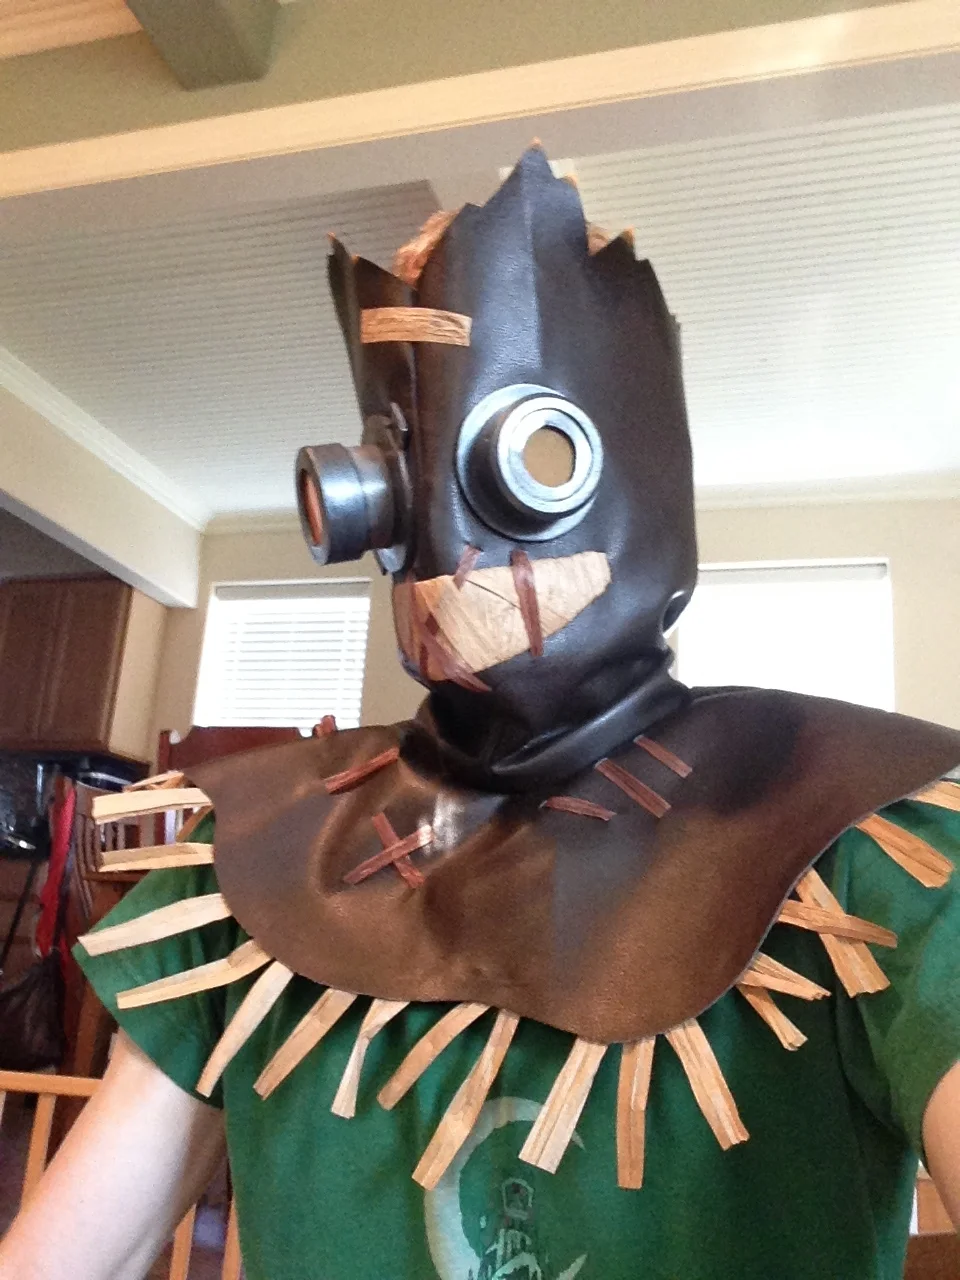
I started by building the mask itself, unsing the vinyl. It velcros down the back for easy wearing and removal.

IMG_8635.JPG

For the mouth, I cut another piece of vinyl in a smile-shape, then hot glued all of the raffia ribbon to it. Once the glue cooled I stitched it to the mask. For the ribbon above the eyes, I actually made two slits in the vinyl and threaded the ribbon through, hot gluing it into place on the back. I did that for all of the other ribbon that's attached as well, which you can see here (apologies for the blur).

IMG_8639.JPG
IMG_8699.JPG

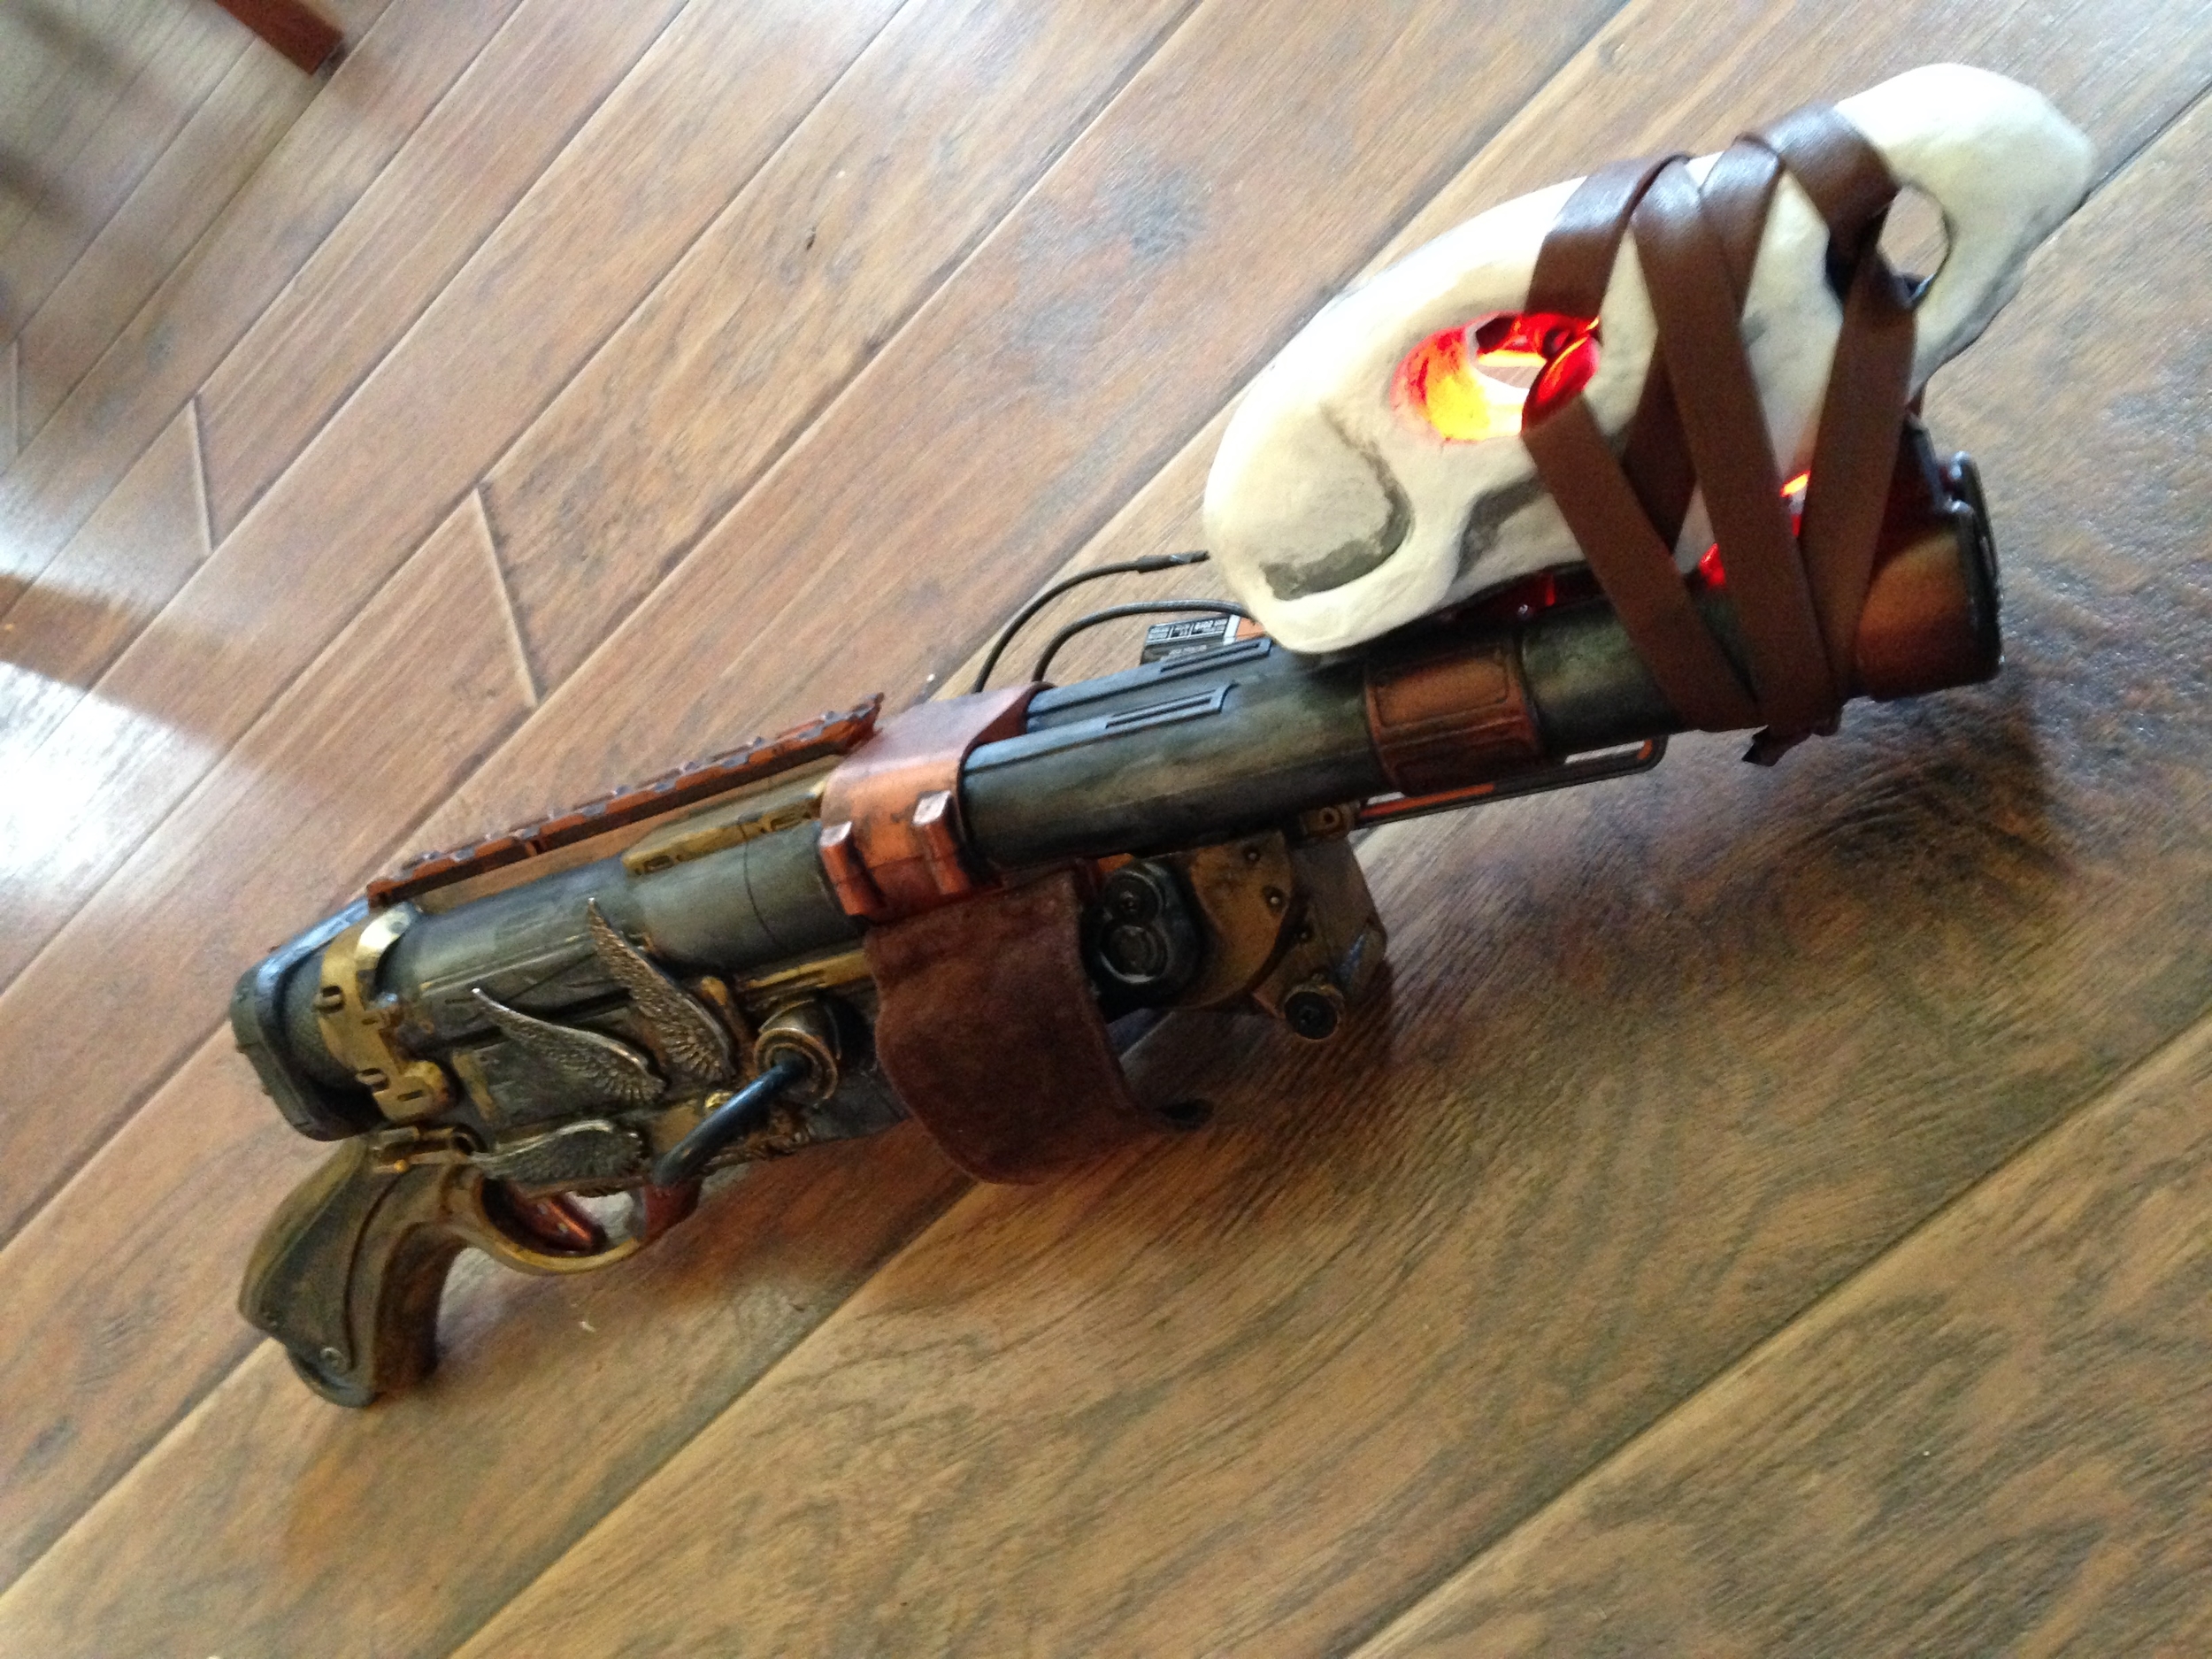
For the goggle-eye parts, I started with a PVC piece for the smaller one, and a length of cardboard mailing tube for the larger one. For the orange lenses, I used tranparent colored plastic folders... specifically these ones. They didn't look very orange with just one layer, so I doubled it up for each lens. The rest of the shaping on the eye pieces are all done in craft foam.

IMG_8634.JPG

I attached them after painting them to avoid getting paint on the vinyl. I used my trusty E-6000 to do the job. 

IMG_8697.JPG

As you can kind of see in this photo, I added the scorched/still smoldering details to the top of the mask. I used a black sharpie for the black, and smudged it with my finger along the bottom edge to get a slight gradation to it, and blend the color into the brown of the vinyl. Then the smoldering tips I simply painted with orange acryllic.

IMG_8708.JPG

The last step was to add the lights to the eyes, which I used a set of moon lights, coiled around the inside of the goggle lenses. the wire was then stitched to the inside of the vinyl in several places, and velcro was added to the battery pack so it could be attached and easily removed to change the batteries.

IMG_8700.JPG

And that's that! Another finished product and another (hopefully) happy customer!

Last thing today is an exciting announcement! Apparently my blog is popular enough, perhaps due to its being featured on Feedspot.com's top 75 Cosplay Blog List, but I've started getting affiliate offers that might help me generate some extra money! And let's be honest, I could really use the additional income. So my first official affiliate is Sclera Lenses!

They're an online contact lens store with a huge selection of colored lenses, including special designs, UV-reactive lenses, and, obviously, sclera leanses. You should definitely check them out because they are already very reasonably priced and they have a summer sale going on right now and you can get 15% off using the code SUM15 (and please use the link provided to help support Mikey Does Cosplay!)

Any time you want to find them in the future (since you probably don't want to have to come back to this page), just scroll down to the bottom of my home page and look for my affiliate banners!

Dragon Priest Mask and some Steampunk Stuff

Michael MacWolff

I'm taking a hot second to show off my finished dragon priest mask and then I'm disappearing back into my cave where I'm assembling a million and one paper flowers out of magic cards. So here 'tis!

dragon priest mask

I'm super happy with how the paint job came out and so is my client, so BOOYAH!

Also, while I'm here, here's my (finally) finished steampunk shotgun that I've been half working on forever and finally got my shit together to finish weathering it and everything. I debuted it in its final form at a steampunk event in the Cuyahoga Valley (you know, that park that used to steal my sou... I mean that I used to work at).

Nidhogg1
Nidhogg2

It has been dubbed "Nidhogg" and is much more menacing in more modest lighting.

And here's a few photos from the event, coutresy of Three Rivers Modeling Co.

CZU at CVSR
face off

More Masks!

Michael MacWolff

Hey folks, as promised I have some updates on the second mask I've been working on, now that the RWBY one is finished.

The process was pretty much the same as the last one, but the shapes were a bit more organic this time which made things interesting.

2015-09-09 08.11.11.jpg
 

This is the dragon priest mask, from Skyrim. I don't know a ton about skyrim, but I do know this is a pretty cool mask. Just like last time, I put together the pattern on a wig head using cardstock. The shaping was a bit harder to figure out and I had to tweak things a bunch to get them right, but ultimately I had a viable pattern to use.


You know what comes next, make it again out of paperboard and cover it with worbla!

A note about using worbla over  detail pieces: start in the middle and work your way to the edges to avoid any bubbles.
Another note along the same lines: Popsicle sticks are great for pressing the worbla into the details. You can see how I did it with the eyes and cheekbone ridges.

The mask construction is done! Now it's time to add the loops for the straps to attach to. I did kind of a bad job of explaining how I made those last time so I tried to take pictures of the steps this time.

Start with some heavy-gauge wire. I think the wire I used was gauge 16, I wouldn't recommend anything thinner than that. You start by folding your piece of wire into a rectangle with the two ends overlapping on one side. Then take a long rectangle of worbla (I used two layers, and would recommend you do too for extra stability), and put it through your wire loop. Then heat up your worbla and fold it around the wire loop, over the edge where the two raw ends are. Then heat it up again and mush the soft plastic into the surface where the loops need to go. You definitely want a layer of worbla on the surface underneath the loop, because the worbla will stick better to other worbla than most other surfaces.

And that's were are now. I'll be priming and sanding for a few days and then it's on to painting! Huzzah!