Contact Us

Questions? Comments? Concerns? Suggestions? Submissions? Shout-outs?

Whatever you want to tell us here at Mikey Does Cosplay, we're always happy to hear your thoughts and feedback!


123 Street Avenue, City Town, 99999

(123) 555-6789

email@address.com


You can set your address, phone number, email and site description in the settings tab.
Link to read me page with more information.

reflection.jpg

Blog

Here's where the magic happens. I'll be posting about all of my experiences and experiments (both failed and successful ones), introducing you to my costumes, sharing fun stories, linking tutorials and useful products, and who knows what else!


Filtering by Tag: armor

New Year, (mostly) New Projects

Michael MacWolff

So now that I have my first con of the year under my belt, commission season is open yet again, meaning that I’m going to be busy making a bunch of awesome stuff for great people!

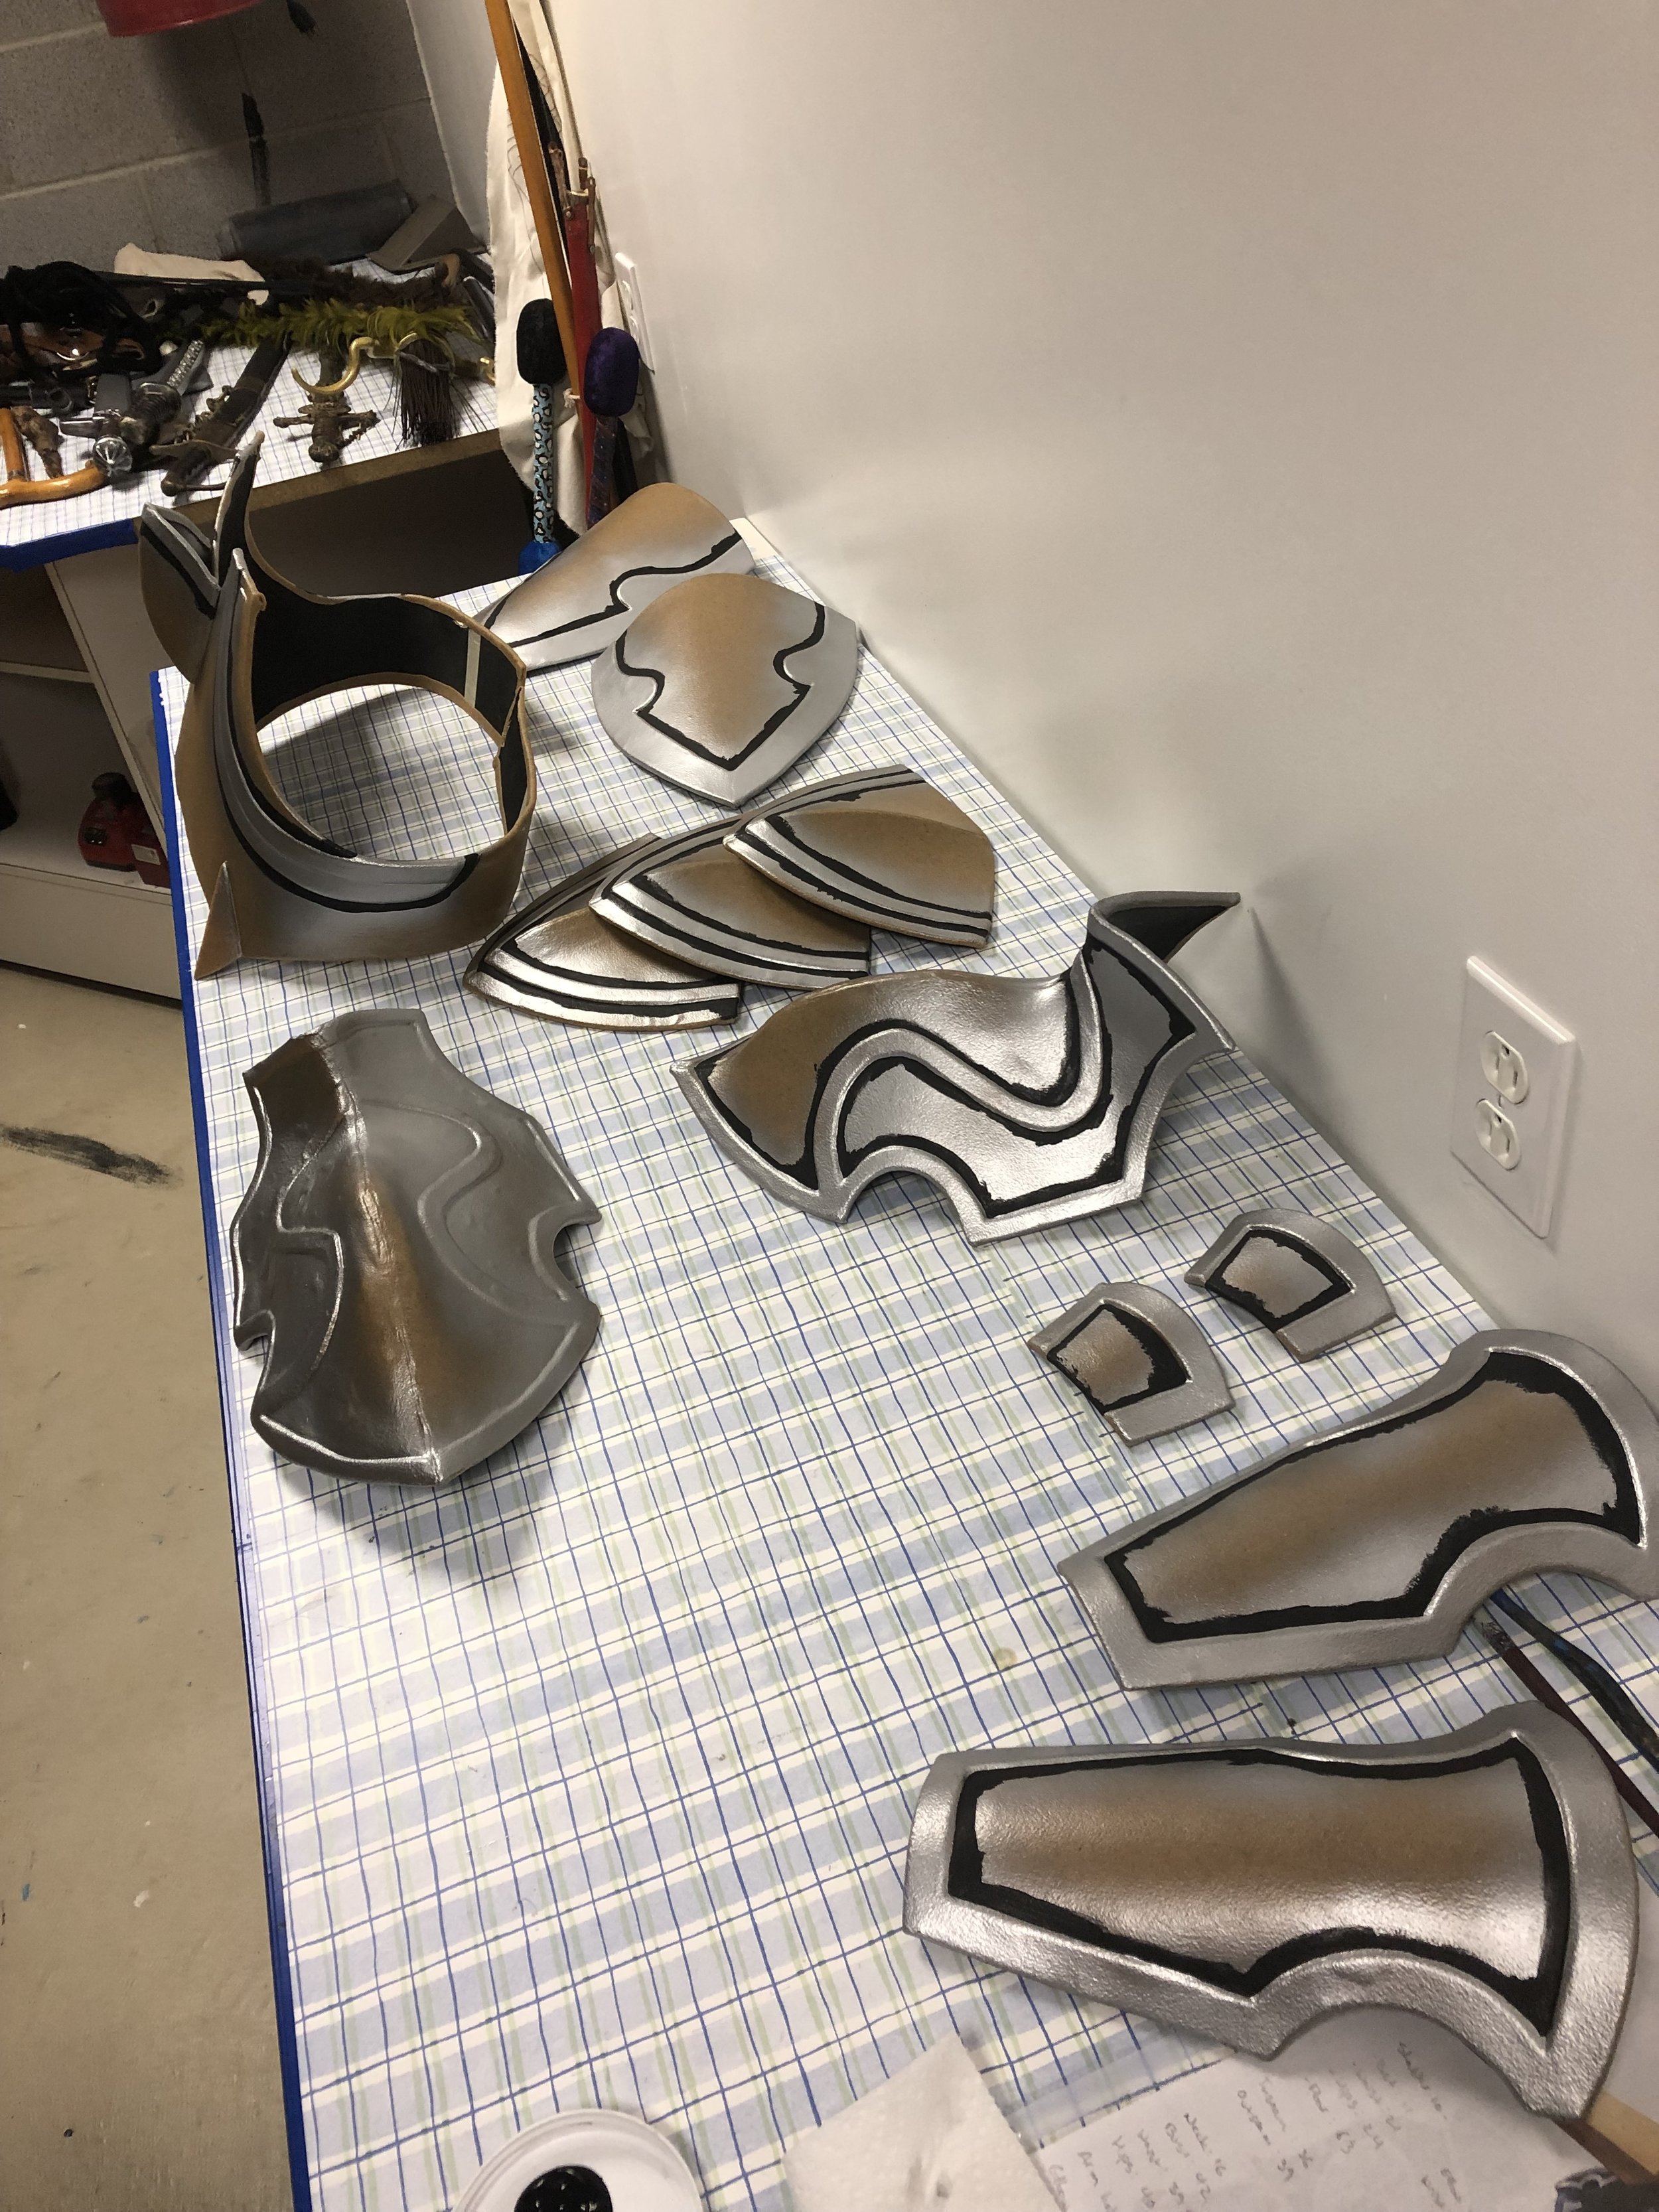
First up o the list is a project you’re all aware of already since I’ve been working no it off and on for quite some time now. It’s the 3rd set of Nohrian armor I’ve been tasked to construct, and this time it’s for Silas. I’ve shown you all progress photos of the build and now we’re into the finishing stages!

IMG_2483.JPG

Those of you familiar with my MO know that I generally try to spray the metallic bits when I can, as it’s a much faster and more consistent way to achieve an even color on them, so I sprayed the silver details on the pieces that have them.

IMG_2499.JPG

With the rest of the armor being black, I’d be brush painting the majority of bulk of the surfaces. In order to keep the silver details from needing touch-ups by getting black on them, but to save myself the time of painting a giant surface with a tiny paintbrush, I followed the normal procedure for painting walls. You “cut in” around the edges with a smaller paintbrush, then you use your larger brush to fill in the middle (when you’re painting walls, it’s usually a roller rather than a brush to paint the bulk, but I’m not going to roll paint armor… I don’t thing it’s turn out well XD)

IMG_2506.JPG
IMG_2511.JPG

Thankfully black paint covers pretty well, so it only took 2 coats to cover solidly (1 on on the first photo, second coat on the second photo)

Normally for stuff like this, I’d do contour painting to make the shapes pop a bit more, but that’s really hard to achieve when the surfaces are black, because despite what Sterling Archer might tell you, there’s no "slightly darker black” to use for shading, and it looks grey instead of black if you do too much highlighting. So I took my opportunities where I could and did some shading on the silver bits, where appropriate.

The shading is pretty subtle, so don’t worry if you don’t notice it, it is doing it’s job ~_^

The shading is pretty subtle, so don’t worry if you don’t notice it, it is doing it’s job ~_^

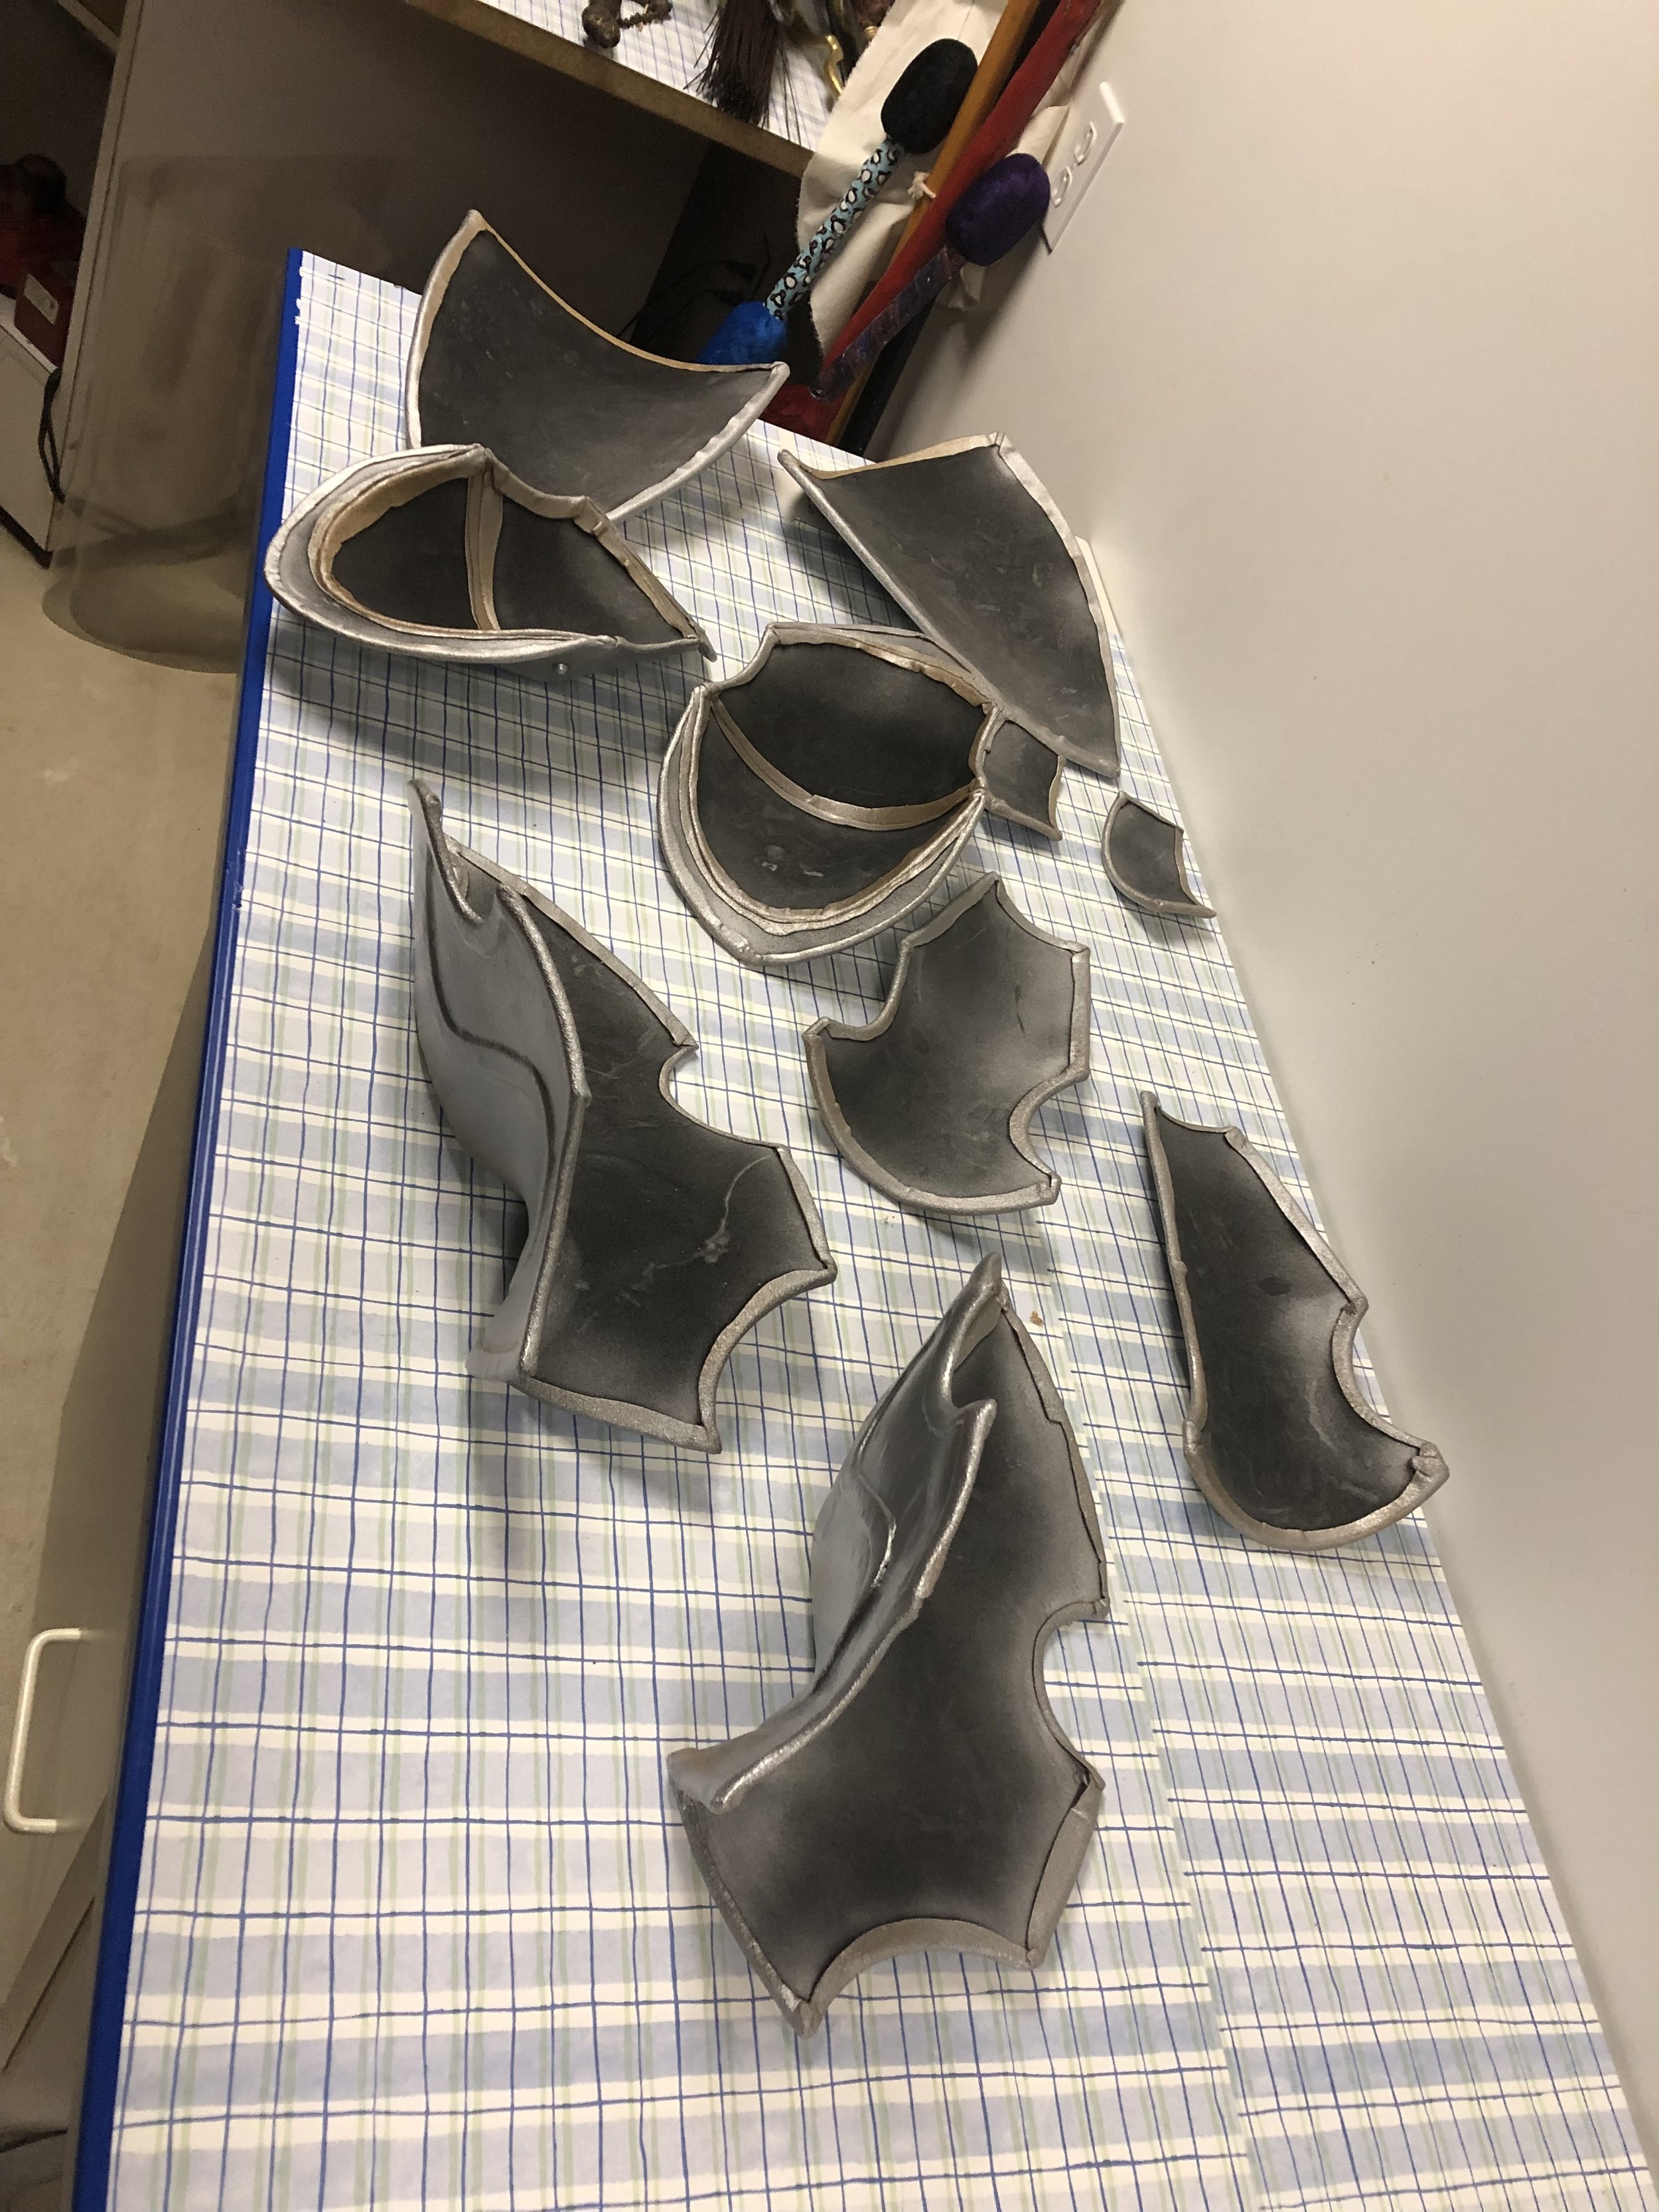
As per usual, the whole armor set is getting a top coat of matte mod podge to give it some moderate sheen and help protect the paint. I’ll also be using it for the back to seal the foam and make sure the silver overspray on the undersides doesn’t get on Indi’s cosplay.

There’s only a few bits left to do, mostly put together the pieces for the boots and seal the exposed foam on the undersides of all the pieces, so I’m glad to be nearly finished with this big project!


The second project I’ve been actively working on is a dark magician staff from Yu-gi-oh. A great big shout-out goes to Giant Dad for his continued support and business. He’s commissioned a number of things from me including the Fat Man from Fallout, and the Zweihander from Dark Souls. This latest project is only getting started but I’m hoping to crank it out in the next couple of weeks.

IMG_2487.JPG

This is the only photo I have at present, because I’ve just started working on it. The staff head is foam with worbla on both sides. For armor I usually only cover the outside and wrap a lip around to the back, to save weight and material; since you see both the inside and outside of the petal shapes I needed to coat both sides or it would have looked super weird. As you can see, the ball on the end lights sup too! I still need to color it green so it lights in the correct color, and somehow all of my green sharpies have disappeared…

You also may have noticed that the shaft of the staff is in fact a broom handle, you know how much I love using random junk in my props! And it works particularly well because it’s hollow so the light that illuminates the ball on the end fits nicely into it. You’ll be seeing more progress on this over the coming weeks.


The last project I’m actively working on is a personal one, that I’m hoping to have done for Tekko in April. If you know me you probably know I have a love of amphibians so I’m particularly excited to be cosplaying one of my favorite anuran characters: Frog from Chrono Trigger. I’m pretty sure I posted a few photos from my early construction of his head, but we’re gonna do it again anyway cause I can’t remember for sure.

IMG_2005.JPG

I did some research on furries for this project, because it seemed to make the most sense to me to construct the head the way they do, and I was fortunate to find some WIP photos from Tionniel on dA of how they constructed it so I had some good guidance.

I decided to cover the head with fleece, mostly for the sake of simplicity, and the face that it would be easily correctable if I messed anything up.

IMG_2215.JPG

Unfortunately, I didn’t have the foresight to trace the foam pieces before I put them together so that I had an accurate pattern for the fleece cover… so I had to eyeball it a bit. Thankfully, the fleece is pretty forgiving, though there are a few big folds in the back that… just have to be there lol.

IMG_2289.JPG

As you can see from the photo here, the nose is my only way to see (though you’ll see later that I have a second option). The eyes are the two halves of one of those big, clear, plastic ornaments. I used contact adhesive to attach the ring of green fleece around the base so they could be stitched onto the head. You might also notice that there’s pieces of masking tape on the eyes, that was to give myself a guide for painting the pupils. I wanted to paint the eyes on the inside of the baubles to they stayed nice and glossy, and to protect the paint from getting scratched as I continued to work on it, and of course later when it’s actually being worn. So since the layer against the plastic is the one you’re going to see, I started with the pupils and worked out from there. They’re not actually attached in the photo above yet, they’re just pinned into place so I could make sure the eyes weren’t gonna be looking in weird directions.

So now the eyes are done and attached! And the nose is fixed too, so it doesn’t look all janky any more.

The last bit I’ve done with the head is the eyelids, which is more bits of upholstery foam with fleece around it.

IMG_2522.JPG
IMG_2566.JPG

With that detail finished the only thing left are the tympanum (frog ears), which should be pretty easy.

And I did mention there was another way for me to see…

IMG_2582.JPG

RIBBIT!

That’s all for this week! I have a handfull of other new commissions in my queue so as soon as that armor is done (which I’m hoping to finish ASAP) you’ll be seeing some more new projects coming together, so don’t forget to check back! And also another friendly reminder that I am most consistent with posting WIP potos on my instagram, @mikeydoescosplay, so feel free to give me a follow to stay up-to-date!

WIP Wednesday

Michael MacWolff

Hey everyone! I've been busy working on commissions and trying not to get too sidetracked by personal projects and vidya games (I've only had moderate success in that respect) but even so I've made some good progress on stuff so I wanted to share.

First up is my most recently finished commission!

IMG_0339.JPG

This is the Zweihander from Dark Souls. This photo might not properly show how big this thing is, so here's a child for context.

Photo courtesy of ashenonecosplay

Photo courtesy of ashenonecosplay

So yeah, it's 5' tall and it was a pain in the ass to ship. But fortunately one of my worbla boxes was tall enough to wrap almost the whole thing, with an extra box to fill the gap.

This guy is made entirely of MDF, so it's nice and sturdy, which was important given the length and width of the blade (it does get a little droopy if you hold it with the flat part of the blade parallel to the floor). There's also a few small details made from cardstock and worbla.

IMG_0176.JPG
IMG_0183.JPG

As you can see, the sword is so long I couldn't make the whole thing in a single piece of MDF. Fortunately the split is in the hilt portion, so there's no worry of having a weak point because it's sandwiched between two other solid pieces of MDF.

This was a pretty straightforward prop since there's not a ton of intricate detail, the only cumbersome part is it's size... which just meant I had to spend about 4 days sanding the damn thing.

IMG_0200.JPG

But once that part was done, it was a quick two days to get the whole thing sealed and painted! I'm super  happy with how this one turned out, and I'm loving the MDF for projects like this, it just work so well for blades! I'm going to be making Mordred's Clarent Blood Arthur for Colossalcon and I'm pretty much making it the exact same way. There's a bit more detail on that one so there will be more craft foam and/or compressed paper board to use but it'll be a comparable build (thankfully it's not 5' long like this one).

The other big project I've been working on is Xander's armor from FE Fates. It's been a project long in the works, if any of you even remember when I made Seigfried (hint: it was in 2016), that's when this project was initiated, but it wasn't until the beginning of this year that I actually started working on the armor. Things have come together pretty quickly, which is good because I need to get it finished and shipped off soon!

IMG_0177.JPG
IMG_0196.JPG

I'm building it the same was as I did with Leo's armor, and most of the other armor pieces/sets I've done. The base is craft foam and/or cardstock, and then craft foam and EVA foam for the raised details. Wrap all of that in a layer of worbla and you have your armor section!

IMG_0263.JPG
IMG_0376.JPG
IMG_0369.JPG
IMG_0379.JPG

At this point, all of the pieces are built and sealed, so all that's left is a few days of painting and some strapping and it'll be ready to go! I'll definitely be posting more photos once things are painted and put together, though you won't see the full suit put together until my client actually wears it nice my dress form is not sized right so I'm going to have them piece it together and get the velcro placed so it actually fits well.

Well, that's all for now, time to get back to painting!

Have Mercy

Michael MacWolff

Welcome back!
As promised I have some construction photos from the second set of Imp Mercy armor I made, since I never really did that for the first set. It's the same bits: hip and leg armor.

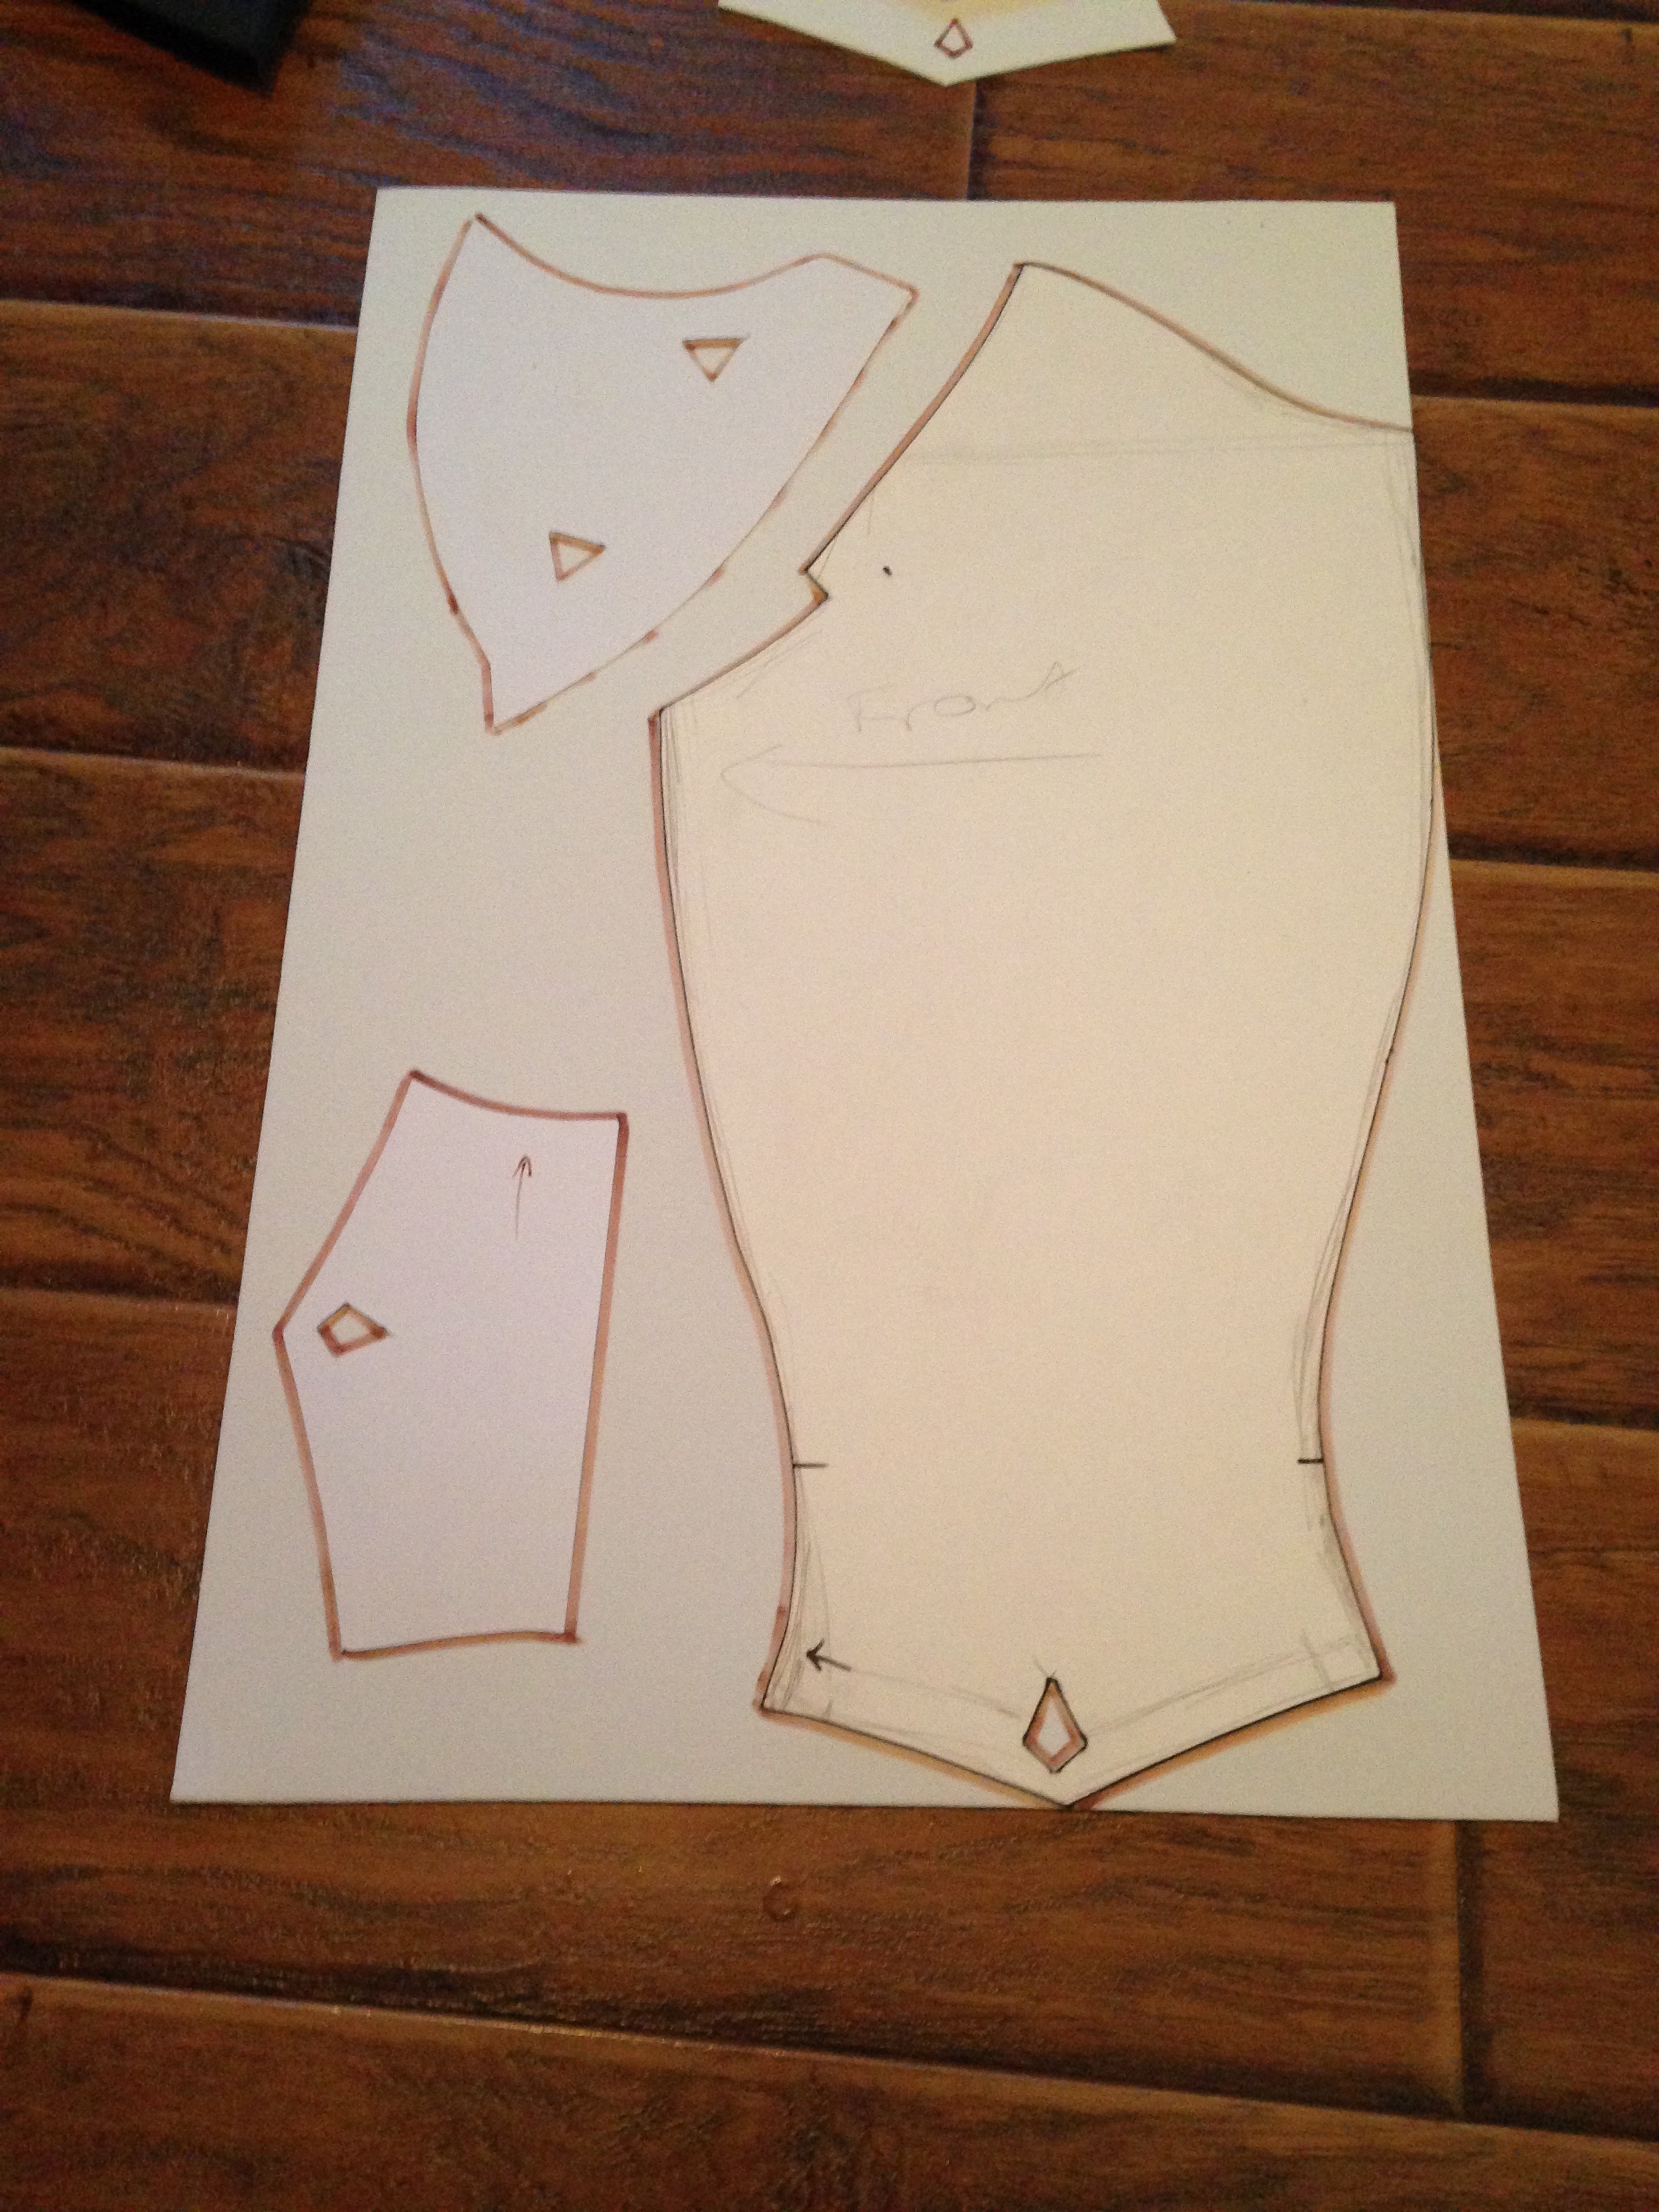
For the leg armor, I started by patterning out the armor on poster board, and then tracing my pattern onto 2mm craft foam.

IMG_9112.JPG

You can see the part that goes over the shin, the ankle piece, and the knee section here. You'll also notice the little diamonds and triangles on the patterns. Those are the details that will be raised on the final pieces: I incorporated them into my original pattern so they'd all end up in the right place and the armor would be as symmetrical as possible.

Each of these sets represents half a leg, so I had to repeat this 4 times to get all of the pieces I needed.

You'll notice the diamonds and triangles on here are yellow now. I cut out the small raised shapes form another piece of craft foam and glued them in place on each piece. When we cover the foam with worbla, these bits will stick out like we want them to.

Time to apply the worbla! Heat up your worbla for each individual piece, we will assemble the pieces later.

IMG_9125.JPG

I don't have photos of the individual pieces before I started assembling them, but you can see one of the leg pieces coming together here. to bring the center seam together, you'll want to heat up the edge of each piece, line them up, and press them together. Be careful not to burn your fingers (have have a few blisters from this assembly) as the worbla needs to be pretty hot to adhere to itself nicely. You can also see the raised detail on the ankle here, I used a popsicle stick to form the worbla around the raised piece of foam.

Once the main part of the leg is done, we'll do the same process with the knee piece, and then add it to the leg armor.

IMG_9134.JPG

There are also long, curved, spike-shaped pieces on the knees. I don't have photos of the pieces on their own, but here's the leg section with the spike added.

IMG_9173.JPG

Lastly, we'll assemble the ankle parts. I left those as separate pieces, rather than attach them to the main leg armor. The reason for that being that it would give better range of motion for your foot while you're walking in them.

With that, the leg armor is almost finished. I used a leather punch to add holes along the back edges so they can be laced together in the back. Then you add your several layers of mod podge to everything, and start painting!

IMG_8477.JPG
IMG_8500 (2).JPG

For painting, I sprayed the silver, then brush painted the black. Remember, metallics are always harder to get a uniform coat, so spraying is way easier. Also, don't forget to seal coat them with another layer or two of mod podge!

Now, on to the hip tassets!

These were made entirely out of foam, I didn't use a worbla layer for them because it wasn't really necessary. The base is EVA foam, and the raised sections are craft foam.

IMG_9106.JPG

I cut the EVA foam with a craft knife and then used my Dremel with a sanding bit to smooth out the rougher parts. For the craft foam, I mostly used scissors, and then an exacto knife for the holes in the center.

IMG_9110.JPG

To get the etched design into the foam, I traced the pattern onto my EVA foam, then sliced into the foam with my exacto knife. It's important not to cut too deep or you'll weaken the foa too much and risk it tearing. Once the foam has the cuts in it, go over the areas with your heat gun and the cuts will become little channels. You'll also want to heat up the whole thing so you can curve it to fit around your hips.

You'll notice that each layer of the foam has the panel cut out of it, that's so the lights can be installed, which is our next step.

To help make the panels as bright and properly-diffused as possible, I used aluminum foil to reflect the light. You can use E-6000 to glue it around the opening in your EVA foam layer.

IMG_9127.JPG

Once the glue is dry on our foil, it's time to install the lights themselves. I used strings of moon lights like these because they work well for cosplay, having small battery packs. You'll take your string of lights, and make a bar that is as long as your opening is wide. You can use other small pieces of wire to keep it together, or clear tape will do the trick too. Make sure to leave some wire at the end near the battery pack.

IMG_9131.JPG
IMG_9130.JPG

I realize you can't really see anything with the foil, but you want to tape down your bar of lights with packing tape along the bottom edge of the foiled foam. Sorry he photos don't help here, it's hard to get a clear picture of it so if you're trying to do this and need help with how, please send me a message and I'd be happy to walk you through it a little better!

The next step is to make a backing for the lights. You'll take annother piece of craft foam and add foil to it. Then youll glue the piece of foam with the foil facing inside to the back of your hip armor piece. That way, any light hitting the foil will be reflected out the front where you want it.

For the front, we're going to add some bits of white plastic grocery bag to help diffuse the light.

IMG_9132.JPG
IMG_9133.JPG

Now that we have our diffusion layer, we'll glue on the first detail layer of craft foam... unfortunately I don't seem to have a photo of that anywhere.

Once our first craft foam piece is on there, we'll want to add our outer panel layer. I used a translucent pink plastic folder for this. It filters the light rather well.

IMG_8461.JPG

Obviously you'll want to cut it first, this is just to show you how it's layered. 

IMG_9169.JPG

Once you glue the pink plastic layer and the top piece of craft foam on, you're almost done!

The diamond-shaped pieces on the sides can be easily added with craft foam if you just want the shapes, but I wanted them to be more 3-dimensional and actually be prism-shaped, so I made a little daimond-shaped prism out of cardstock and made a silicone mold of it. Once the mold had cured, I cast the daimond-shaped pieces in liquid plastic. Once they were all cast, I attached them with contact cement.

IMG_9175.JPG

Now it's time for mod podge! Paint on a bunch of layers and then you can start painting. I sprayed the white sections and brushed the black. If you spray any part of this, you'll want to be careful to cover the top part so you don't get paint on your glowing panels. 

IMG_9198.JPG

I don't have any photos of the underside, but I added loops of webbing/strapping so that they can be worn from a belt.

IMG_9200.JPG

And that's that!