Contact Us

Questions? Comments? Concerns? Suggestions? Submissions? Shout-outs?

Whatever you want to tell us here at Mikey Does Cosplay, we're always happy to hear your thoughts and feedback!


123 Street Avenue, City Town, 99999

(123) 555-6789

email@address.com


You can set your address, phone number, email and site description in the settings tab.
Link to read me page with more information.

reflection.jpg

Blog

Here's where the magic happens. I'll be posting about all of my experiences and experiments (both failed and successful ones), introducing you to my costumes, sharing fun stories, linking tutorials and useful products, and who knows what else!


Care of Magical Creatures - Part 3

Michael MacWolff

It occurred to me, as I spent nearly 20 minutes poring over my blog posts to find some specific creature photos, that I missed a few in my first two lessons. So I thought to myself, why not have a third? After all, I never did show off what are arguably my most impressive creatures (though the Swooping Evil is pretty awe-inspiring), as well as all of my creatures that are not explicitly from Harry Potter canon. If you missed the first two, you can find them here: Lesson 1, Lesson 2.

So, on to my final magizoology lesson (at least until I make more critters).

Phoenix

The phoenix might be the most iconic creature in the Harry Potter series, second perhaps only to dragons. We come to know and love Fawkes, Dumbledore's phoenix, through the books, and he comes to Harry's rescue on a number of different occasion…

The phoenix might be the most iconic creature in the Harry Potter series, second perhaps only to dragons. We come to know and love Fawkes, Dumbledore's phoenix, through the books, and he comes to Harry's rescue on a number of different occasions.

The phoenix is a large and highly intelligent magical bird. These creatures can be fiercely loyal to witches or wizards with whom they have a strong connection. Phoenixes have a number of magical properties, the most notable of which is their periodic rebirth by way of self-combustion. The phoenix ignites and a new body is born from the ashes. The creature retains all of its memories, however, and as such can live for a very long time. It is unknown how many times a phoenix can be reborn. In addition, phoenixes can carry immensely heavy burdens with ease, they have apparition powers, allowing them to disappear and reappear at will, their tears have very potent healing properties, and their song also has mysterious magical properties.

IMG_8916.JPG

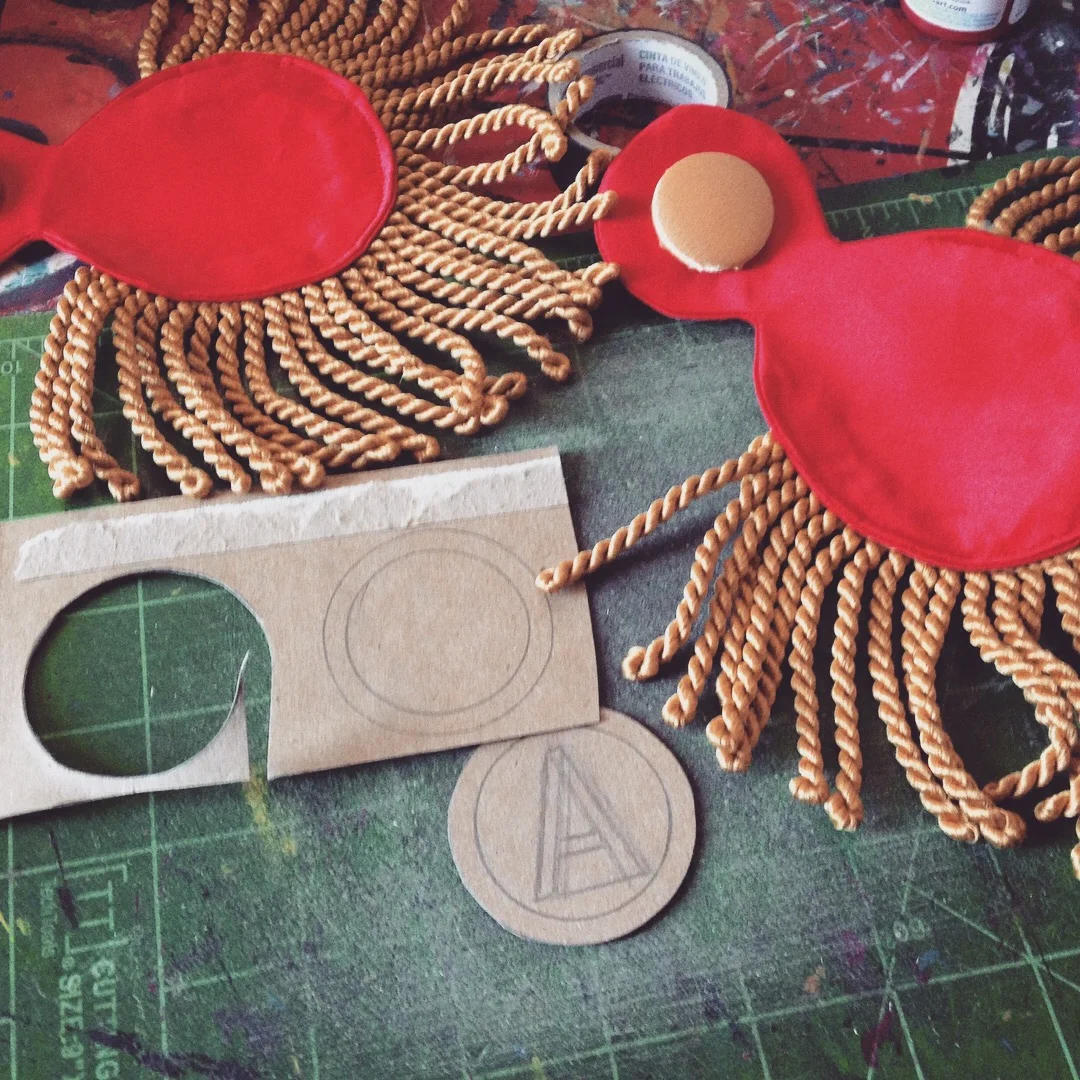
My phoenix was created from a lawn flamingo. I started by painting the flamingo red. The feet are made from heavy gauge wire, wrapped with a thinner copper wire to give them better texture. The legs are threaded through holes in the bottom of the plastic flamingo. The tails are stiff red felt with metallic gold painted around the edges. They are all hot glued together to form the three individual tails. For the bright orange underbelly I pulled apart a stuffed animal and glued the fur to his underside. The red fuzzy feathers are marabou feathers I glued to the flamingo's body. For the wings, I used more heavy gauge wire threaded through holes in the sides of the flamingo, and then hot glued a small piece of red felt around the wire to form the base for each wing. The feathers are then attached to the wing base with more hot glue, which allows the wings to be folded. for the head, I used a combination of different types of feathers to make a crest on top. He's perched on a piece of branch from our back yard that I turned into a stand for him.


THUNDERBIRD

2017-11-08.png

The thunderbird is another large magical bird native to the western United States. These massive raptors can create storms simply by beating their six wings in tandem. These creatures require a very large, wide-open spaces for their habitats and claim territories several hundred square miles in area. Thunderbirds were hunted nearly to extinction and very few of them are living in the wild today. As such they are very closely protected by the magical law enforcement in their areas.

IMG_8656.JPG

My thunderbird is essentially a plush with a wired underskeleton. The face was made with sculpey and then painted. The base body I patterned out myself and sewed with a suedecloth fabric, which you can see on the tails. I then massacred several different stuffed animals to get the different shades of fur on his body. The wings were a part of the plush pattern, and parts of the wire skeleton extend into each wing to make them pose-able. Most of the pinion feathers on the largest pair of wings actually came from a pheasant tail I purchased from a taxidermist. A lot of the other feathers came from masks or other unusual sources, since I wanted them all to be natural colors.


RUNESPOOR

The runespoor was initially intended to be in the film Fantastic Beasts and Where to Find Them but the scene was deleted. You can see it on youtube here.

The runespoor was initially intended to be in the film Fantastic Beasts and Where to Find Them but the scene was deleted. You can see it on youtube here.

The runespoor is a three-headed snake native to Africa. It is highly venomous and can reach up to 7 ft. long. We have learned from parselmouths that each head serves a different function: the left is the planner, the middle is the dreamer, and the right is the critic. As such, the right head tends to clash with the other two often, and it is not uncommon to find wild runespoors with only two heads, if the planner and dreamer get fed up with the critic and decide to bite him off.

IMG_8704.JPG

My runespoor is simply a snake plush with a couple of extra heads. I modified the pattern I used to make my occamys and made it with tiger-striped fur, since runespoors are generally black and orange striped. There is a wire skeleton on the inside so he can be posed as I please.


ACROMANTULA

We all remember this terrifying thing from Harry Potter and the Chamber of Secrets.

We all remember this terrifying thing from Harry Potter and the Chamber of Secrets.

Acromantulas are gargantuan spiders native to southeast Asia. Their venom is highly toxic, but is also a very valuable potion ingredient. these spiders are highly intelligent and are capable of human speech when the get older. These are also social creatures, unlike most arachnids, and can form colonies of hundreds of their species.

I admittedly didn't make this one, I just bought it on Amazon.


PUFFSKEIN

You might recognize these guys' smaller breed, the pygmy puff, bred and sold by the Weasley Twins.

You might recognize these guys' smaller breed, the pygmy puff, bred and sold by the Weasley Twins.

The puffskein is a small, cushy, harmless creature that is a favorite pet for young witches and wizards. They are incredibly durable and don't care about being cuddled or tossed around.  The most unusual thing about the puffskein is their taste for bogies, and they tend to use their long, flexible tongues to clean out their owners' noses while they sleep.

This guy started out as some sort of plush I found at the thrift store... I think it might have been a duck. I cut him open, reorganized some stuff, and sewed it back together in a sphere. The tongue is fleece with wire in it so. it can be curled up.


AMPHISBAENA

From this point onward, we are out of the Harry Potter canon. The amphisbaena is a two-headed snake originating in Greek mythology.

From this point onward, we are out of the Harry Potter canon. The amphisbaena is a two-headed snake originating in Greek mythology.

The amphisbaena is a two-headed snake, thought to be related to the runespoor. However, unlike is other multi-headed cousin, the amphisbaena has a head on either end of its body, rather than all heads facing the same direction. As such, the heads do not function independently as the do with the runespoor, but rather work in tandem to accomplish the creature's goals. These snakes are also venomous, and the venom is an uncommonly-used potion ingredient. In addition, the skin has certain healing properties and is best harvested shortly after it is shed.

I made my amphisbaena just like i made my runespoor, I just modified the pattern a bit to accomodate the extra head.


PYGMY ARCWHALE

Flying whales show up in a lot of different fantasy settings, these are my own interpretation. Just add wings.

Flying whales show up in a lot of different fantasy settings, these are my own interpretation. Just add wings.

Standard arcwhales have been soaring the upper atmosphere for millenia. It is said that the first whale dreamed of being free of the sea, and rose from its waters, ascending to the heavens above. Arcwhales feed on dream energy from witches and wizards; they tend to function in a similar fashion to dreamcatchers, filtering out bad dreams and leaving the sleeping witch or wizard with only pleasant ones. As such, you can see their appeal, and that is how pygmy arcwhales came about: they were bred to be kept as pets, since the full-sized arcwhale would not be able to fit through your door.
In addition to feeding on dreams, arcwhales (pygmy or otherwise) generate cloud or mist around them when they fly. This helps obscure them from muggle vision, and can indicate a pod passing through a residential feeding zone when a heavy fog rolls through. 

IMG_8880.JPG

My whales are just plushies I found at the thrift store and added fleece wings to. I did use wire in the wings so they can be posed.


I hope you enjoyed the next installment of my Care of Magical Creatures lessons. I have plans for a lot more critters so hopefully some time down the line I'll have time to add to this continuing segment here at MDC.

Site Updates and Such

Michael MacWolff

Hey everyone, just a quick update today with a few changes/updates/etc.

Character Compendium

I have a new section on the site that lets you look through my cosplays by character, and then when you click on the picture, it'll give you all of the photos in my gallery of that particular cosplay. I like organization so I'm pretty pumped about it. Here's where you can find the Character Compendium on the main page, and I'll also put a link to it here.

2017-11-07 (1)_LI.jpg

Mikey's on Instagram!

This is just another friendly reminder that I'm on Instagram now! I've been doing better lately of posting photos on there than I am on Twitter, and I like the format a bit better. If you're looking for more cosplay and less inane fandom junk, my instagram account is the way to go, so follow me @mikeydoescosplay!

Because I've been, and hope to continue to be, more active on instagram, and I'm using it exclusively for cosplay-related stuff, I added a media block on my home page that shows all of my most recent posts. You can find it just above my social media links on the home page. I'd love to hear opinions on the block, if you think it's worth it or if it just clogs things up too much. If you have any input please let me know!


Post Regularity

Ok so I know I've said this a million times so you probably don't believe me, but I'm doing my best to have more regular posts on my blog here! i will be keeping my regular WIP updates mostly on Instagram, and then making a full post when the prop/costume is actually finished, so it's not too broken up if you're trying to more or less recreate my methods. However, there will be a lot more in-between posts on a much more regular basis than I have been doing.

I'm bringing Throwback Thursday back since I realized there's a decent number of cosplays I made before I started this site, and I haven't done posts about them yet. You can expect to see one every two weeks with the first one posting on Nov 23rd. I'm being a lot more proactive about my blogging and have several posts put together that'll go out on schedule. I'm hoping this will get me into better posting habits, but we'll see. If nothing else, it will actually mean there's going to be more consistent posting on here so that's a good thing!
I'm also going to be doing a weekly throwback photo on my Instagram account so keep an eye on that too!

I'm hoping to have instate a monthly Materials Monday post, starting in December. I've already started putting together the first post so with any luck I'll keep that rolling!

CAW-CAAAW

Michael MacWolff

It's time to show off my newest cosplay! Ok, sort of. Mostly just regale you with tales of how I constructed it because I don't really have many photos of the whole thing yet, those will come when we get proofs back from out awesome Phantom Thieves photoshoot at Youmacon!

72d4d6a01b9149c5615adaf22debddd9.jpg

So first things first, let's take a moment to appreciate how ridiculous this outfit is. For those of you unfamiliar with the Persona 5 universe, the Phantom Thieves' costumes manifest themselves when they are in the Metaverse (the supernatural portion of the game world) and are based off of that person's idea of what a revolutionary/subversive hero would look like. So apparently Akechi sees a revolutionary as a super gay drum major with a crazy bird beak...

I can't get over it.

Anyway, let me regale you with the tale of how I put this bad boy together. I actually started with the accessories before I put any of the outfit together.

IMG_9115.JPG

I patterned out the mask on cardstock, then transferred it to craft foam and did my usual worbla-wrapping method, mushing the center seam together to get the mask. You can see the first iteration above. I liked it, but I overdid the beak a little, so I trimmed the bottom, re-mushed the wworbla, and go this much more acceptable beak.

IMG_9116.JPG

Then it was time for.... you guessed it: Mod Podge-Mania! Several coats later, we were ready to paint. I sprayed it white to start, then sprayed the bright red over it, then brush painted the parts around the eyes with a darker red. Not to brag but I think the fruits of my labors were pretty damn juicy.

IMG_9179.JPG

Next up was the sword, because of course this flamboyant young man would never weild a normal sword, he has to carry a freaking lightsaber.

66ea3fe42e617b870d16ddb94ee65149.jpg

Well, fortunately for me, I had a few extra lightsaber blades from my commission a while back (I made a lightsaber based on the 10th Doctor's sonic screwdriver) and a flashlight that fit perfectly on the end of it. I also had some tubes that fit just the way I needed them to, so constructing the hilt was actually quite easy. I used the rigid tube, some craft foam, and a bunch of E-6000 to attach the flashlight to the blade. Also, I should note that I put 2 layers of blue plastic folder on the end of the flashlight to give the light a blue tint.

I guess a fair amount of masking tape was also involved...

I guess a fair amount of masking tape was also involved...

The guard was all just card stock and worbla, though getting the right curvature took a few tries. The back end was actually the plastic wheel from a roll of scotch tape, which miraculously fit perfectly on the end. The thin hand guard it thin vinyl tubing with heavy gauge wire in it. Put it all together and you get...

Apparently I also added an extra layer of craft foam on the grip...

Apparently I also added an extra layer of craft foam on the grip...

We have once again come to the mod-podging stage, along with painting. I'll spare you the boring  and repeptitive details.

IMG_9156.JPG

Now that the props were done, I felt a little better, because nothing else involved several coats of paint and having to wait for things to dry... Oh wait.

IMG_9275.JPG

The belt buckle originally had a butterfly on it with some rhinestones. I covered it with craft foam & worbla for Goro's iconic "A."

IMG_9238.JPG

The "A" pieces on his epaulets were just layers of cereal box coated in mod podge & then painted.

Which brings us to one of the most frustrating things in shopping for this costume, because I had a hell of a time finding satin, braided chord, and braid fringe that were all the same freaking color. Fortunately I got close enough but there was lots of profanity flying around the trim isle at Joann's.

So, time to start on the jacket. I patterned it off of an athletic jacket I found at the thrift store which fit me about how I wanted it to. It's not as tailor-fit as it could have been, but it's comfortable and I can raise my arms without my belly showing so that was the important thing.

I used a white bottomweight for the base fabric, I believe it was Target or possibly Rodeo, I don't really remember. I got a bottomweight partially because I was hoping not to have to line it, but that didn't work out, and I had to line it anyway because f*** white fabric. 

After cutting out all of the pieces, it was time to add the weird white mountain-trim bits to the front. Little did I know this trim would be one of the most frustrating parts of making this costume. Each strip had to be about a yard long, and each one took an inordinate amount of time to sew together because of all of the stupid little mountain peek things every 3/4"

And, let's take a look at that reference artwork again...

72d4d6a01b9149c5615adaf22debddd9.jpg

Excuse me, I need to make HOW MANY OF THOSE?!?! 2 for the front of the jacket, 2 for each sleeve, and two for each pant leg is a total of 10 of this f***ing mountain trim. I was annoyed, but I made the first two so I could continue working on the jacket.

So let's take a quick second to talk about what making and attaching this trim entailed, in case any of you guys are looking at this to help you make your own flaming drum major costume. You stitch along the marked lines, trim the inside so you can flip it & flatten it out, but not so close that your fabric frays along the stitch line and you have to start over again (FML WE'RE NOT GONNA TALK ABOUT IT). Once it's successfully flipped, which I had to use a mechanical pencil point to get all of those little peaks pushed out, you'll want to press it flat, and then line it up & pin it onto the outside of the coat.

IMPORTANT NOTE: With the way I'm doing this, you want the peaks to be facing the opposite direction that they're supposed to point when you're done, because we're going to fold the trim over after we stitch it.

Once it's in place, you'll do a zig-zag stitch along the raw edge. Here's why I did a zig-zag stitch: the fabric will fray a little bit, but with a zig-zag it'll keep that to a minimum and make sure you have a nice, tight seam line on the trim.

IMG_9210.JPG

Once you've stitched it to the front, take it back to your iron, fold the trim over your zig-zagged edge, and press it flat. So now our raw edge is hidden under the trim and the peaks are pointing the proper way.

IMG_9211.JPG

Now that they're pressed, you'll want to stitch them down. You can do this on your machine by running a top stitch along the edge of your trim, though with the weird shape of the trim, it'll take while. On the other hand, if you are a masochistic perfectionist like I am, you can hand stitch it down.

Thankfully, the base came together nice and easily, and I did a pretty good job sticking to my pattern so there weren't any weird spots between the lining and the outside. After the excruciating process adding the trim to the front I needed this part to go well for the sake of my sanity.

IMG_9213.JPG

Once this part was done, I decided not to immediately attach the sleeves, because they were going to need that stupid mountain trim added to them too. Instead I decided to put together the cape.

Construction on the cape was fairly easy, I simply patterned it straight from the pieces of the jacket I tore apart to make the rest, I just had to add the standing collar, which wasn't particularly difficult, but it did turn out a bit big for my neck.

The most time consuming part was hand-stitching the gold braid along the top, but even that wasn't that bad, and I got through a few Tiger & Bunny episodes as I worked on it.

IMG_9239.JPG
IMG_9223.JPG

The epaulets are just as absurd as the rest of this cosplay, but thankfully they were pretty easy to put together, and I could machine-stitch the chord fringe to them, which was nice since I had to hand-sew all of the gold chord. The center thing is a cover button with gold satin on it, and the "A" embellishments, as I stated earlier, are made from cereal boxes.

IMG_9270.JPG

With the cape done, it was time to delve back into trim hell and repeat my mountain trim 4 more times for the two sleeves. I made it through and the rest of the sleeve construction was surprisingly unproblematic (sleeves often give me trouble, too so this was a welcome surprise).

IMG_9264.JPG
IMG_9271.JPG

Of course in the references there are two different types of gold trim on the sleeves, so I used satin ribbon for the flat part, and more of that gold braid.

Well, things are looking up at this point, as all I had left was the gold braid closures on the front. Little did I know that that aspect alone would take just as much time as putting together the entire rest of the f***ing costume.

IMG_9276.JPG

3 days later I'm down to my last 3 sections of braid and my fingers can barely hold a needle, I've lost several mL of blood from stabbing myself so many times with my needle, and I am desperately trying not to just bleed all over my pristine white costume, so instead I'm just sobbing onto it because I can't help myself and I'm supposed to be leaving for Detroit in 24 hours. Hell, I'm about ready to just set my whole sewing room on fire and just be done with it.

It is at this point that something miraculous happened. As I was listening to my nerd music playlist, Prince Sidon's theme came on. Now, for those of you who haven't played Breath of the Wild and are unfamiliar with the Zora prince, he is a treasure. He is very affectionate and encouraging with Link. Now, at Tekko this year I met an awesome artist named voidbug who made this fantastic print of Sidon.

2017-11-07 (2).png

Coming home from Tekko, I immediately hung this print up in my sewing room to give me encouragement while I'm working on cosplay and let me tell you , IT WORKED. The combination of hearing his theme music and looking up at this print with my 8ft tall fish boyfriend giving me encouragement... I continued crying but they weren't tears of frustration any more. This art actually got me through this cosplay; it's a miracle.

So I buckled down, grabbed a pair of pliers (since my fingers were all sore at this point) and stitched the last sections of braid down.

IMG_9287.JPG

I was so happy to get it done, and I absolutely love how it turned out. There are a few things I could do to make it a little better, but none of them are that important and frankly I think it looks awesome as is.

The best part about all of this was that I got to be part of a full group photoshoot at Youma, with a bunch of really good cosplayers (like, REALLY GOOD. Two of them won a Hall competition trophy that weekend for other cosplay they had). Here's the photo we have now, the rest will come later, when our photographer has a chance to go through and edit them.

Photo courtesy of  back_of_beyond_cosplay

Photo courtesy of  back_of_beyond_cosplay

Not sure how often I'll end up wearing this, but I do know several friends want to do P5 cosplays too, so I'd fit right in. I have no intention of cosplaying any other version of him though, this one is just too fabulous.