Materials Monday: Foam Board
Michael MacWolff
Alright folks, it's time for me to start putting my new plan into action! So I'm happy to welcome you to the first installment of Materials Monday here at MDC.
And what more appropriate material to start things off with than one of my personal favorites: Foam Board.

Those of you who have been following this blog for a while know that I use this stuff all the time. The biggest reasons why are:
- It's lightweight
- It's cheap
- It's easy to cut, sand, finish, etc.
- It has enough volume to easily make 3D projects
- It's sturdy enough as long as you have base or enough layers
- It can be used to make a wide variety of props.
I've made everything from swords to guns to armor out of this stuff, and it has yet to let me down. Here are a few projects that have foam board as a base material:


Truth be told, the vast majority of my props (particularly larger items) use foam board somewhere in their construction.
Working with Foam board
One of the greatest things about making stuff out of foamcore is that it's really easy to work with! All you need is an X-acto knife and you're good to go. Ok, you probably want a few other things (namely a pencil, some paper, and probably a ruler), but you get the idea.
The first thing you want to do with any project is make a pattern.

Ok yes, you're seeing the pattern with the nearly finished prop, but it's the only photo I could find >_<
When you're working with foamcore, because the foam is covered with paper on either side, it's makes transferring your pattern super easy. Just cut out the pattern piece you want to transfer, and then use a pencil, pen, marker, bloody finger, or whatever else you want, to trace around the outside or your pattern.
Once you have your pattern traced, you can use your X-acto knife to cut out the shapes! Easy-peasy!

Building your prop from your cut pieces is just as simple. All you need to do is stack them and glue them together. I generally use either wood glue or Mod Podge, and paint it on with a wide paintbrush. While it's drying, I generally put a heavy book or other object on top, to essentially "clamp" the pieces together so that they have as much surface area pressing together as possible.
IMPORTANT NOTE: Foamcore is not the most sturdy material in the world.
You pretty much always want a minimum of 3 layers of this stuff. With Mika & Yuu's swords, the blades were long and narrow and I didn't want them to be overly bulky, so I only used two layers and they were not as sturdy as I would have liked. With wider blades like Ashnard's Gurgurant or Yatsuhashi's giant orange blade, you might be able to get away with just 2 layers, because they're so wide, but I wouldn't recommend it. The other option is to simply build them on a sturdier base. I did that with both of my large blades: they're thin wood at the center, with foam board on either side. That will definitely give you the sturdiness you need without it being super heavy by having the bulk of making the whole thing out of wood.
Beveled Edges
Another great thing about foamcore is that it's much quicker and easier to get a beveled edge than if you're using wood or MDF, particularly if you have a wide bevel.

Auron's katana is a great example of a very wide bevel. I would not want to have to sand that whole surface into this shape with just wood. I'd be spending the rest of my life working on it.
To achieve a beveled edge, start by marking where the bevel will go on your piece of foamcore board. Then, with your Xacto knife, carefully slice through the top layer of paper. You'll end up cutting a little into the foam as well which is fine, but you want to make sure you're not cutting all the way through your board because you want the beveled part to remain attached.
Once you've sliced the paper, you can peel off the part where your bevel is going to be. Depending on how easily the paper comes off, this can be somewhat time-consuming, but you don't have to get every last bit off, because the next step will remove any remaining bits.

Once you've done what you can with the paper, it's time to sand sand sand! You'll want to use a rough-grit sandpaper because that'll get rid of the mass faster, and it doesn't matter if it leaves scratch marks on the foam, because you'll be covering it with spackling paste when you're done anyway.
An alternative to simply sanding the foam into your bevel is you use a knife to cut the foam into the bevel (I generally use a cheap serrated kitchen knife that I got at the thrift store). There are advantages to both methods, and you can even use them in tandem. Generally sanding gives you more control because you're getting rid of the foam a little bit at a time & you're less likely to take too much off or gouge your project as you are with a knife. On the other hand, it's a lot faster to use a knife and if you have a very wide bevel (like with Auron's katana) it can save you a whole lot of time and effort. You choose the method that you're most comfortable with, and just remember that even if something happens to your foam, you're going to be covering it with spackling paste in the next step anyway so you can fix any mistakes at that point.

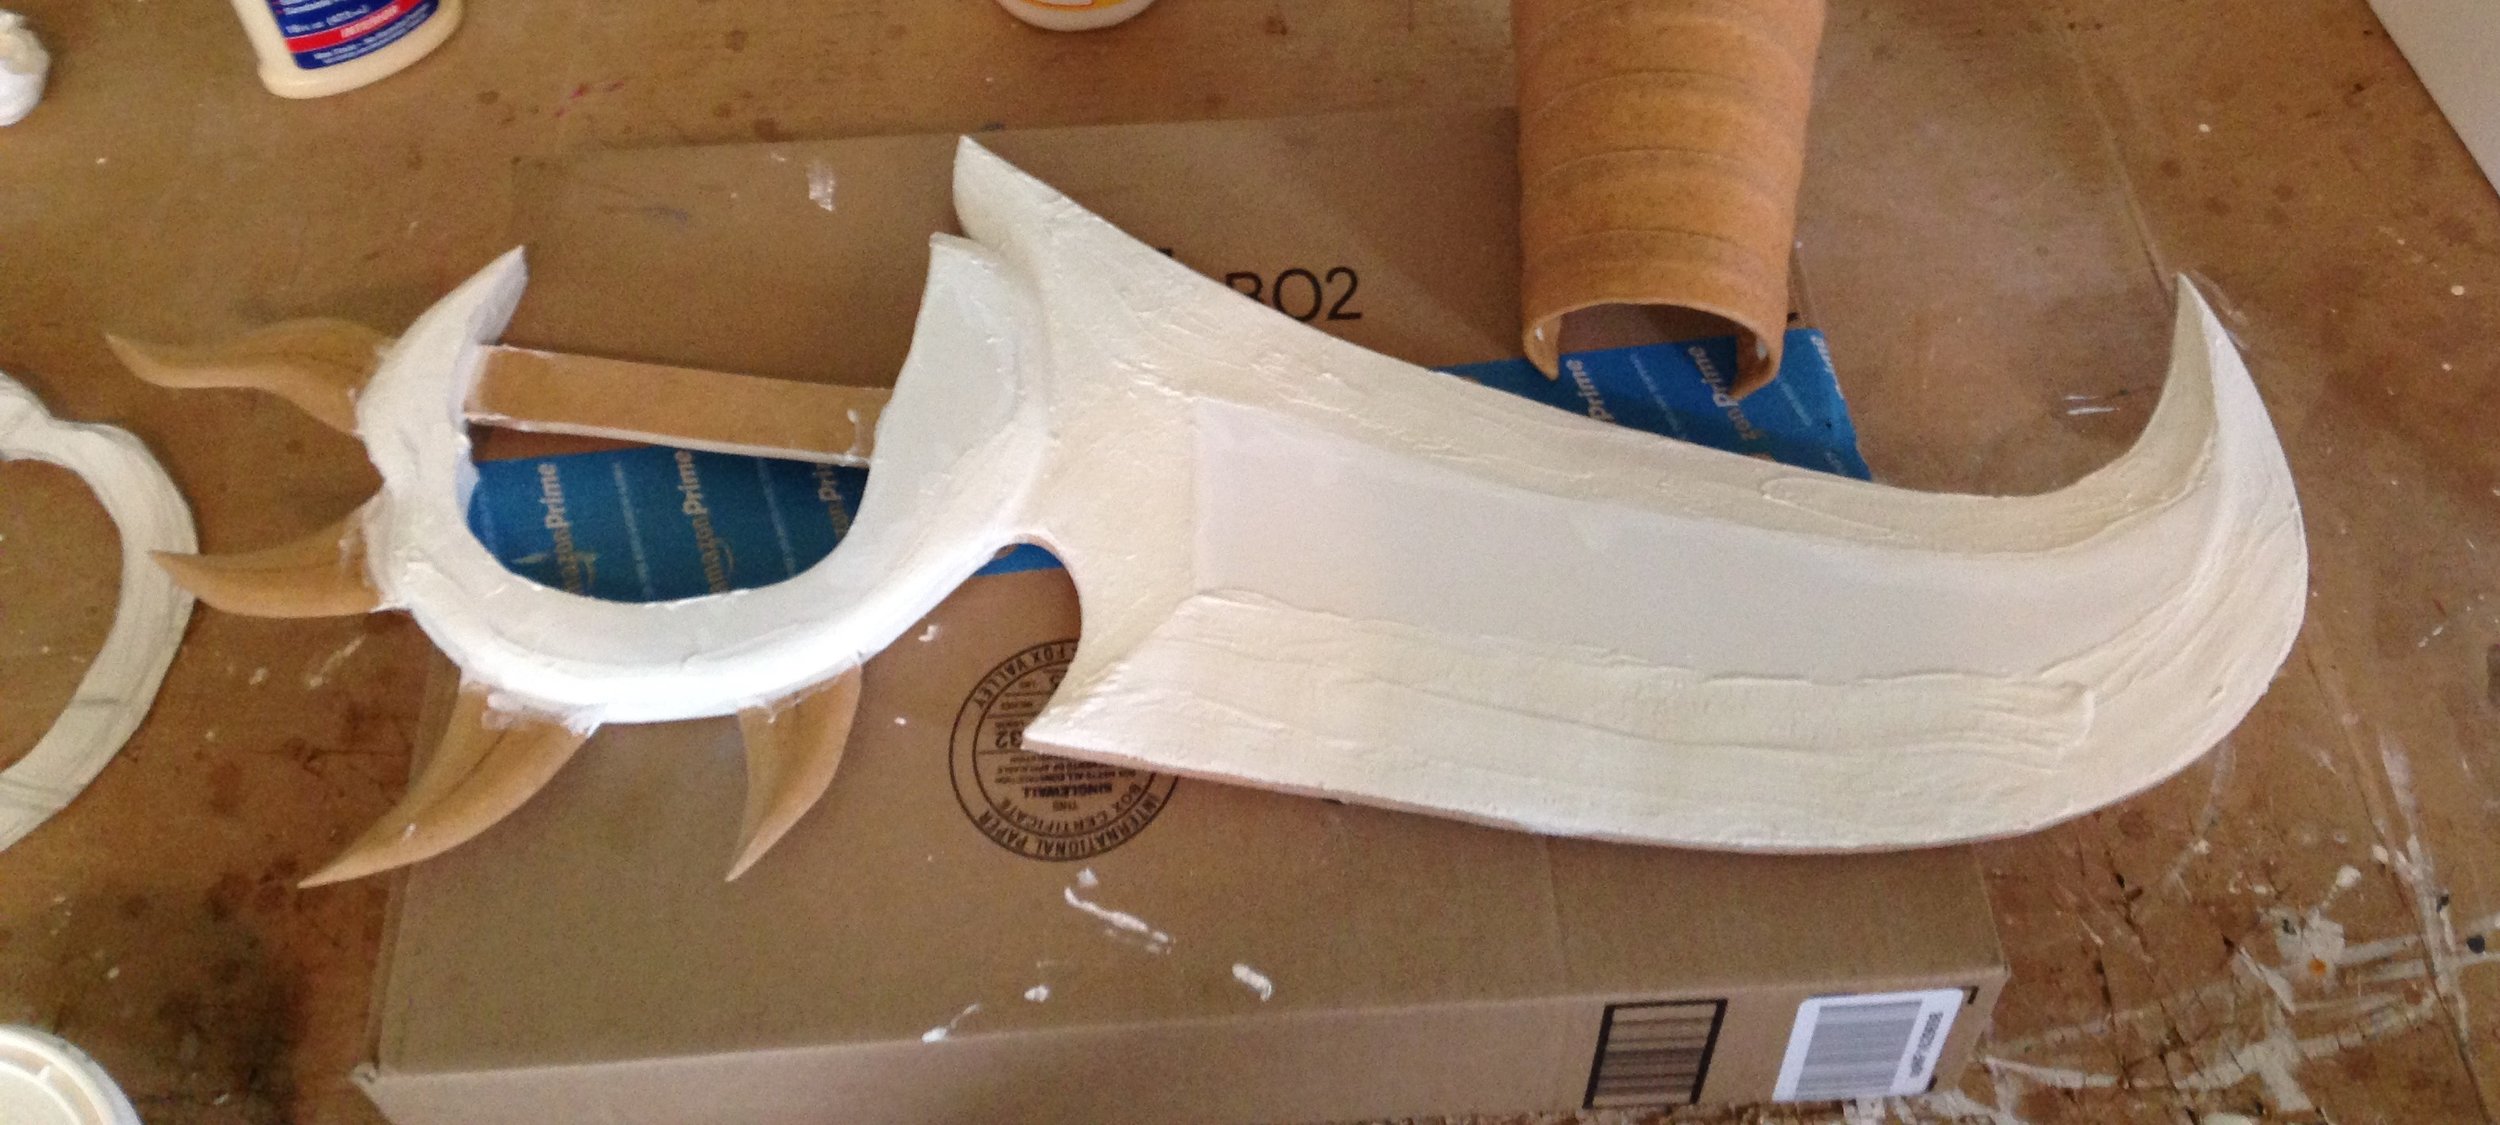
Spackling
This is the most important part when using foamcore or even regular styrofoam because this is what keeps your project from looking like shit. Whether you have a beveled edge or not, you'll want to spackle all of the raw edges of your foam board.

I use DAP All-Purpose Spackling Paste. It's inexpensive, sands easily, can generally be found in any hardware store and works well for my purposes. You can also find it on Amazon.
When you spackle your edges, you want to goop it on pretty thick. I usually just spread it on with my finger. Let it sit for a while (I usually leave mine overnight), because if it's not totally dry, you might have big chunks come off when you try to sand it.
Once it's totally dry, now it's time to sand away! I usually start with a rougher-grit sandpaper to file down the spots where it's especially thick or gooped on weirdly, and then a finer grit sandpaper to smooth it out. You may have to repeat this process once or twice if you have weak spots in your spackling, because this is what gives you your surface to paint on, so you want it to look nice, and the spackling is harder than the foam so it'll be sturdier that way.
Once the spackling is done, you'll still want to prime it with mod podge or your sealerof choice, to keep all the insides well protected.