WIP (not quite) Wednesday: MOBA Edition
Michael MacWolff
Hello again folks! Mikey here, trying his best to keep to the plan he put forward last week. And we'll be starting things off simple, because I'm going on vacation this week and don't have a ton of time to lollygag around. So this week, I'm bringing you some WIPs from my current collection of commissions! (all of which come from MOBAs, no less!)
First is a set of weapons from the giant lion, Rengar, from League of Legends.

I've been working on both the big, spiky sword, as well as the claw blades on his left arm.
I decided to use MDF for the base on all of it, so I started by patterning out the blades. Once the patterns were transferrred, I used my jigsaw to cut them out.

Here are the patterns for the blades (along with the engine sword I built. You'll get to see that later.


To connect the two small blades, I used a chunk of dowel rod and screwed them on, then wood glued everything to make sure it stayed together.
As you can see here, for the small gauntlet blades, I beveled the MDF directly using my Dremel tool with a sanding bit. Since they were so small it seemed silly to add an extra layer, just to bevel it. For the big sword, however, I added some layers of foam core board, and did the wide bevel on those.
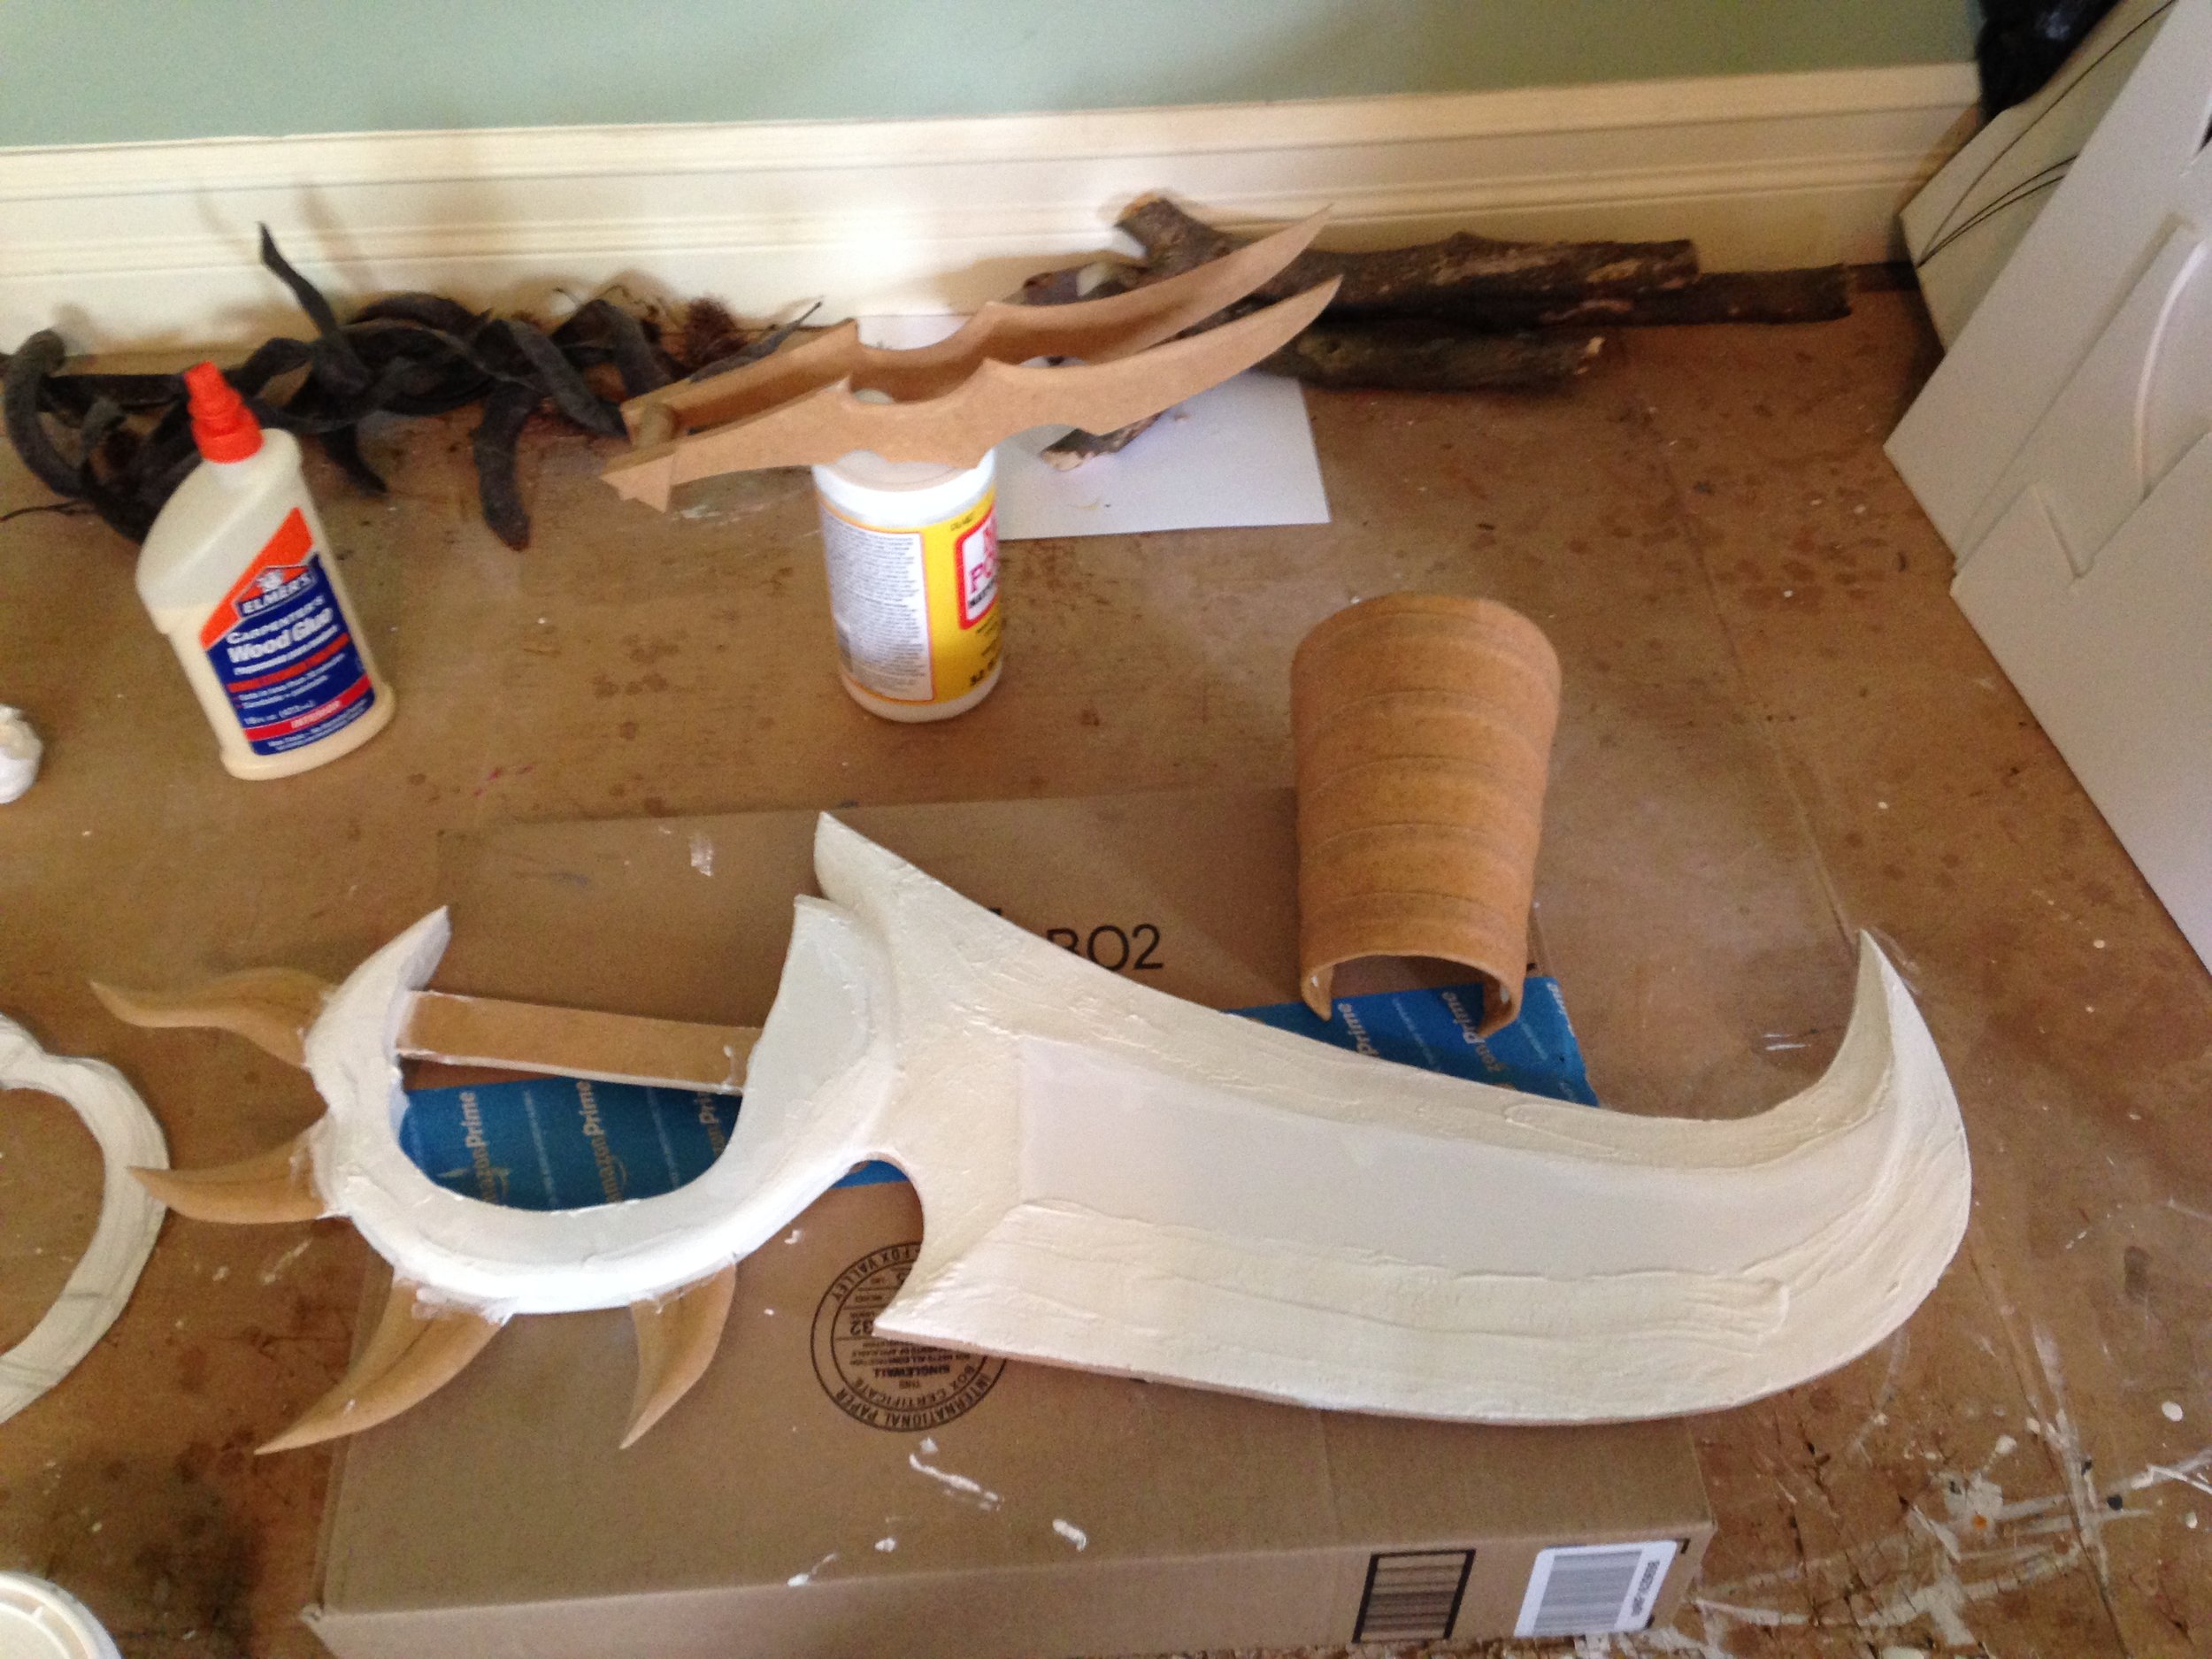
As per usual, all of the exposed foam was spackled & sanded smooth. For the gauntlet part that the arm blades would attach to, I weapped strips of worbla around 2mm craft foam, and shaped it so it would take the approrpiate curve to be worn as a gauntlet. It also has holes so it can be laced up along the bottom. I also attached the blades themselves with a strip of worbla, heated and stretched over the piece of dowel between the two blades, and mushed into the worbla on the gauntlet.

From here, all that was left was to put a bunch of layers of mod podge on everything and then start painting! That's the step I'm currently on, but they should be done pretty soon after I get back from my vacation.

The next weapon I'm working on is one a lot of folks should recognize, considering how popular this game has been.

That's right, I get to make Symmetra's photon projector. Honetly, I'm super pumped about this project because it should look awesome when it's done, and of course it's going to light up! The other nice thing is that Kamui Cosplay made an amazing one of these (but let's be real, all of her props are phenomenal), and has a tutorial of how she made the gun.
While I built the base of the gun a bit differently (namely, mine is hollow), and lit it in a slightly different way, it was super useful to see how she put it together. Also, the arms will end up being built more or less the same, so that'll be helpful ^_^
As always, I started by patterning out the base (which naturally I didn't take a photo of). I cut the base out of cereal boxes and wrapped it in worbla, the result of which you can see here:
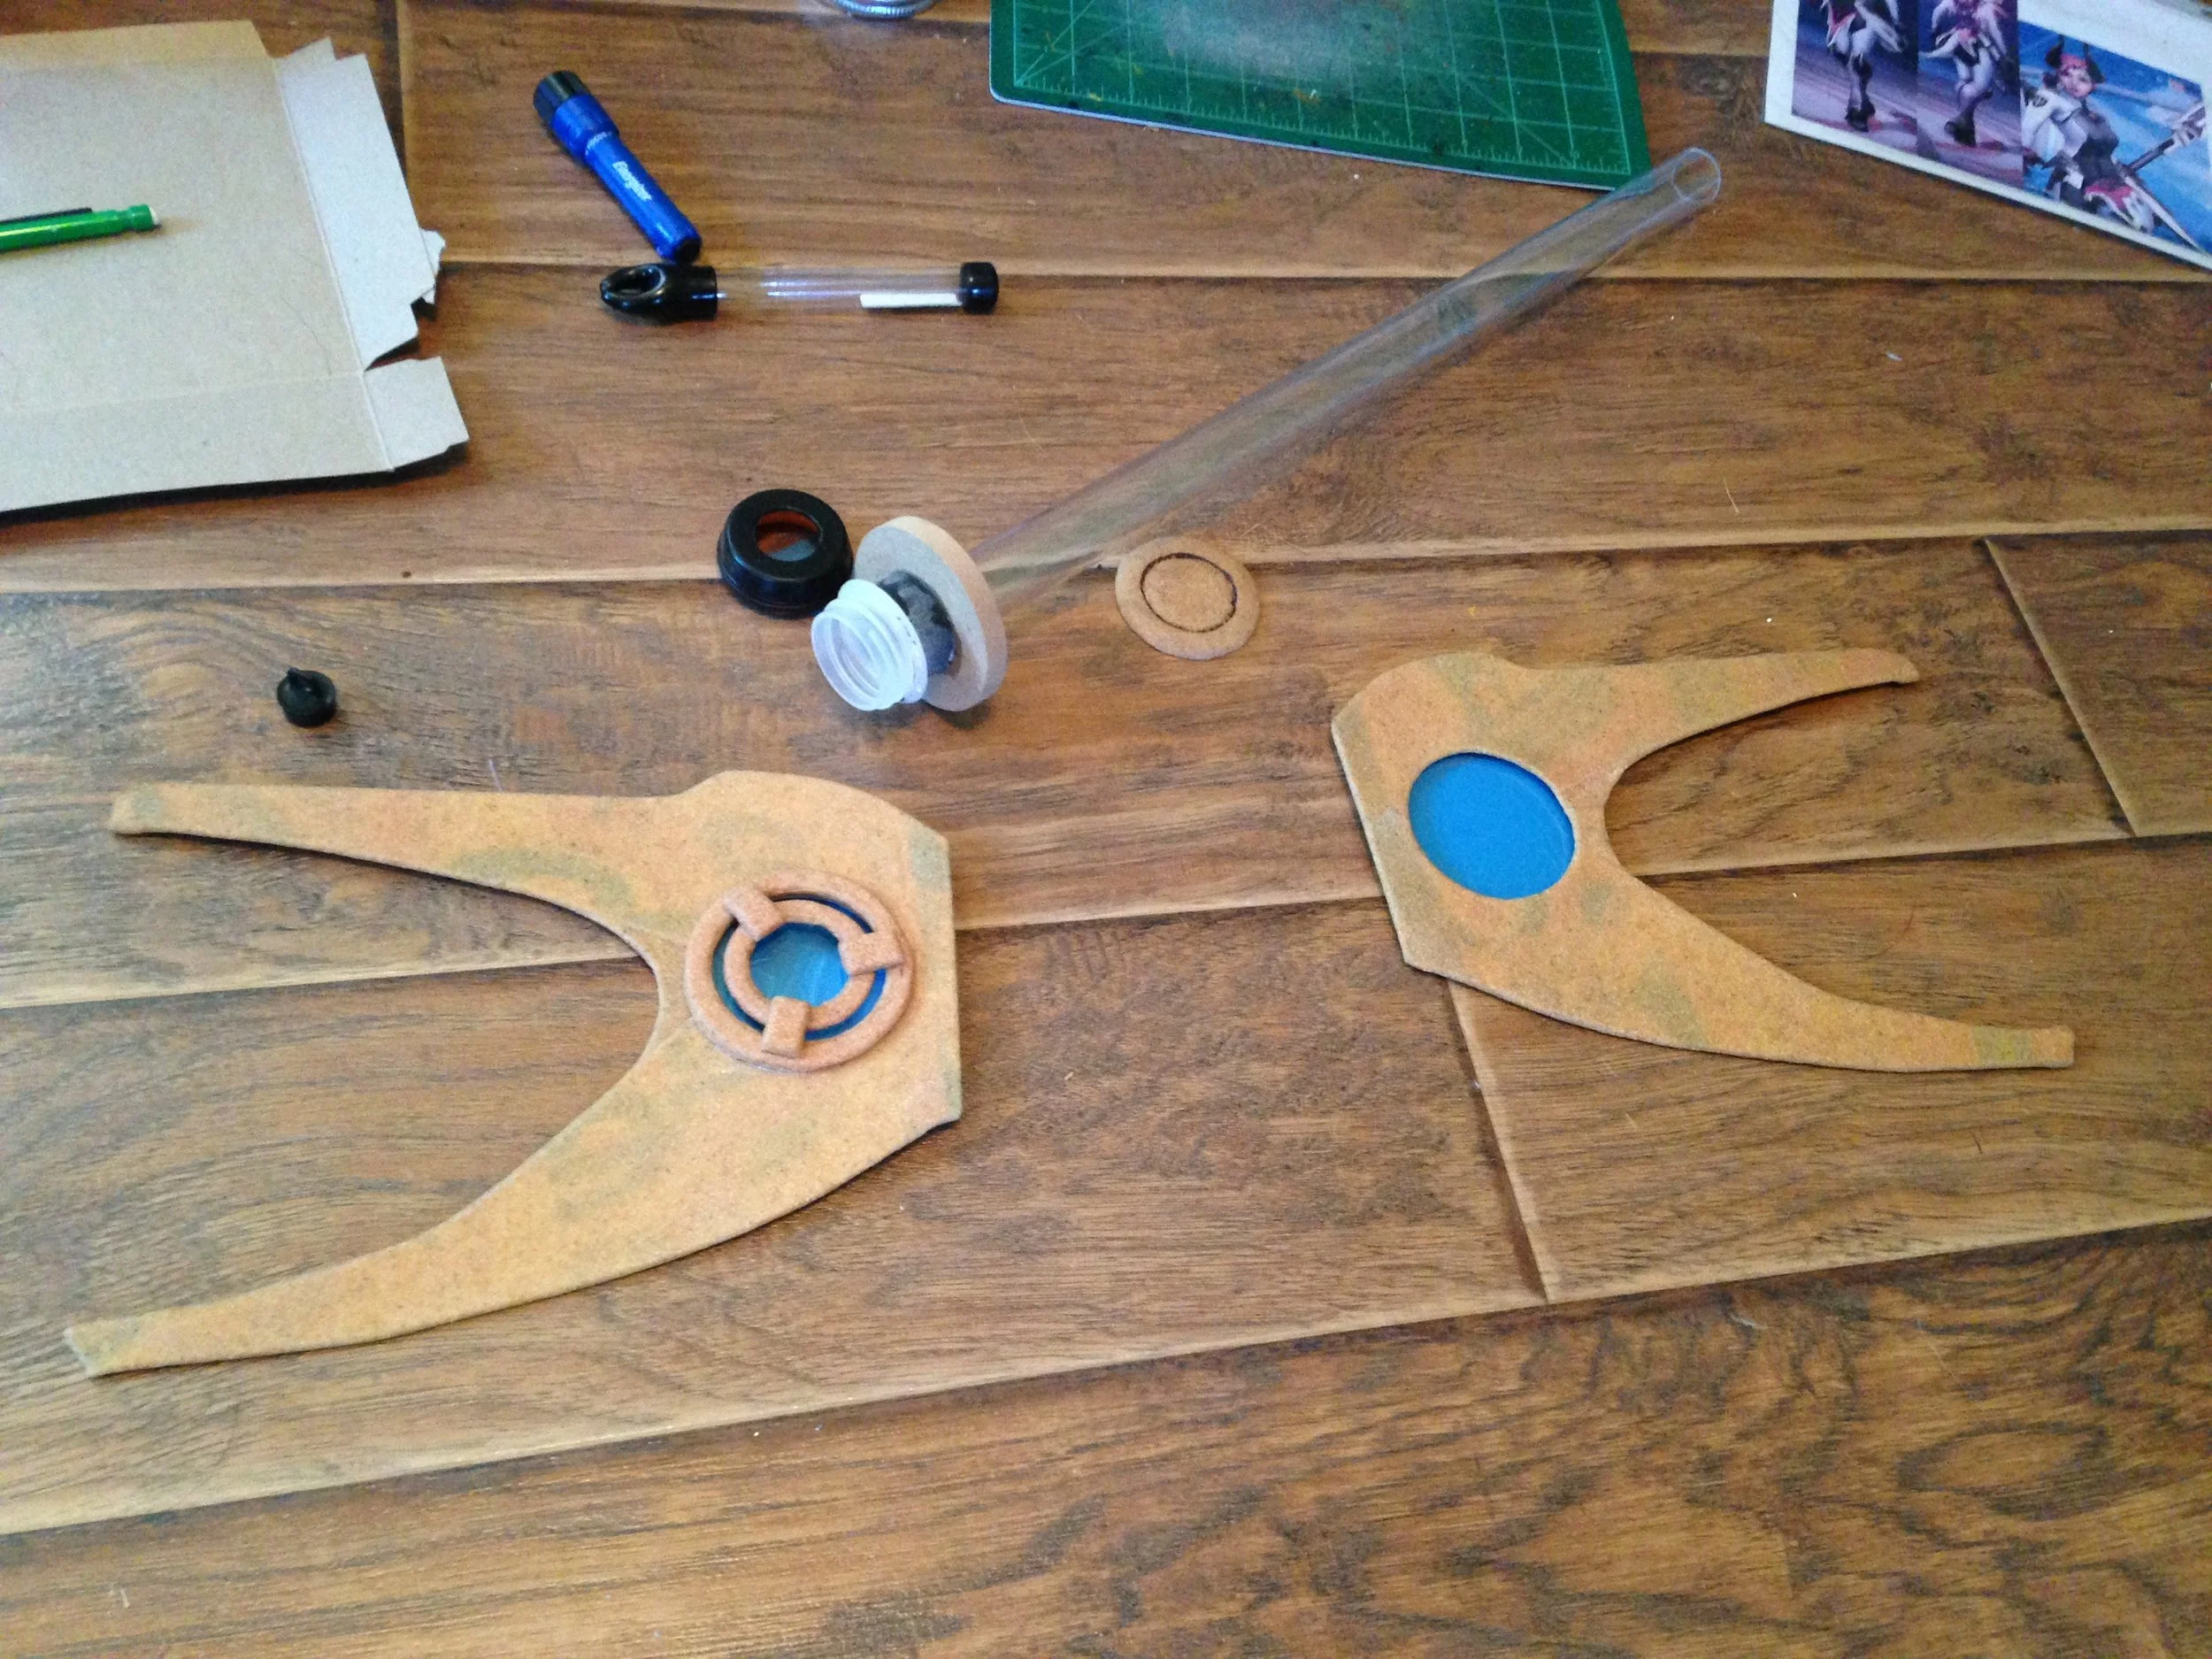
The detail over the glowing part is also worbla, wrapped around craft foam. For the blue panels where the light will come through, I took toploader car protectors which I have a ton of because Magic: the Gathering. The blue is actually just blue plastic shopping bags I cut up, wrapped around a card-sized piece of clear plastic, and inserted into the card protector.
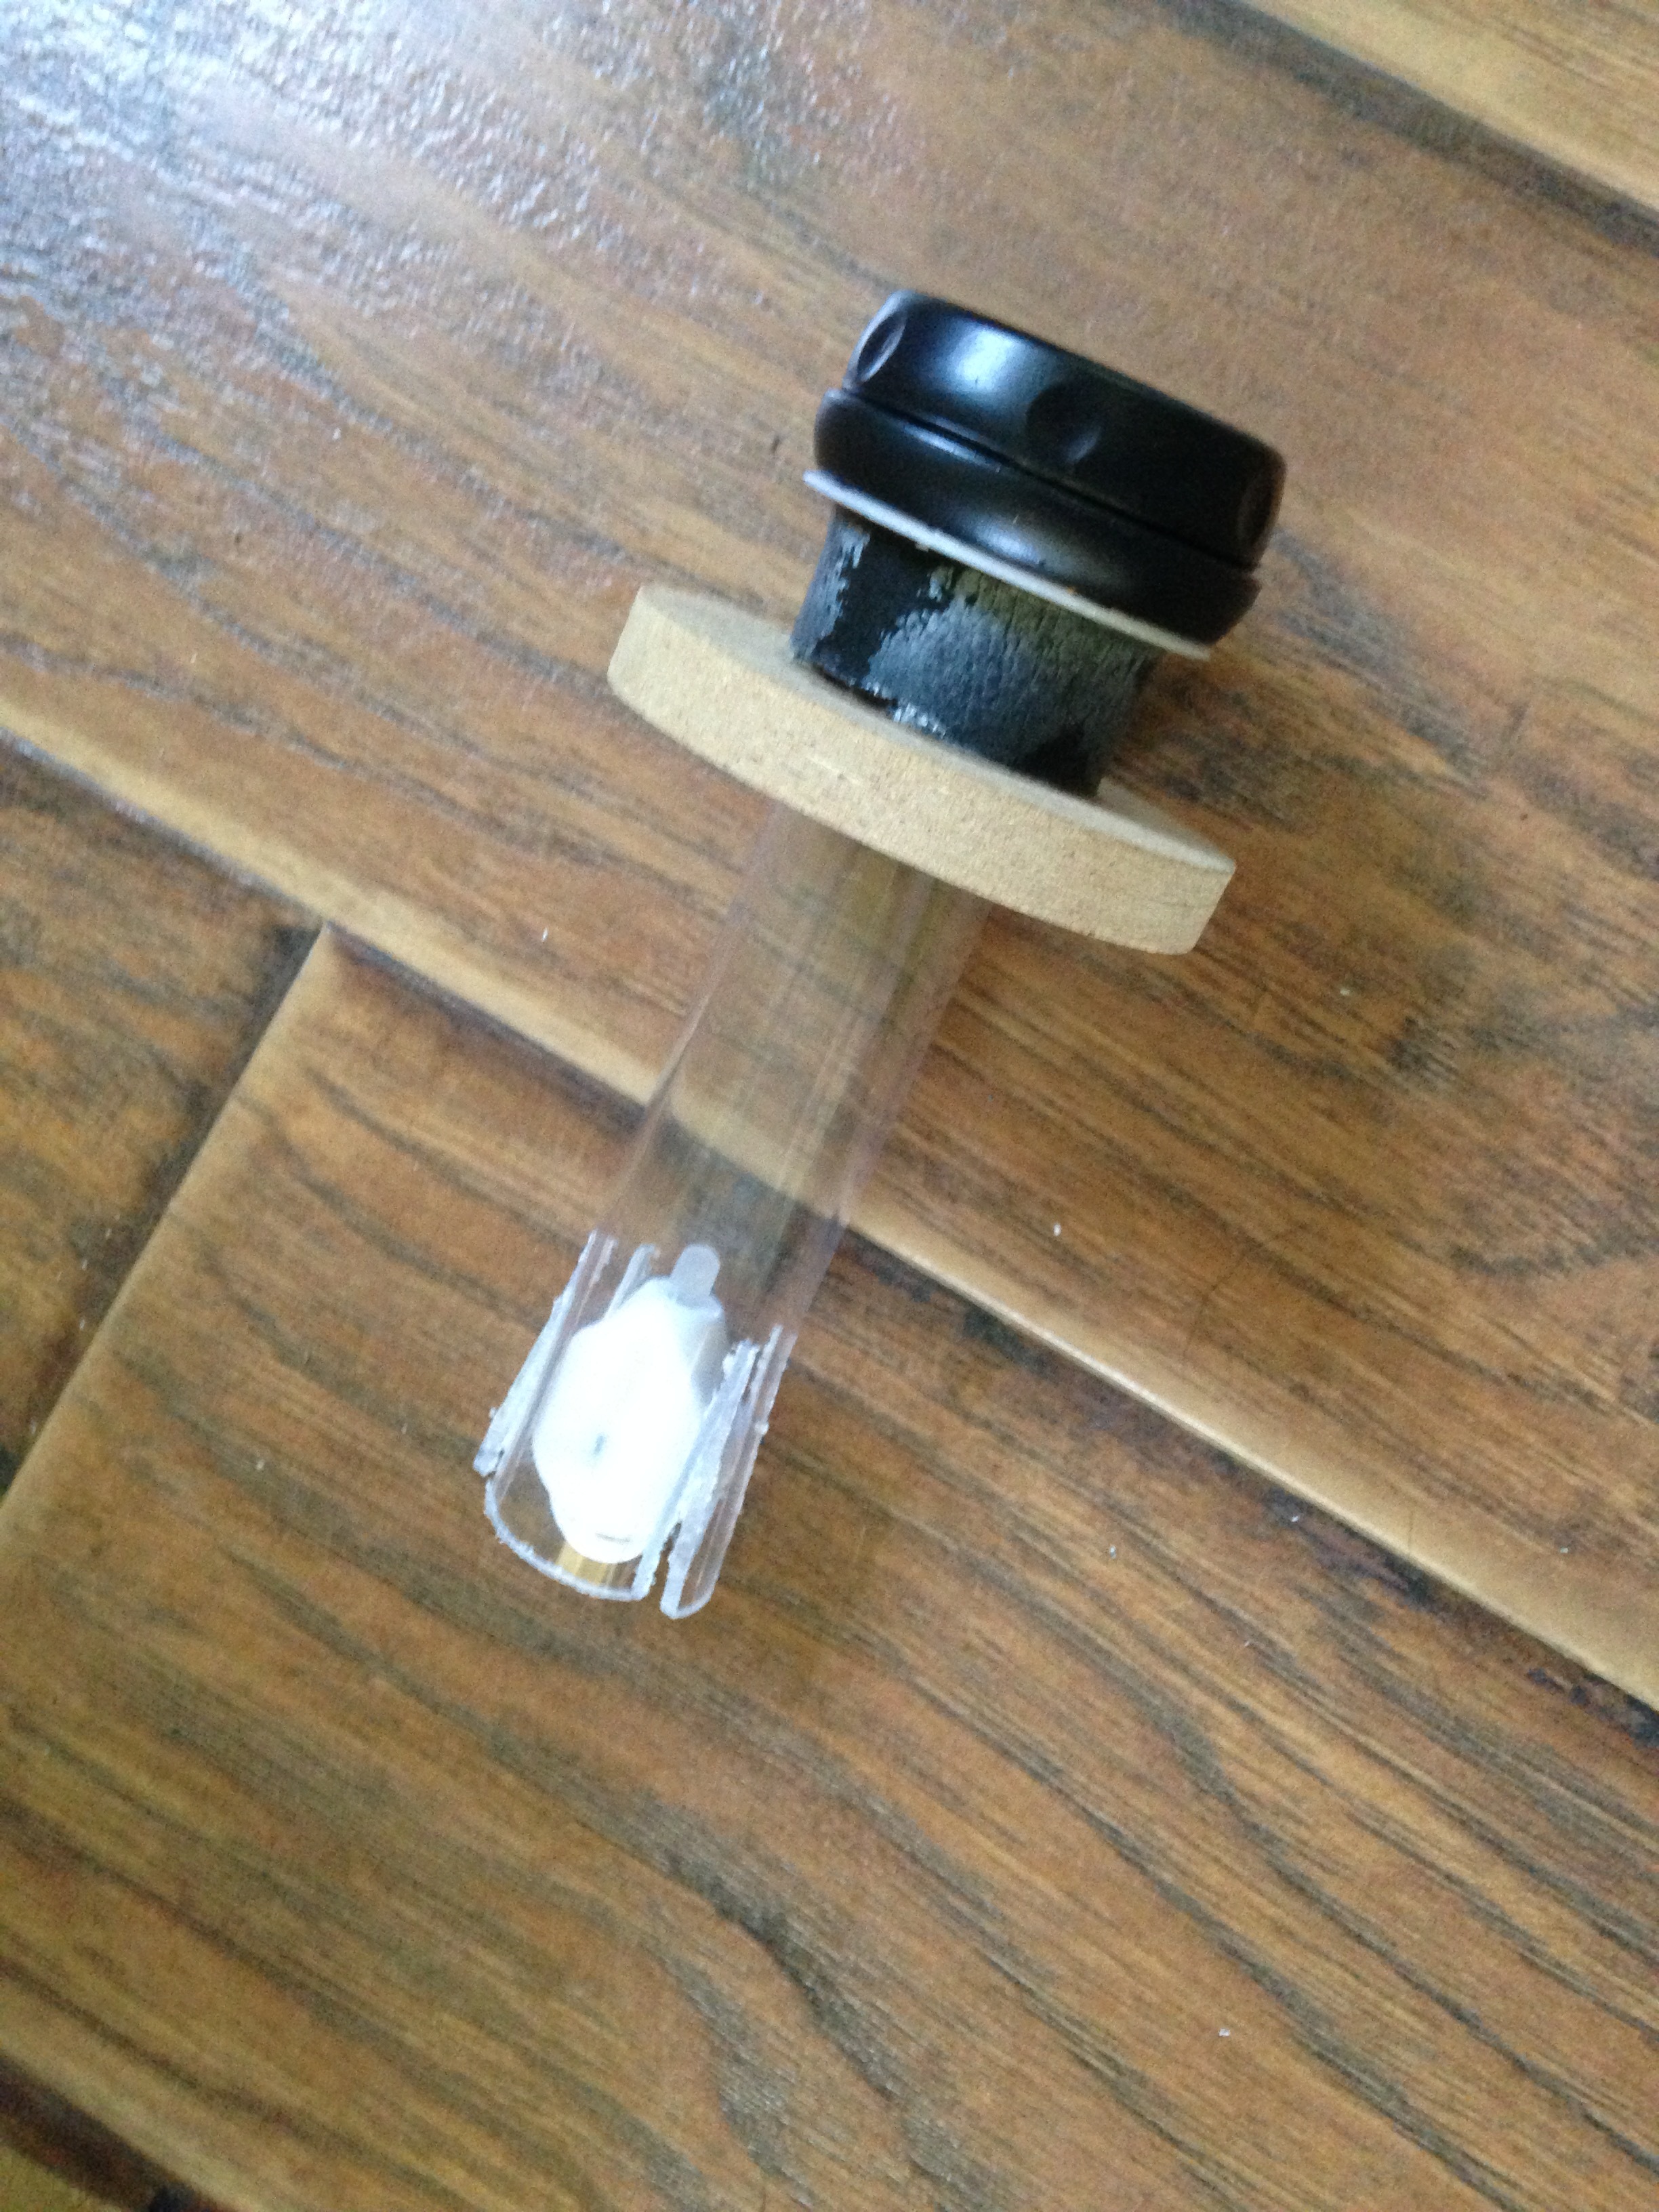
I then began to build the barrel of the gun which, in common fashion for me, is made out of trash and scraps of things I have leftover from other projects. I started with the cap from a baby bottle (left over from my Adam Syringe) which I used for the actual end of the barrel because I could make a small disc of the blue translucent setup and screw the top on to keep it in place. The next chunk is part of a wire spool that I had lying around (which I wrapped with a piece of craft foam so it wouldn't glow when the light was on), the thick disc is a piece of MDF that came as some sort of packaging for something and I decided to keep it (because I am a pack rat and this junk comes in handy sometimes). Lastly, there's a piece of aquarium tubing (left over from my Dr. Who lightsaber) what is attached to the back. I cut slits in the aquarium tubing to snugly hold my light, and because it's transparent, the single light actually makes the front and both side panels glow, all together.
Don't even ask me how I came up with this method because I have no idea what my brain did to come up with it.

Now that I had the lighting mechanism put together, it was time to build the rest of the gun base, which I used more cereal box wrapped in worbla to build.

Here you can see it with the pattern pieces. The aquarium tubing fits through that hole on the front.

You can just barely see in the photo, but there's a large opening on the inside curve here. that lines up with the end of the aquarium tubing so that you can putt the little light out to turn it on/off. When it's finished, there will be a piece of craft foam that covers the hole, and will most likely be attached by velcro.

Here you can see everything with the light inside.

The last part that I've put together is the handle, which it two layers of EVA foam glued together. As you can see I still need to sand it so it's not oddly textured like that, and then that will also be covered in worbla. Then I'll just have to make the arms and paint!
The last project, which I haven't actually started yet as I'm waiting on a few more measurements first, is also an Overwatch commission. This one is for a few armor pieces for Imp Mercy. Specifically I'm making the hip tassets and the leg armor.

I'll be making them using the same method I used for Leo's armor: worbla over craft foam. Also, I get to light the little purple panels on the hip pieces so that'll be fun.
And that's all for this week! I'm working on two new posts for you guys:
First is a tutorial-ish post on how I made my engine sword from FFXV (which I haven't posted anything about it on here, though I did post some progress photos on Twitter/FB).
Second will be my first installment of "Materials Monday" where I talk about some of my favorite crafting materials, how to use them, what they're good for, etc. The first material on the list is foam board! I'm hoping to have that together for next Monday so stay tuned!