Contact Us

Questions? Comments? Concerns? Suggestions? Submissions? Shout-outs?

Whatever you want to tell us here at Mikey Does Cosplay, we're always happy to hear your thoughts and feedback!


123 Street Avenue, City Town, 99999

(123) 555-6789

email@address.com


You can set your address, phone number, email and site description in the settings tab.
Link to read me page with more information.

reflection.jpg

Blog

Here's where the magic happens. I'll be posting about all of my experiences and experiments (both failed and successful ones), introducing you to my costumes, sharing fun stories, linking tutorials and useful products, and who knows what else!


Filtering by Tag: costume

WIP Wednesday: Frelian Finery

Michael MacWolff

Hey folks, welcome to another WIP Wednesday edition of MDC. This week, we're taking a look at my current personal project (since I don't have a ton of commissions in process at the moment) for some time next year: Prince Innes from Fire Emblem: The Sacred Stones.

If you can't tell just by his art, he fits into the "Asshole Archer" archetype that we see a lot in FE games.

If you can't tell just by his art, he fits into the "Asshole Archer" archetype that we see a lot in FE games.

Innes has been a favorite character of mine for a while, despite being kind of a jerk, so I decided it was time to make it happen! I got started immediately after Youmacon, riding my post-con high which tends to lend itself well to getting a head start on projects. I honestly still have no clue when I'll be debuting him, but it seemed a shame to waste my motivation so I got right to work.

He is so fancy it's absurd.

He is so fancy it's absurd.

Since Innes was somewhat recently released in FE Heroes, I had to make a tough decision: which design was I going to go with? I really like the fancy designs on his Heroes coat, and the artwork is a lot clearer/you can see the details a lot better, so I decided to base my design primarily on that version.  I am planning on using his original bow, however, because I don't like the look of the one they gave him in Heroes. The designs (particularly the white scrawling pattern) was a little too intricate for me to easily be able to do, so I simplified it a bit.

IMG_9535.JPG

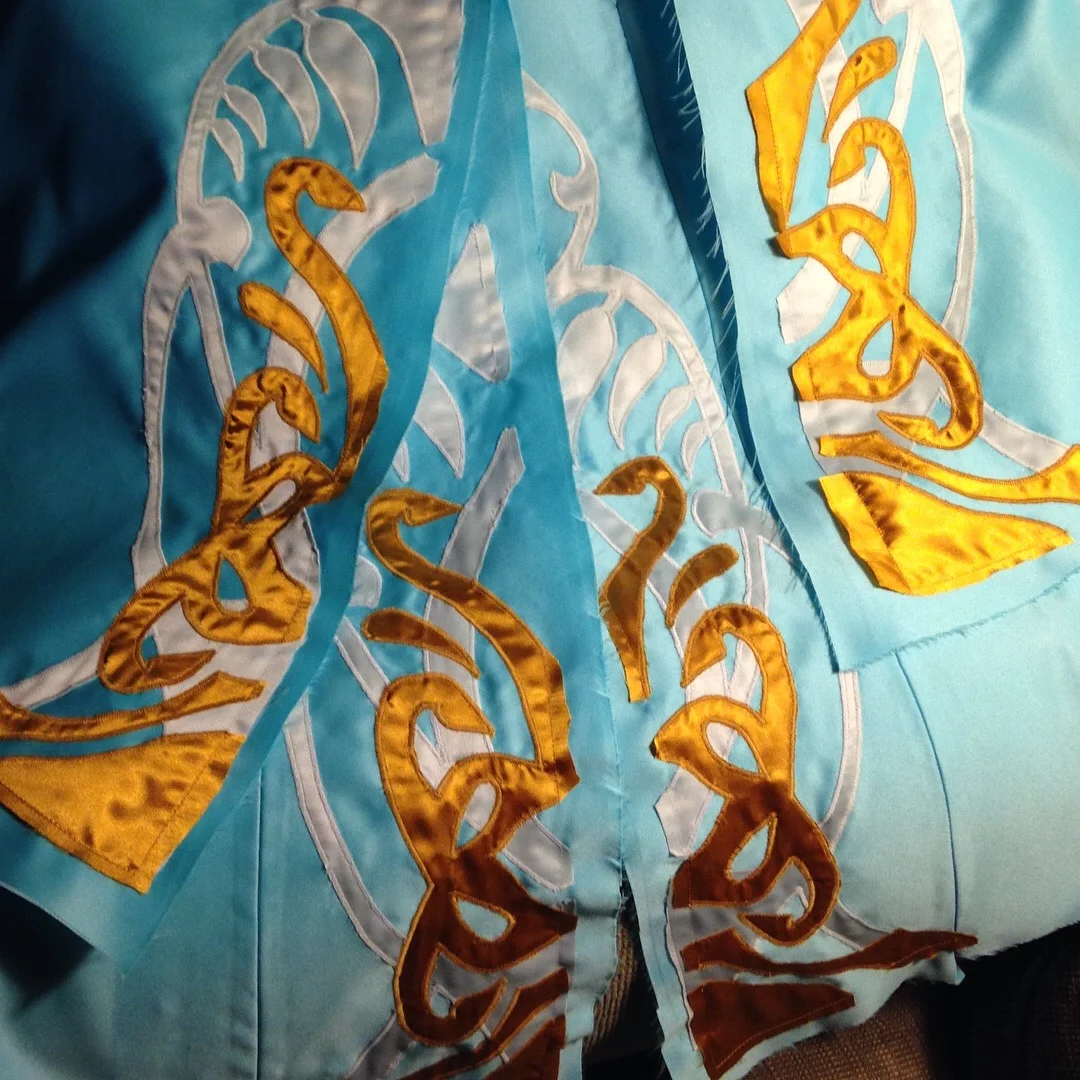
To get all of the intricate designs onto my lovely light blue fabric, I made a pattern on some cardstock, ironed on some stabilizer to the back of my pieces, and traced the design onto the stabilizer. Then came the arduous task of satin stitching all of those pieces on.

To do that, I pinned a sheet of the light satin to the front, satin-stitched around the design, and then clipped out the excess fabric from the front.

2017-11-27.png

You can see the white designs here, both before and after the excess fabric was cut away. After the designs were set, I got to do it again with the gold.

2017-11-27 (1).png

At this point, the satin stitching is finished for everything except the sleeves (since I don't have enough of the gold to do both, and I want to make sure they at least match each other if I have to use a different satin). But with the designs done, that means I could start sewing the actual garments together!

IMG_9536.JPG
IMG_9589.JPG
IMG_9582.JPG

Since the capelet is smaller, I got that finished first, and added the gold trim, which is all satin ribbon that's been folded over the edges and hand-stitched on.

IMG_9651.JPG

The buckle-thingies were both done with layers of cereal box, and the actual belt buckle has a clip in the back so I can actually put it on when the belt part is attached. Obviously, they look a little fancier all painted.

IMG_9673.JPG

With those done, I finally made it to the store to get more gold satin for the sleeves... except that whatever I have doesn't seem to exist any more. Frustrated, I did find some lining fabric that was really close in color (as close as anything I could find anyway). but it doesn't have the same luster as the satin. I got it anyway, along with an entire bolt (almost 10 yards) of one of the casa color clearouts because I cosplay FE so I'm definitely going to use it. And I don't want to run into this problem again, ever.

I REGRET NOTHING

I REGRET NOTHING

So after agonizing over it for a couple of hours, I finally had moment of clarity that manifested itself on Twitter...

2017-12-05.png

I had sleeves, the details matched, and there was much rejoicing. That meant I could progress a little (or maybe a lot) further on the project and actually wear the thing without looking like a goon.

Some more trim and a zipper later, I have something wearable.
But that's not all, since the weather has been super warm [because our climate is fucked] I could actually work in my garage and I decided to start working on his bow.

Now originally I was planning to make the bow in his original artwork, because I thought the one in his heroes design looked stupid. 

Look at this, it just looks like it has knobby ends that he's going to NEVER MIND

Look at this, it just looks like it has knobby ends that he's going to NEVER MIND

But then I found artwork of it that's not at a dumb andgle and it's SUPER COOL. Those are snake heads on the end, that's why they're wider like that!

FEH_Nidhogg.png
MHFG_Nidhogg_01.png

So obviously I had to make it because SNAKES and it is a legendary weapon, after all. I wasted no time in getting to work!

IMG_9701.JPG
IMG_9724.JPG

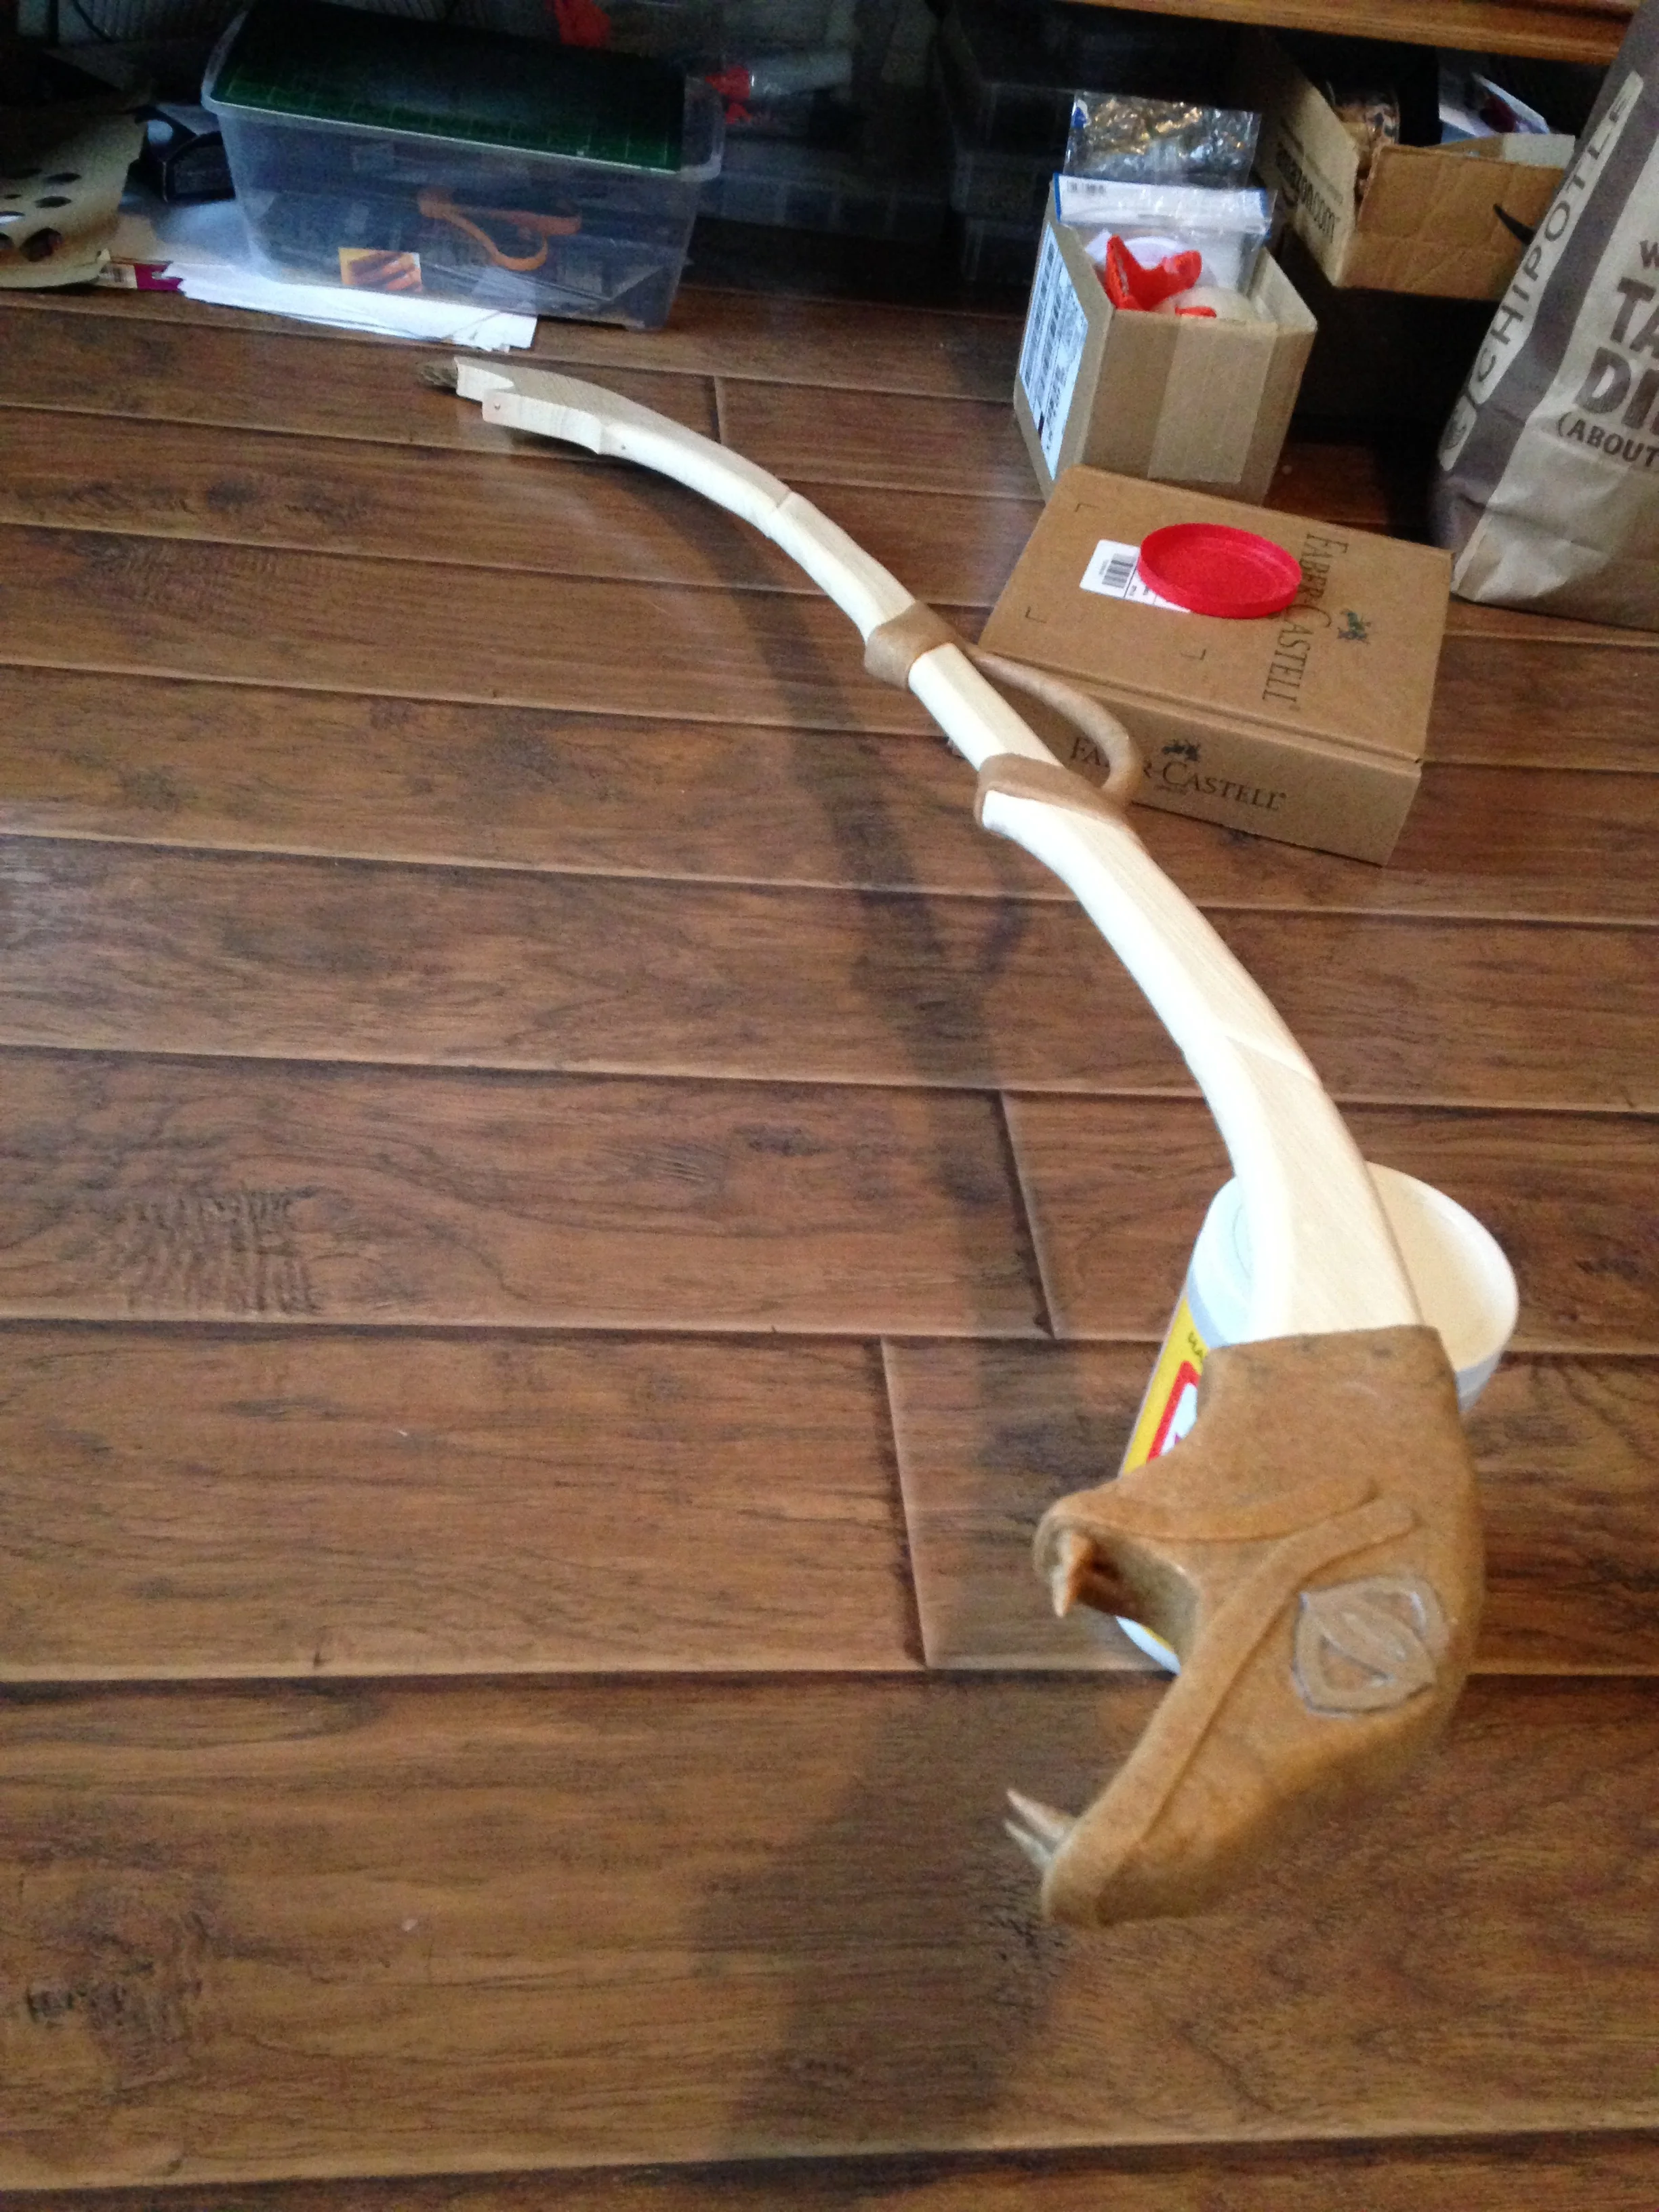
The base is wood and the details are worbla scraps I mushed together and molded. They even have fangs *KA KAH*

So with things being wearable and half a bow finished, it was finally time to try everything on!

IMG_9727.JPG
IMG_9728.JPG
IMG_9729.JPG

There's obviously a bunch of work left to do on both the bow and the costume, but I'm incredibly happy with how this is turning out. I just wish I had a con to wear it to, but I don't have any more conventions until Ohayo at the end of January. Alas, my pompous prince will just have to wait.

Pre-Youma Crunch Time

Michael MacWolff

Hey folks, welcome back! As usual, my hiatus has been related to having a crapton of projects and minimal time to make blog posts. So, rather than sit here and listen to me moan about all the work I still have left to do, let's just look at the stuff I've been making.

First up, we have a gun & case from one of the Purge movie... I'm not sure which one cause I haven't seen any of them.

hat is an actual working airsoft gun, with a legit case. I didn't really build anything for this, it was initially pitched as a simple "paint a few parts of this gun" request, and then spiraled into the much more elaborate commission that you see before you. Thankfully it's done and I don't have to worry about it any more.

Next up we have this giant nail bat/club thing from one of the Yokai Watch characters. It's all a paper/cardboard base with a worbla shell covering it. The nails are also worbla scraps mushed together and formed into nail heads!

Most of the painting still needs done, but thankfully my client no longer needs it by Halloween, so I have some time to work on that without rushing it. I'm hoping to have it done in the next few days though.

Last, and most importantly, we have my new cosplay for Youmacon! I'm doing Yatsuhashi from RWBY!

I've been wanting to do a RWBY cosplay for a while, and I have a long list of characters I want to make, as well as several people I want to cosplay with, all as different characters. So it came down to which one would make the most sense to have for Youma. Well, thankfully my friends made the decision pretty easy for me, since only one of the three of them was even going to be there, and was planning on cosplaying Coco again, so it was a perfect fit. Eventually I'll also be doing Torchwich to pair up with my friend's lovely Cinder, and either Qrow or Taiyang, to pair up with my other friend's kickass Raven (the one I made the mask for, if you guys remember that).

Anyway! Down to business. Thankfully his outfit is fairly straightforward. I bought a black tshirt and cut the arms off to do his undershirt, and I found a pair of brown pants to use. Unfortunately, I was not able to find a pair of boots to use for him, so I had to make spats. Thankfully those are pretty simple so it was no big deal. The first parts I actually made were the top & the thick leather belt/cincher piece he wears around his waist.

Next up is his shoulder pauldron. Pretty straightforward, worbla over craft foam, as per usual. Don't ask why I did all of the plates with full details when you don't see 60% of any but the top one.

The pauldron attaches to the harness... strappy... thing with some giant snaps. I don't have photos of them, but I made his boot armor plates thee same way.

Next up are the gauntlets. They're layers of foamcore with craft foam details, and some worbla pieces. The rings split in the middle and are held together by velcro.

Last up is the sword. Since it's ginormous I decided to use a wood base (wide craft boards) and then shape the bevel with a layer of foamcore on either side. Same method as usual: remove the paper, sand the bevel into the exposed foam, coat with spackling paste, sand again.
The handle is a piece of PVC with a strip of worbla wrapped around it.

And the only bit left is the wig! I used an old black wig I stole... I mean "inherited" from our family's costume closet. It was already kinda short and I cut it eve shorter. For as much as I hate cutting and styling wigs, I feel like this one turned out alright. It's obviously not as short as Yatsu's actual hair, but I couldn't cut it much shorter than this or it would've looked super spotty. So I suppose this'll just have to do.

Well, that's all folks! If you want to see what the whole costume looks like, you'll have to wait another week until I wear it at Youma. I should have some awesome photos with my Coco and we're going to a RWBY photoshoot so hopefully I'll have some photos of a bunch of other awesome cosplayers. Until next time, ciao!

Mikey is Still Doing Commissions...

Michael MacWolff

So while my last series is done with, I am still working on one last commission for Youmacon, for a friend of mine. She's going to be doing Sailor Pluto, and asked me to make her staff!

It all starts with a flagpole. Seriously, flagpoles are the greatest things ever when it comes to making staffs because they're generally an appropriate length & thickness, and you can get ones that separate in the middle for easier storage & transportation. Unfortunately, the flagpoles I used to get at Joann Fabrics, I can't find any more. They were much higher quality and I could get them cheap because coupons; but alas, now I am forced to use this one, that I found on Amazon. 

I used a carving bit in my Dremel to make all of the indentations around where the round parts went, then used some craft foam covered in worbla to get the fluted part on the end where the topper would fit into.

The round bits all along the staff were then made by using a bunch pf leftover bits of worbla which I heated, rolled together, and then mushed around until I got it as round as I could make it. Caution: it's really easy to burn yourself while doing this so be careful!

The key parts you see in the photo are just two layers of foamcore with a layer of cereal box on either side, for extra support. I did my usual spackling/sanding routine on all of the edges.

Now just add a couple of layers of mod podge, spray paint it silver, and the staff part is done!

Ste staff head, however, is a bit more involved. I started with an acrylic ornament that separates in half, so I sanded the inside with a very fine sandpaper to make it translucent. Once it was all sanded, I spent a couple of hours taking a red sharpie to it until is was this lovely color.

The lighting was simple, I use a string of mini LEDs with a tiny battery pack, because I knew I'd need to hide it in the staff and there's not much room. These are the same type of lights I used for the Crystal Maiden staff, if you remember that. Also, to keep the little lights stable & spread out appropriately through the little globe, I wrapped the string around a styrofoam ball I happen to have lying around, and used packing tape to secure them in place. Lastly, to diffuse the light a little further, I wrapped the whole inside with two layers of kleenex (remember folks, improvisation is everything)!

Now that we had the light ready, I had to figure out how to mount it on the top of the staff while being able to hide the battery pack somewhere. And my godsend appeared in the form of a plastic spool that I got some heavy gauge wire on. The battery pack actually fit in the central tube, and it was the right height to fit in the fluted part on top of the staff. To top it all off, the wider bits of the spool fit perfectly into the fluting such that it holds it there without me having to install velcro or anything like that to keep the topper from falling out. YAY SERENDERPITY!

You can see here I also started with the core of the heart shape part of the topper. It's just a couple layers of corrugated cardboard. There were a couple of marbles I hot glued in for the round bits, then I took a bunch of worbla scraps and heated them around the shape. Slowly I heated areas and mushed them together to get it smoothed out. You can see the process here:

Here's the topper, all mushed smooth and attached to the red orb!

Now all that was left to do was paint the topper! I used the same silver spray as I did with the rest of the staff, and used cling wrap & masking tape to protect the red orb. The little spheres in the staff design are all gold, so I did my brown undercoat and brushed them with the acrylic gold paint!

And that's all there is! The staff is all finished and I'm happy about that because it's another thing to check off of my list, since I still have 2 commissions to finish before the end of October, my own new cosplay I'm working on for Youmacon (which is the first weekend of November), and 2 events coming up at which I'll be vending: Con on the Cob, which is the weekend following Youma, and the Yule Ball, which is December 10th. So needless to say, I'm going to continue being busy for a while yet.


As a fun little end note, I was also commissioned to make a Sailor Moon outfit for a friend's daughter. It doesn't warrant a full post because I only have photos of the finished costume, as modeled by my teddy bear, Murray. Enjoy!